
You want a fuss-free, crowd-pleasing drink station that lets guests serve themselves. A DIY lemonade bar gives you that relaxed vibe and saves you time during parties. Build a self-service lemonade bar that looks pin-worthy and runs smoothly all afternoon.
In this guide you’ll learn what to buy, how to prep lemonade bar basics, how to set up self-serve stations, and quick styling tips that make the spread feel intentional. By the end you’ll have a clear checklist and step-by-step layout to copy for any event.
What You'll Need for Your Lemonade Bar
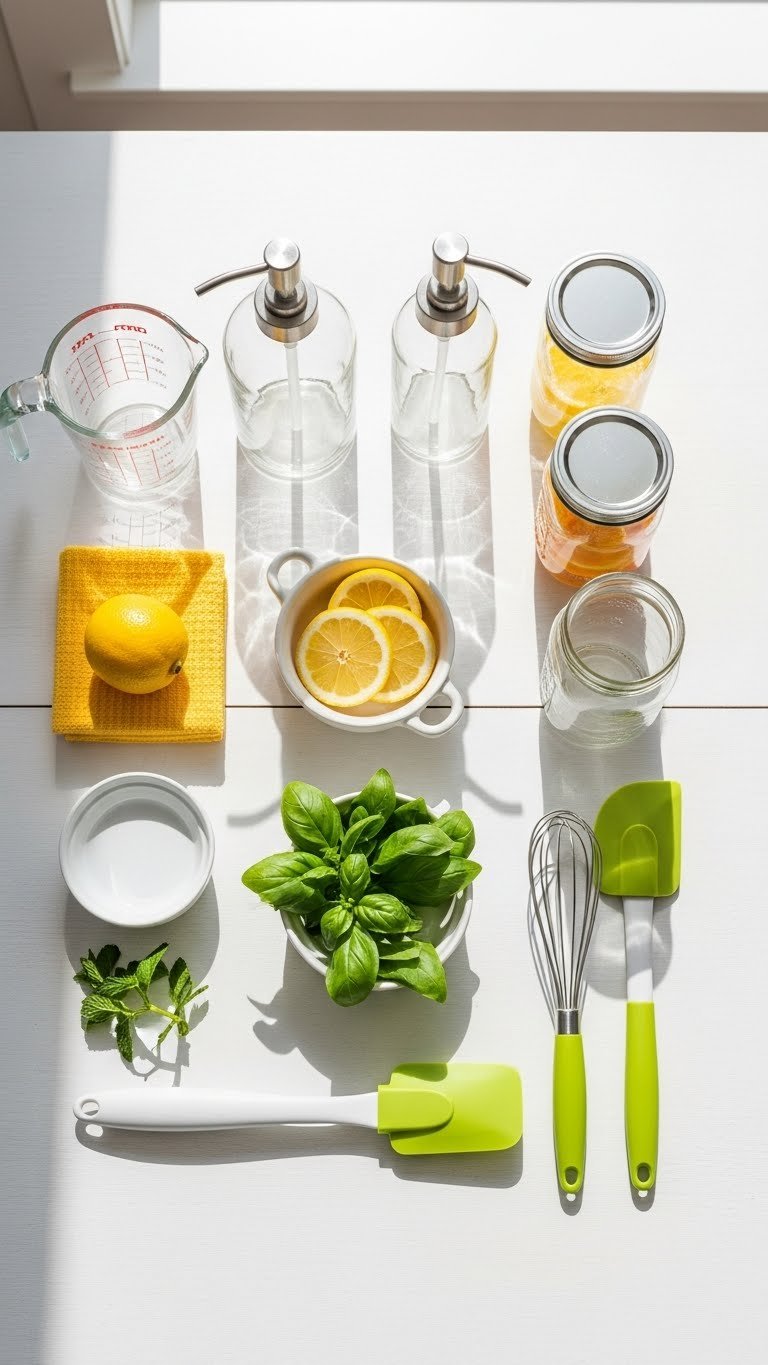
Gather supplies the day before to avoid last-minute runs.
- Drink dispensers: 2–3 glass dispensers (2–3 liter each) or a large beverage cooler
- Glassware: mason jars or clear glasses, 12–20 depending on guest count
- Ice: large cooler + ice bucket to refill; plan 1–1.5 lb ice per guest
- Garnish bowls: lemon slices, lime wedges, fresh mint, cucumber ribbons
- Mixers: plain lemonade, sparkling lemonade, herbal or fruit infusions
- Tools: long spoons, tongs, funnel, small chalkboard or printable labels
Tip: Buy disposable straws and napkins that match the color palette for easy cleanup. Label dispensers clearly to prevent flavor mix-ups.
Preparing Lemonade and Mixers
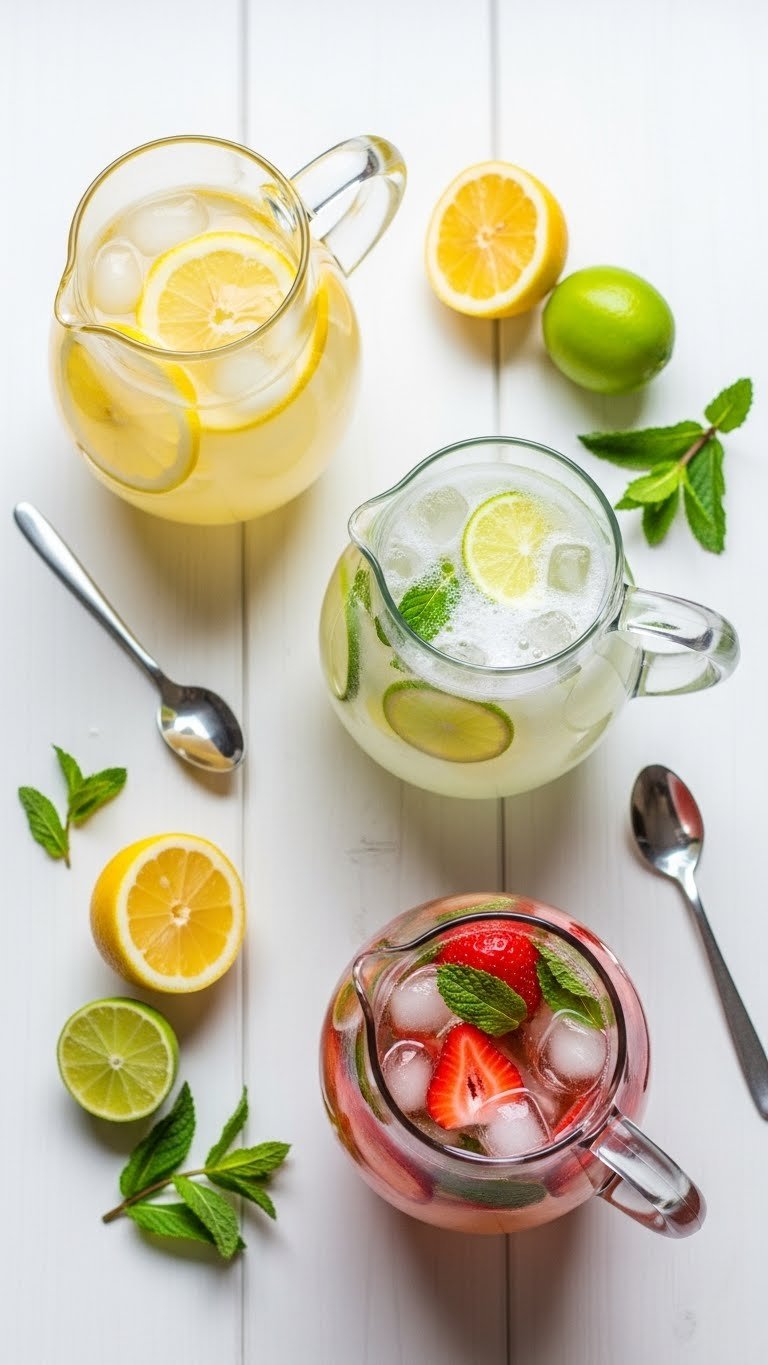
Make one base recipe and one fun variation so guests can mix flavors.
Classic lemonade (yields about 1 gallon):
- Juice 8–10 large lemons (about 2 cups lemon juice).
- Make simple syrup: simmer 2 cups sugar with 2 cups water until clear; cool.
- Combine 2 cups lemon juice, 2 cups syrup, and 1 gallon cold water. Chill at least 2 hours.
Sparkling lemonade: replace half the water with 1 liter sparkling water just before serving.
Fruit-infused option:
- Muddle 2 cups sliced strawberries or cucumber per 1 quart lemonade.
- Let infuse 30 minutes in fridge, then strain.
Tip: Keep a pitcher of concentrate and let guests dilute it with still or sparkling water to taste.
Setting Up Your Self-Service Lemonade Bar
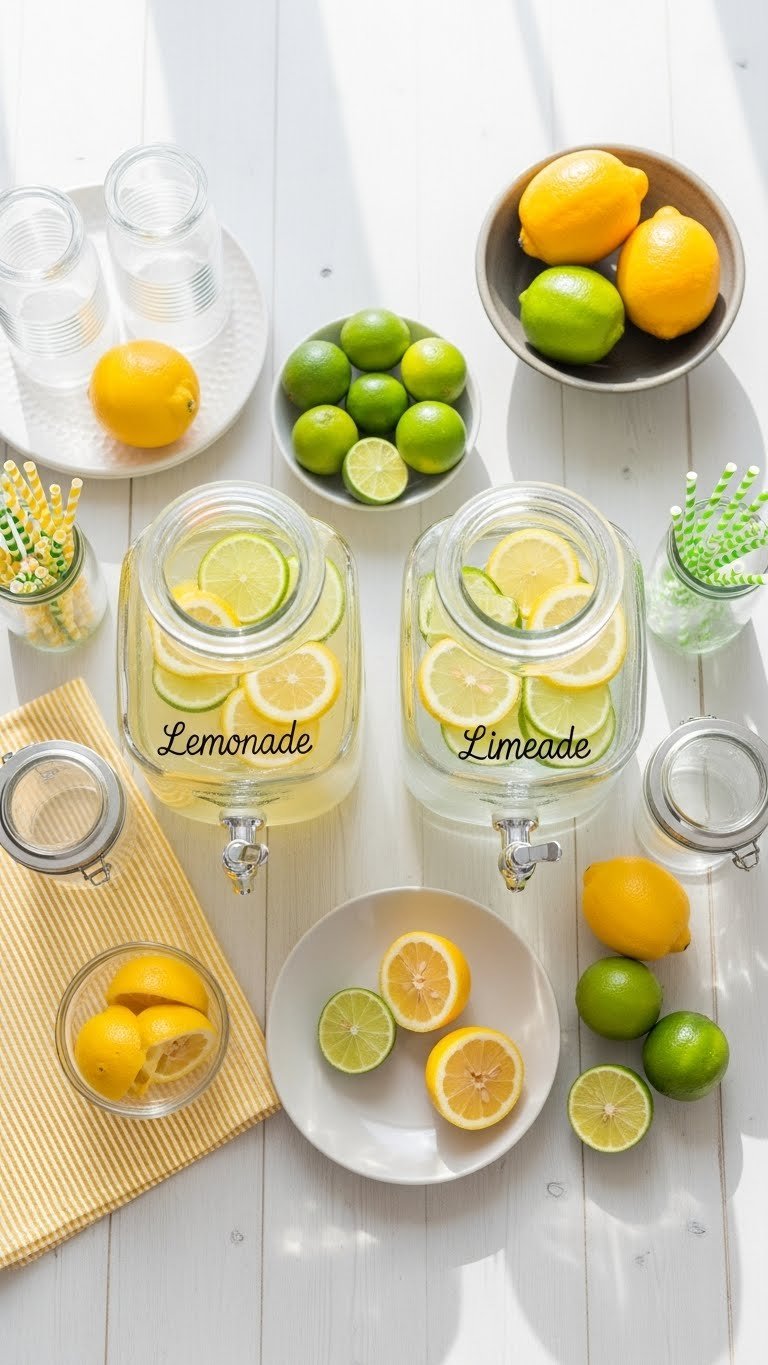
Position stations so traffic flows and spills stay contained.
- Choose a long table against a wall to allow one-direction flow.
- Place dispensers at the center with glasses at the left and ice at the right.
- Arrange garnishes in small bowls with tongs and spoons.
- Keep a trash bowl for used fruit and a covered bin for used cups.
Numbered steps:
- Set glasses or cups in stacks of 6–8.
- Put ice in an insulated bucket within arm’s reach.
- Add labels: Classic Lemonade, Sparkling Lemonade, Strawberry Lemonade.
- Place a small pitcher for kids or those who prefer less sugar.
Safety tip: Keep the dispenser taps over small trays to catch drips. Refill ice frequently to keep drinks chilled.
Styling Tips, Serving and Storage
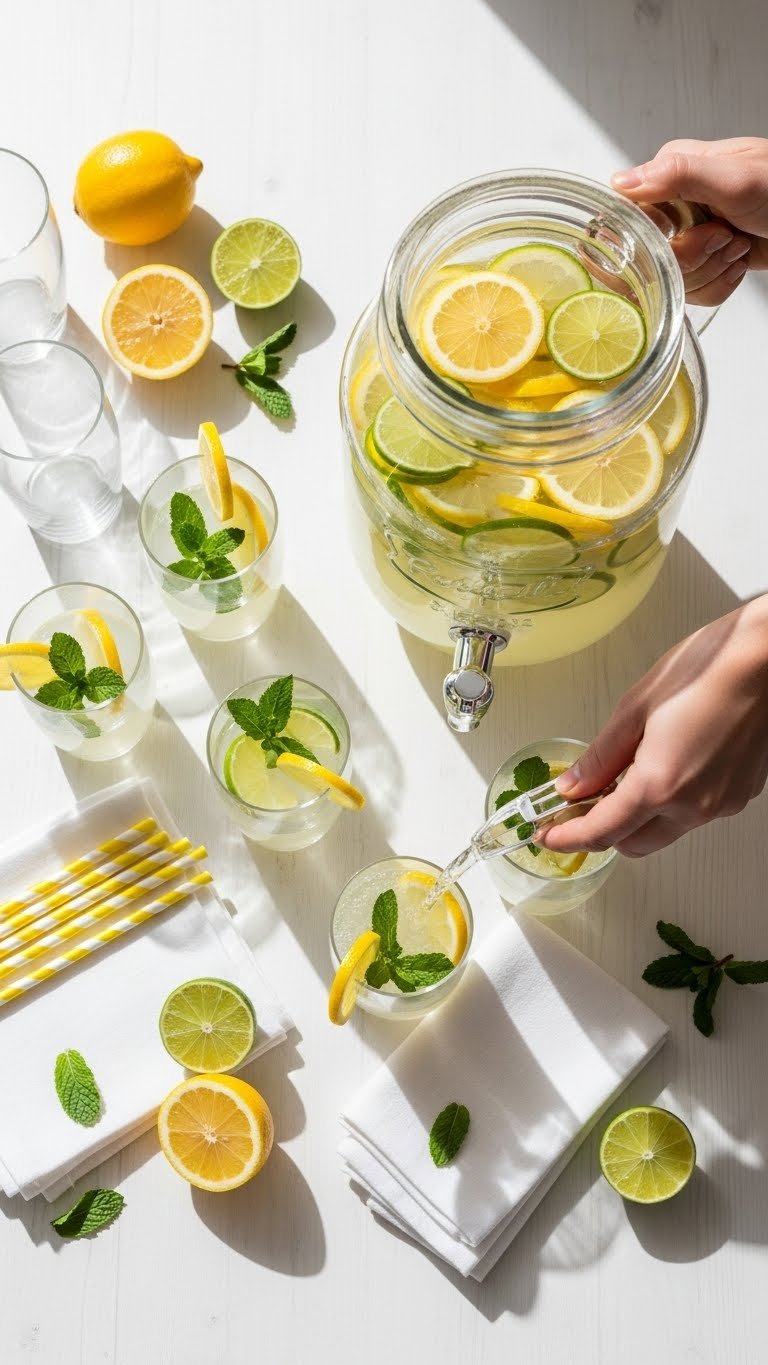
Make your display feel curated with simple styling.
- Use repeating elements: lemon halves, mint sprigs, and identical glassware.
- Add height with a wooden crate or cake stand under one dispenser.
- Offer garnishes on small white plates for neatness.
Serving notes:
- Keep perishables chilled and swap them every 2–3 hours.
- Store leftover lemonade in sealed jugs in the fridge for up to 48 hours.
- For make-ahead ease, prepare concentrate and soda on-site.
Quick fixes:
- Too tart? Add 1 tablespoon simple syrup per cup.
- Too sweet? Add a splash of sparkling water for balance.
Finish with a pinch of charm: a bowl of whole lemons and a small vase of fresh mint makes the display inviting and photo-ready.
Pin this guide for your next summer party! Save this layout and share with friends who need a simple, stylish self-service drink station. Which lemonade flavor will you try first?