
You want your next get-together to naturally gather people—and a cheerful lemonade station does exactly that. Building a simple, attractive lemonade station pulls guests in, keeps conversations flowing, and makes serving effortless. This guide shows you how to build a lemonade station that becomes the party hub, from shopping and setup to styling and serving.
You’ll learn a basic batch recipe, smart layout tips, garnish ideas, and quick fixes so your lemonade station runs smoothly. Read on for step-by-step setup, visuals to pin, and time-saving make-ahead tricks you can use today.
What You'll Need for Your Lemonade Station
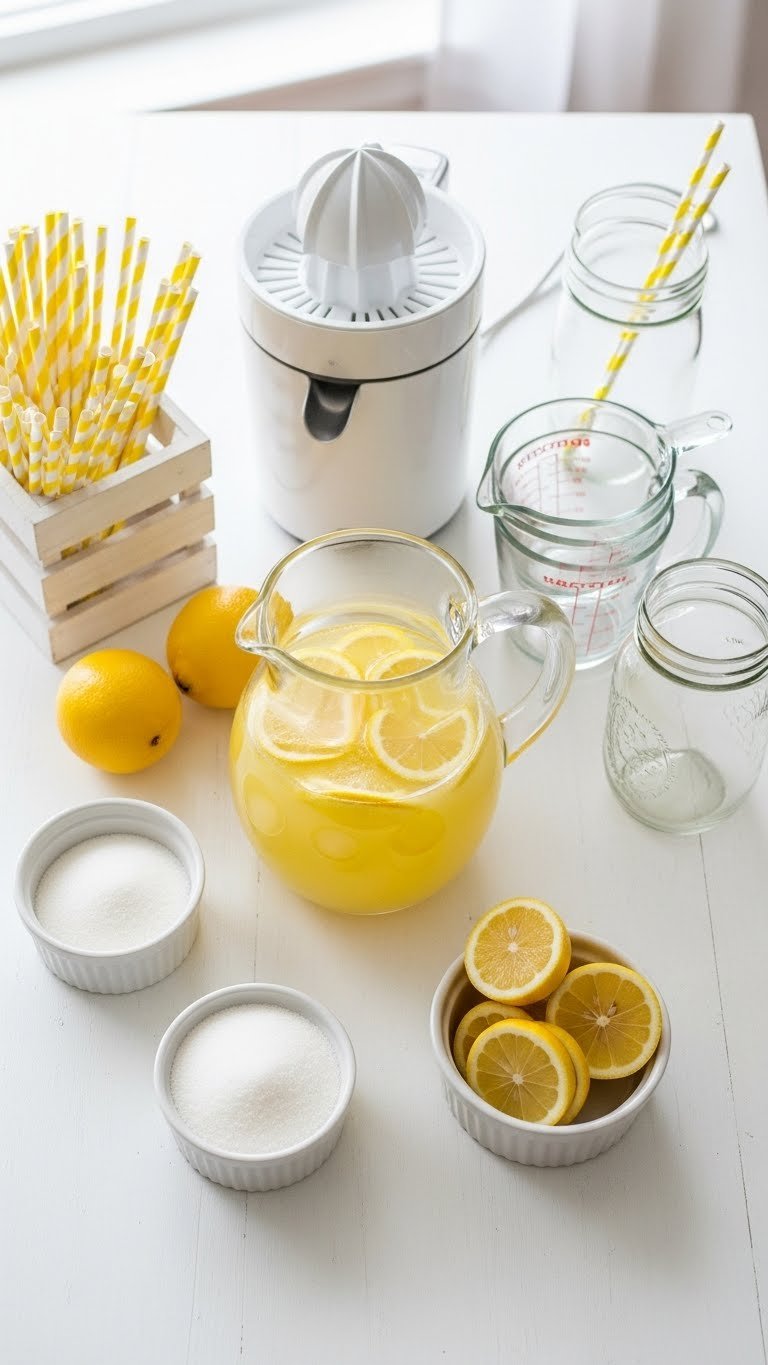
Gathering the right tools saves time. Keep everything in one place so guests can serve themselves.
- Essentials:
- 2-gallon glass beverage dispenser or two 1-gallon dispensers
- Mason jars or disposable cups (24)
- Ice bucket, tongs, ladle or spigot
- Small bowls for garnishes and a tray for glasses
- Ingredients for a basic batch (makes about 2 gallons / 16 cups):
- 2 cups fresh lemon juice (about 10–12 lemons)
- 2 cups granulated sugar
- 12 cups cold water
- Optional: 1 cup fresh sliced strawberries or handful of mint sprigs
Tip: Make extra simple syrup (1:1 sugar to water) to dissolve sugar quickly. Label non-alcoholic and spiked dispensers subtly by placement.
Setting Up Your Lemonade Station
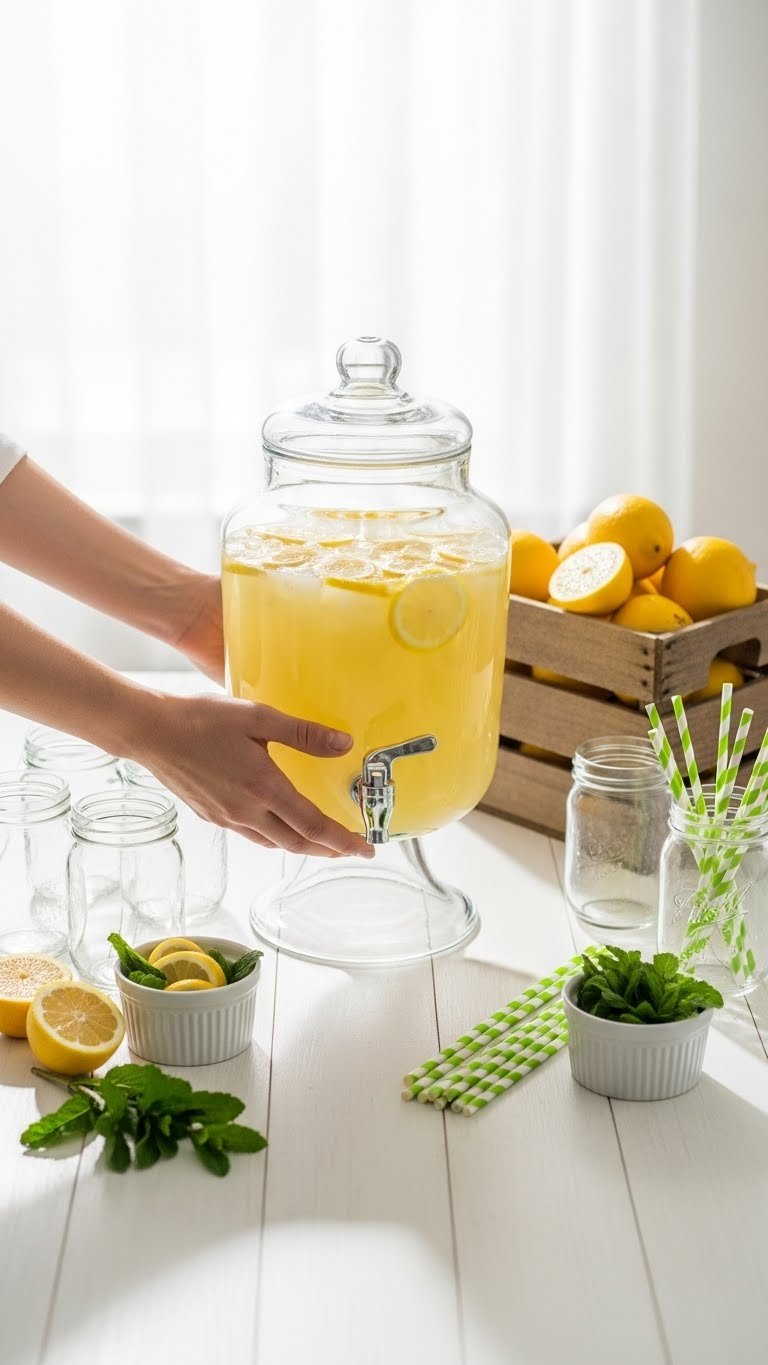
A good layout reduces lines and confusion. Aim for flow: glasses → ice → dispenser → garnishes → napkins.
- Position the beverage dispenser centrally and slightly elevated (use a wooden crate).
- Place clean glasses to the left, ice bucket next, then garnishes to the right for easy customizing.
- Add a small waste bowl for peels and used napkins.
Quick steps to make the lemonade:
- In a saucepan, heat 2 cups water with 2 cups sugar until dissolved. Cool.
- Combine syrup with 2 cups lemon juice and 10 cups cold water. Adjust with more water to taste.
- Chill at least 1 hour. Add ice to dispensers only right before guests arrive.
Warnings: If lemonade tastes too sweet, add water and tweak. If too tart, add simple syrup in 1 tablespoon increments.
Styling Your Lemonade Station

Style matters for the “pin-worthiness” that draws people in. Keep it bright and consistent.
- Use repetition: matching jars, identical straws, and a row of small bowls.
- Add height: stack a wooden crate or tiered tray to hold garnishes.
- Use fresh garnishes: lemon wheels, mint sprigs, cucumber slices, or berry skewers.
- Keep a small cutting board and a sharp knife nearby for quick refills.
Pro tips:
- Pre-slice lemons and store in an airtight container to maintain brightness.
- Offer a second dispenser with a flavored option—strawberry lemonade (replace 2 cups water with 1 cup puree) or mint-cucumber infusions.
Serving, Make-Ahead, and Storage Tips

Plan ahead to keep the station stress-free.
- Make-ahead:
- Prepare syrup and lemon juice up to 48 hours in advance; store refrigerated.
- Assemble garnishes the morning of the event.
- Refill strategy:
- Keep backup lemonade in a chilled cooler and swap dispensers quietly.
- Avoid adding large ice blocks to the dispenser; use an ice well or separate ice bucket to prevent dilution.
- Storage:
- Refrigerate leftovers in airtight pitchers for up to 3 days.
- Freeze extra lemonade in ice cube trays for later use in smoothies.
Troubleshooting: Cloudy lemonade? Strain pulp through a fine mesh. Sticky dispenser spout? Rinse with warm water and run a straw through the hole.
You now have a clear plan to make your lemonade station the place guests gravitate toward. Pin this guide for your next backyard brunch, save the measurements, and set aside an hour to prep—the results are friendly, functional, and picture-perfect. Which garnish will you try first? Pin this guide for your next party and share with friends who love easy hosts!