
You want your bloom cupcakes to look like they belong on a styled Instagram feed, but color chaos or muddy photos can ruin the effect. This guide shows you exactly how to color coordinate bloom cupcakes for Instagram-worthy photos so your feed looks cohesive and professional. You'll learn how to pick a palette, mix reliable frosting shades, pipe baker-friendly blooms, and style a pin-worthy shot in minutes.
Follow these clear steps and you'll have a consistent visual story — from batter to final photo — that gets saved and shared.
What You'll Need (Ingredients + Tools)
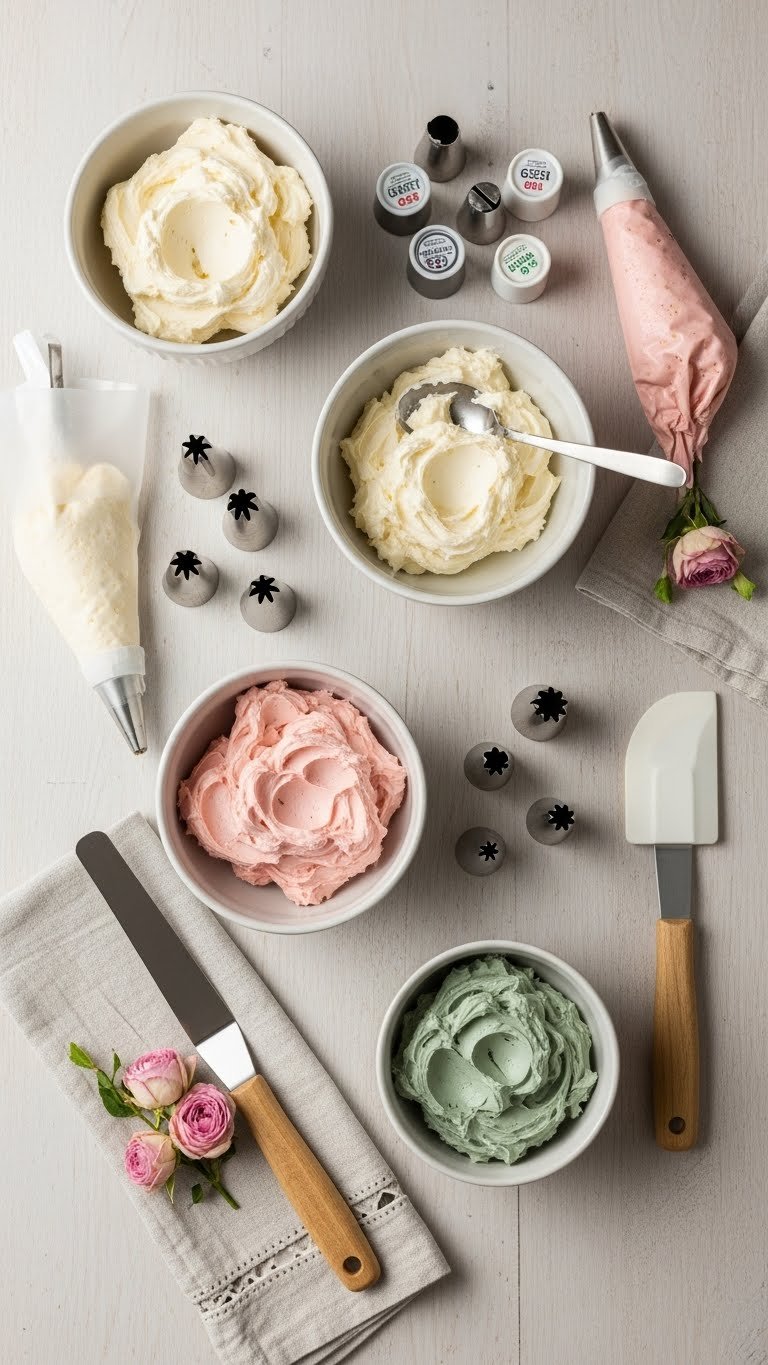
Gather everything before you start to keep colors consistent and timing fast.
- Ingredients:
- 12 baked cupcakes, cooled (vanilla or almond base)
- 2 cups buttercream (divided into small bowls)
- Gel food colors: sage green, soft pink, cream (tiny drops)
- Tools:
- Piping tips: petal tip #104, leaf tip #352
- Piping bags, small bowls, toothpicks
- Fresh flowers for garnish (optional) and neutral linen napkin
Tip: Use gel rather than liquid color — 1–2 drops per bowl is usually enough. Always test on a scrap paper plate first.
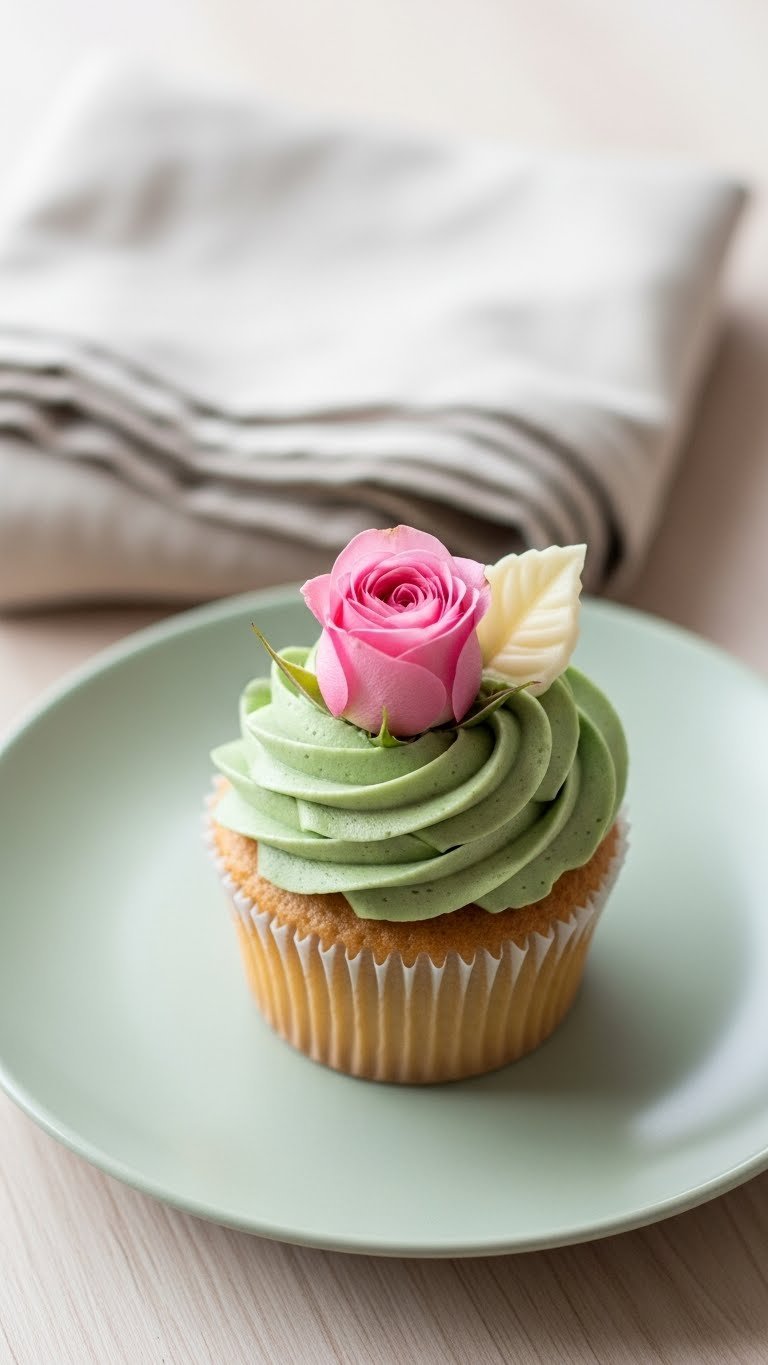
Choose and Mix Your Color Palette
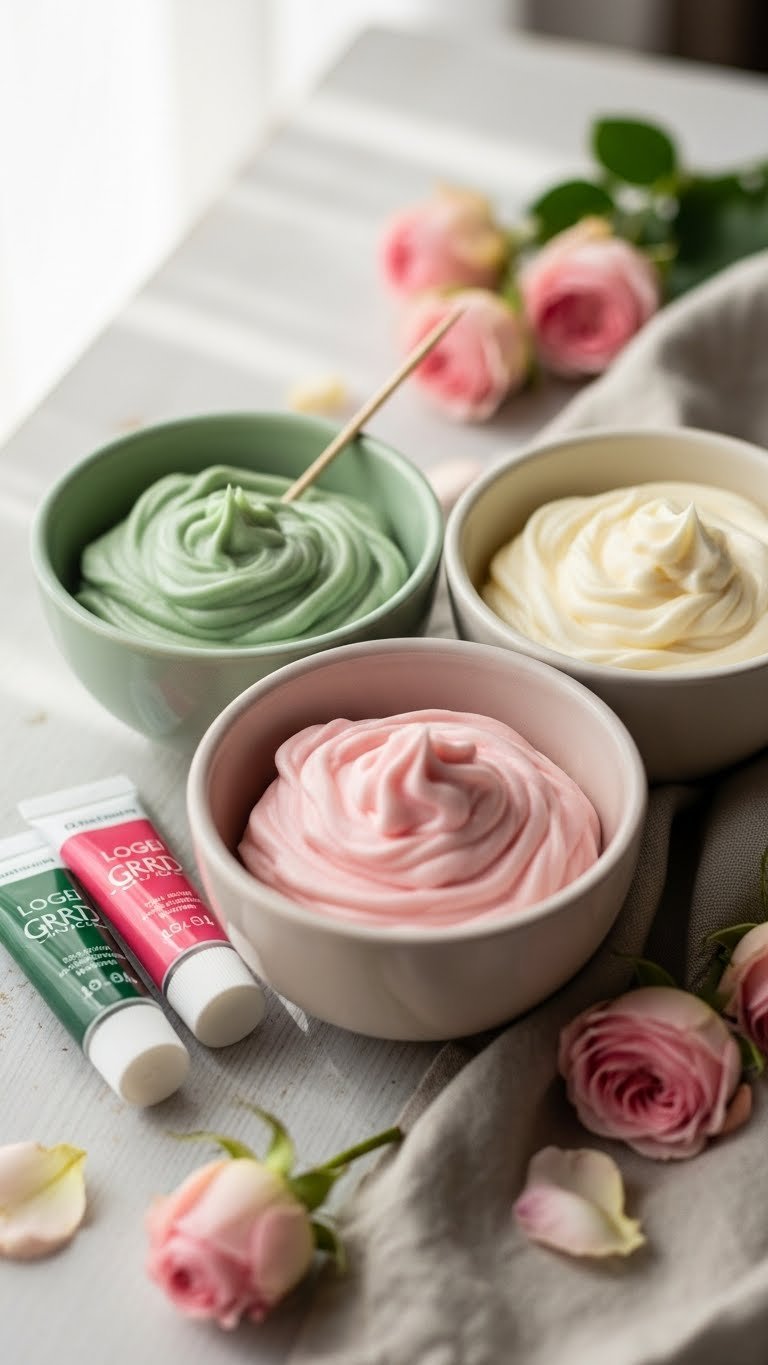
Picking a palette stops your photos from looking busy. Stick to 3 complementary shades: a dominant color, a support color, and a neutral.
- Dominant: soft pink or blush for most blooms.
- Support: sage green for leaves and accents.
- Neutral: cream for base frosting and variation.
Mixing steps:
- Add 1 drop gel color to 1/2 cup buttercream, stir, wait 1 minute — colors deepen as they rest.
- Adjust with tiny increments (¼ drop) until you hit the hue.
- Keep a swatch on parchment to preview under your shooting light.
Pro tip: Make small test cupcakes to confirm colors look right in soft natural light. Avoid over-mixing; colors mute as you whip more.
Pipe Bloom Cupcakes Step-by-Step
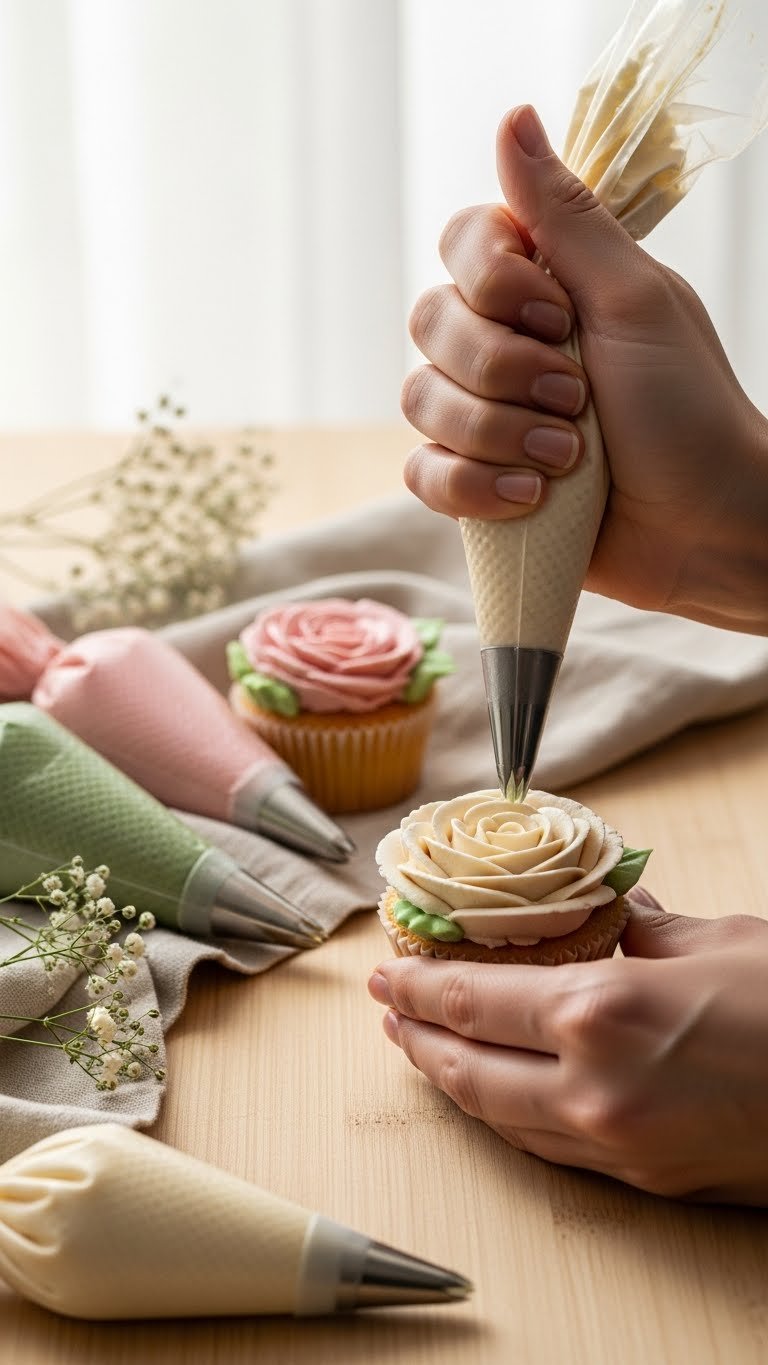
Piping blooms is easier when you break it into simple motions.
- Fit a piping bag with petal tip #104. Fill with the dominant color.
- Hold the bag at a 45-degree angle, narrow side of the tip facing up.
- Create a small cone of buttercream for the center (1/2 inch high).
- Rotate the cupcake slowly and sweep the petal tip outward for each petal.
- For leaves, switch to leaf tip #352 and pipe small 0.5–1 inch leaves in sage.
Quick tips:
- Keep wrist steady; rotate the cupcake, not your hand.
- If buttercream is too soft, chill 5–10 minutes.
- Use a toothpick to fix tiny mistakes quickly.
Warning: Too much pressure makes petals droop; apply gentle, consistent pressure.
Style, Shoot, and Share for Instagram
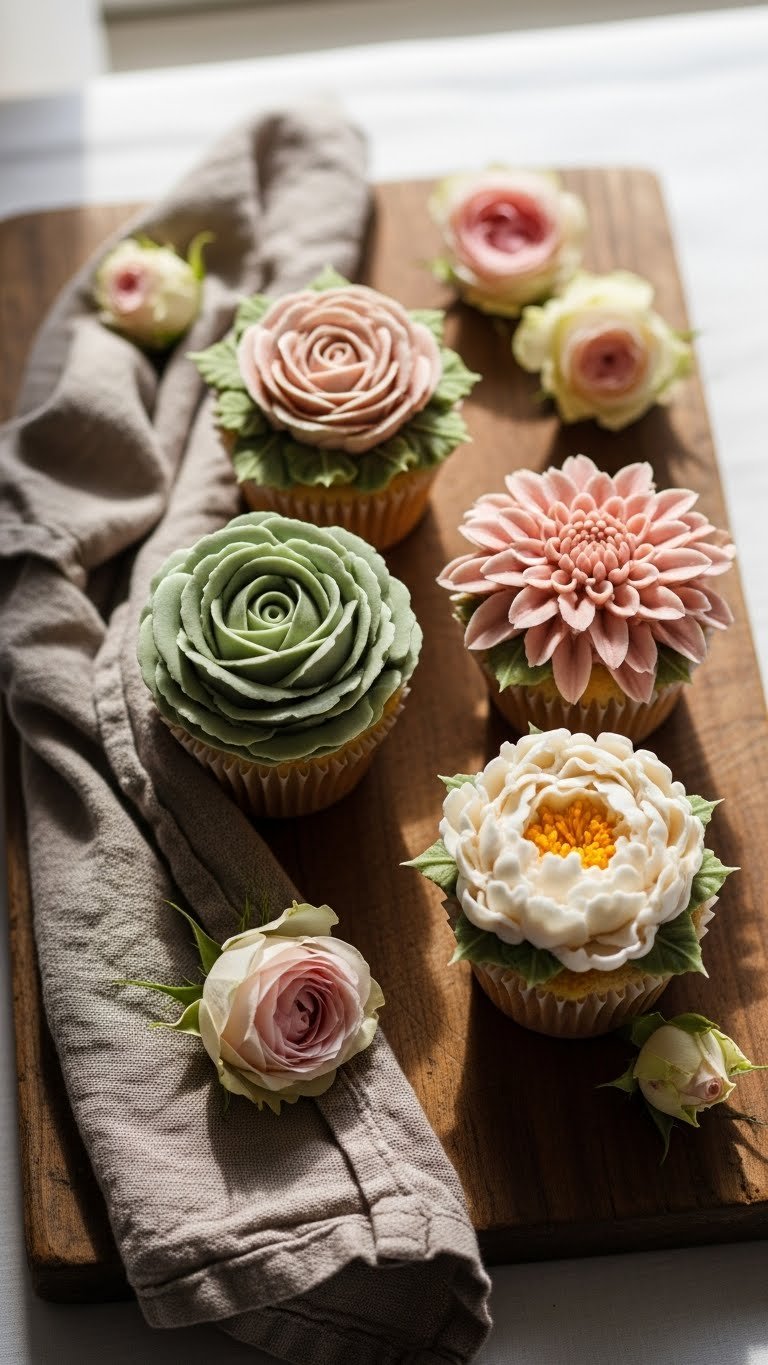
Compose a consistent feed-ready photo in three moves.
- Background: Use the same light wood surface and linen you used while baking.
- Props: Keep props minimal — one linen, three rosebuds, and a ceramic plate.
- Camera tips:
- Shoot at 45-degree angle to show depth.
- Use soft natural window light; avoid harsh midday sun.
- Aperture around f/2.8–f/4 for gentle blur.
- Framing: Place one cupcake in focus, others slightly behind for depth.
- Editing: Slightly raise exposure (+0.2), lower saturation of green (-5%) if it looks too bright.
Pin-worthy caption idea: "Simple color-coordinated bloom cupcakes — sage, blush, cream. Step-by-step inside."
Storage & make-ahead:
- Store covered in fridge up to 3 days; bring to room temperature before serving.
- Make frosting a day ahead; keep colors labeled.
You now know how to color coordinate bloom cupcakes for Instagram-worthy photos: pick three colors, mix small batches, pipe steady petals, and style with consistent props and light.
You're ready — your cupcakes will look cohesive on the grid and irresistible to save. Pin this guide for your next bake, and try one palette swap: which color combination will you try first? Save this for later and share with a friend who loves pretty baking!