
You want a show-stopping dessert that pulls the room together, and a cupcake tower is perfect when done right. This guide on How to Create a Cupcake Tower That Becomes a Centerpiece walks you through the materials, the assembly, and the styling so your display looks intentional and effortless.
You’ll learn how to make a stable tower, pipe consistent frosting, and style with flowers and greenery so the tower reads like the event’s focal point. Follow these steps and you’ll have a pin-worthy cupcake tower in under two hours of hands-on time.
What You'll Need (ingredients + tools)

Start by gathering everything so setup is fast. You’ll need baked cupcakes, buttercream, and a sturdy stand.
- Cupcakes: 24 standard-size or 36 mini cupcakes
- Buttercream: about 3 cups (for 24 cupcakes)
- Tools: three-tier cupcake stand or cake plates + dowel, piping bags, tips (#1M and round), offset spatula, parchment squares
- Decor: fresh flowers (roses, spray roses), eucalyptus, ribbon, cake topper (optional)
Prep times:
- Bake: 18–22 minutes per batch, then cool 30–45 minutes.
- Frosting: 15–20 minutes to color and fill bags.
Tip: If you want to save time, buy plain cupcakes and focus your effort on consistent piping and styling.
Preparing Cupcakes and Frosting
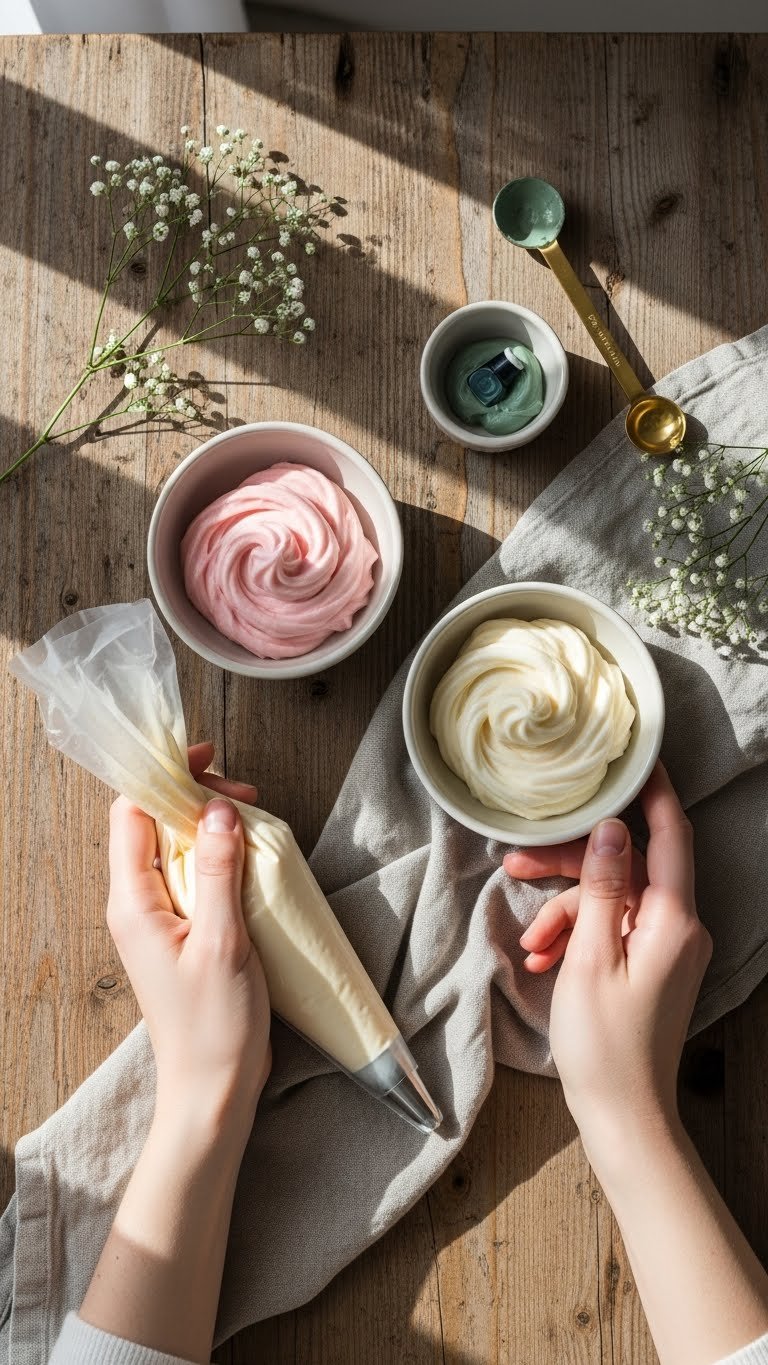
Consistency matters: aim for a frosting that holds shape but still looks soft.
- Make a stiff but pipeable buttercream—start with 2 cups powdered sugar and 1/2 cup softened butter, adding milk by teaspoon to reach texture.
- Color small batches: use gel dyes for sage, soft pink, and cream hues.
- Transfer to piping bags fitted with #1M for rosettes, and a small round tip for dots.
Quick troubleshooting:
- If frosting is too soft, chill 10–15 minutes.
- If too stiff, add 1 tsp milk at a time.
Pro tip: Pipe test swirls on parchment to keep sizes consistent. Aim for 1–1.5 inch rosettes.
Assembling the Cupcake Tower (step-by-step)
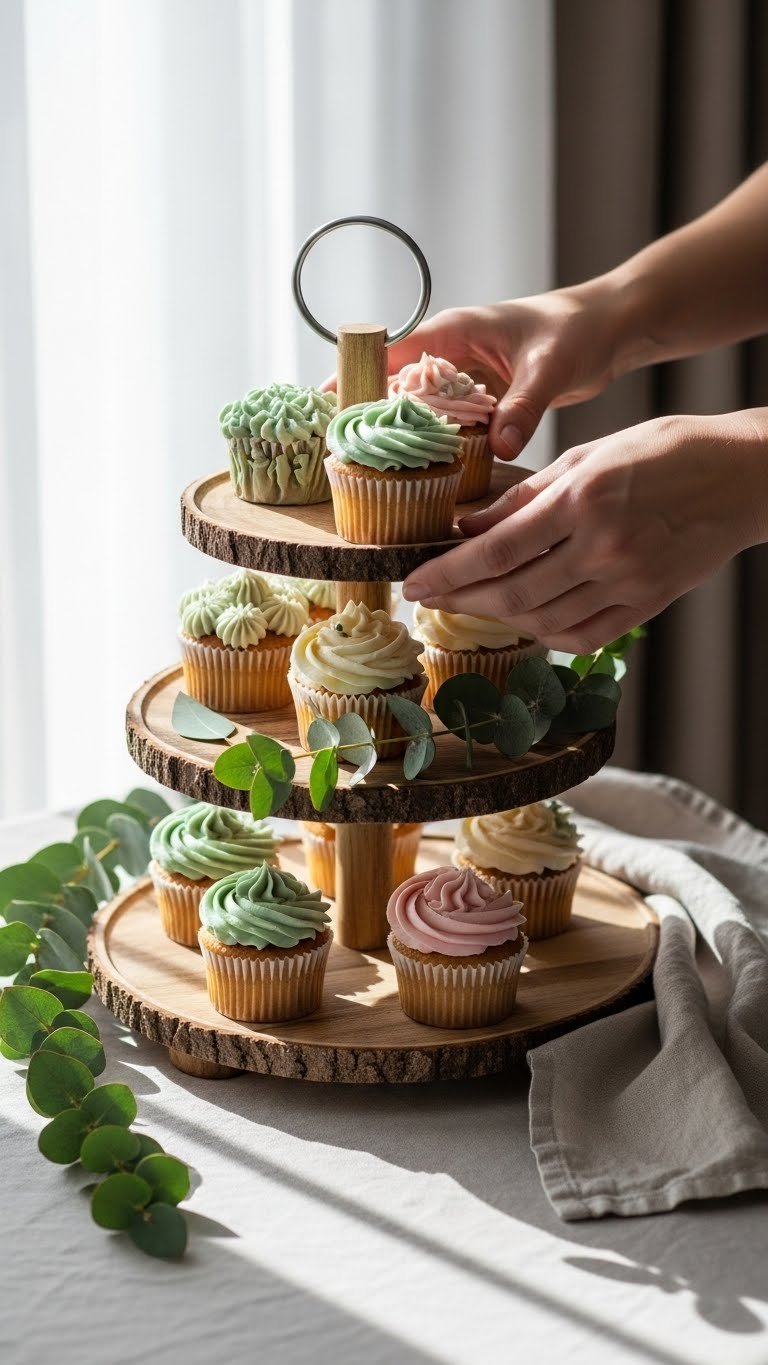
Assembly is simple when you follow a plan and balance colors.
- Place the largest cupcakes on the bottom tier. Start at the outside and move inward.
- Alternate frosting colors for visual rhythm (pink, cream, sage accents).
- Fill the middle, then the top tier, keeping heavier decoration at the base.
- Use parchment squares under cupcakes if the stand surface is delicate.
Tips for stability:
- If your stand wobbles, insert a small clear adhesive dot under the base plates.
- For DIY tiers using plates, push a dowel through the center to secure layers.
Keep cupcakes spaced so guests can grab one easily—don’t overcrowd.
Styling and Finishing Touches
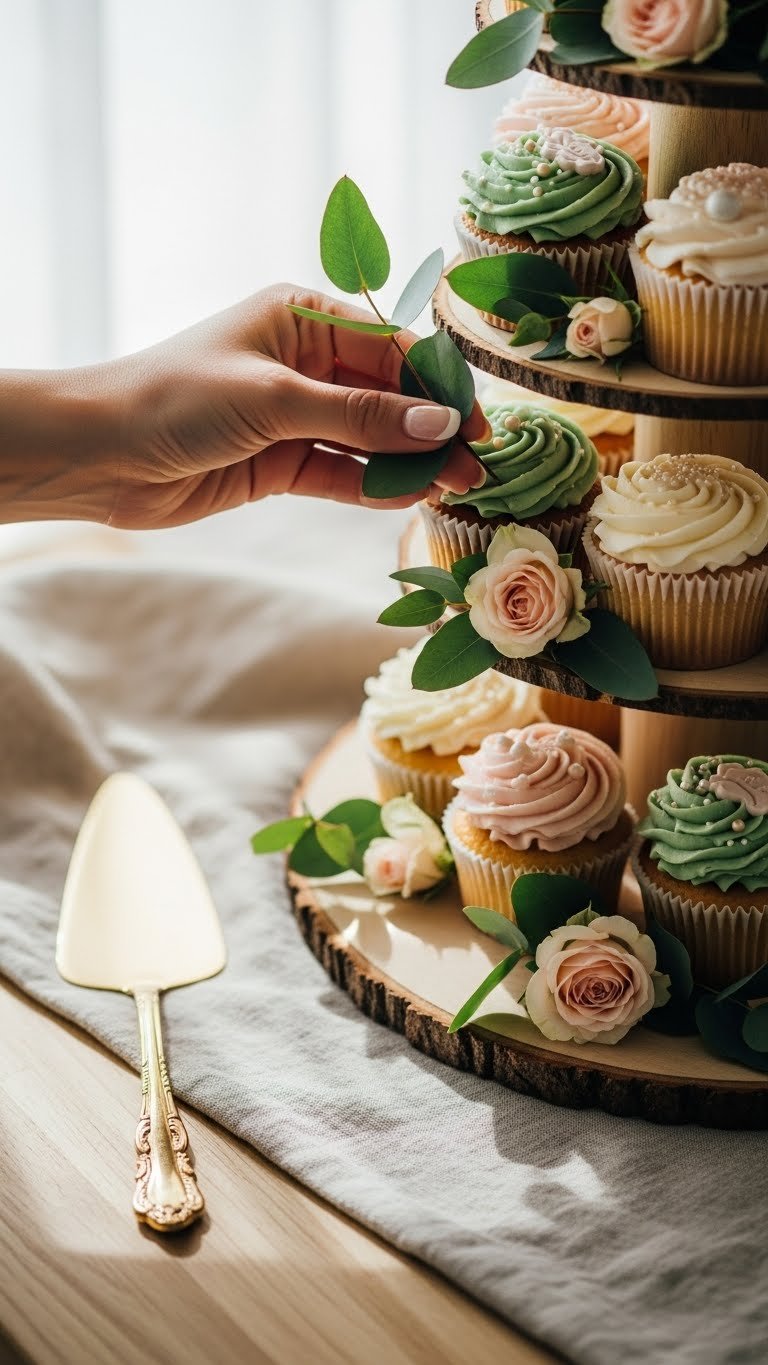
Styling is what turns a cluster of cupcakes into a centerpiece.
- Add small clusters of flowers and eucalyptus between cupcakes—use non-toxic blooms or floral picks.
- Tie a sage-green ribbon around the stand post for cohesion.
- Scatter a few loose petals and a matching napkin at the base for texture.
- Consider a small sign or simple topper in cream to match the palette.
Make-ahead and storage:
- Bake cupcakes 1–2 days before and keep unfrosted in an airtight container.
- Frosted cupcakes store in the fridge up to 48 hours; bring to room temp 30–45 minutes before serving.
Warning: Avoid using heavily scented flowers that can flavor the cupcakes.
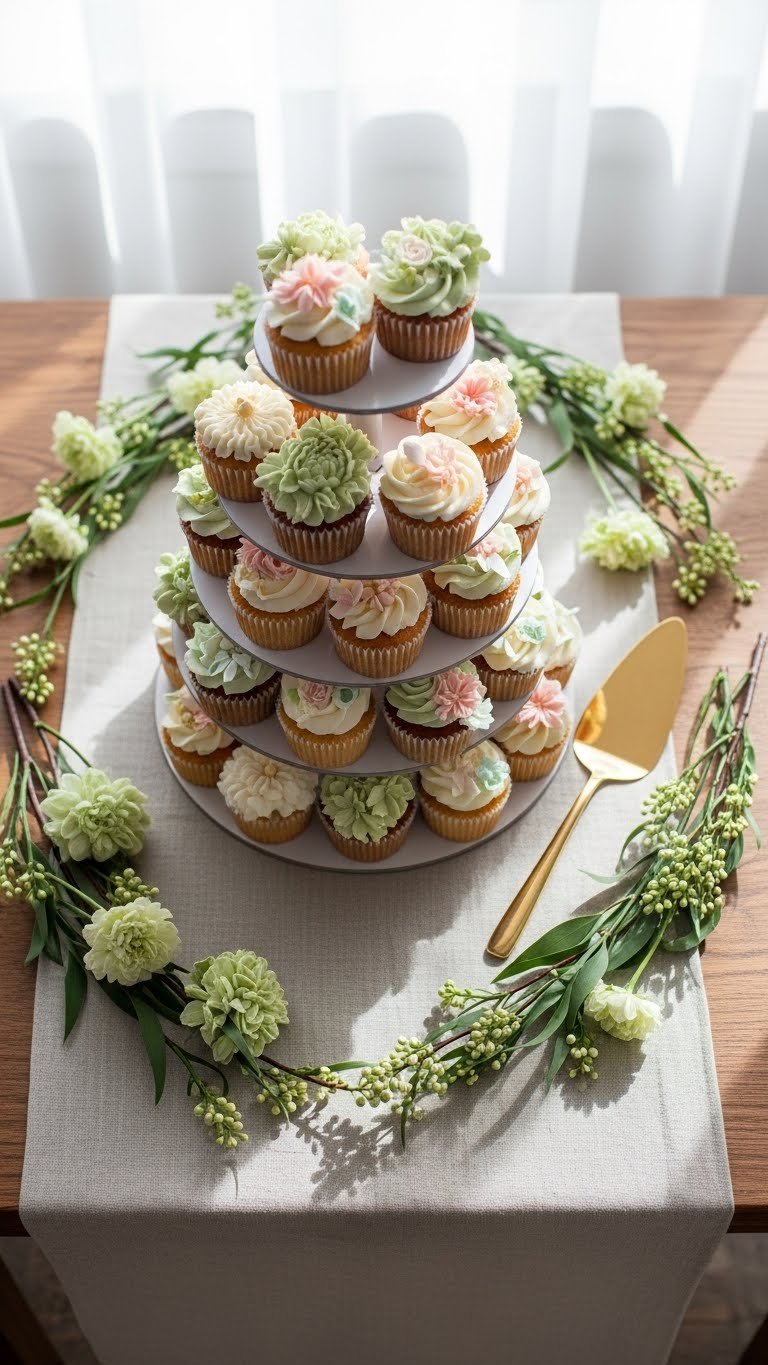
You’ve got the steps, the timing, and styling tips to make a display that stops guests in their tracks. How to Create a Cupcake Tower That Becomes a Centerpiece is about balance: stable tiers, consistent frosting, and thoughtful accents.
Pin this guide for your next event! Save it for later and share with friends who need a pretty, practical dessert display. Which styling tip will you try first? Ready to make this happen? Let’s do it!