
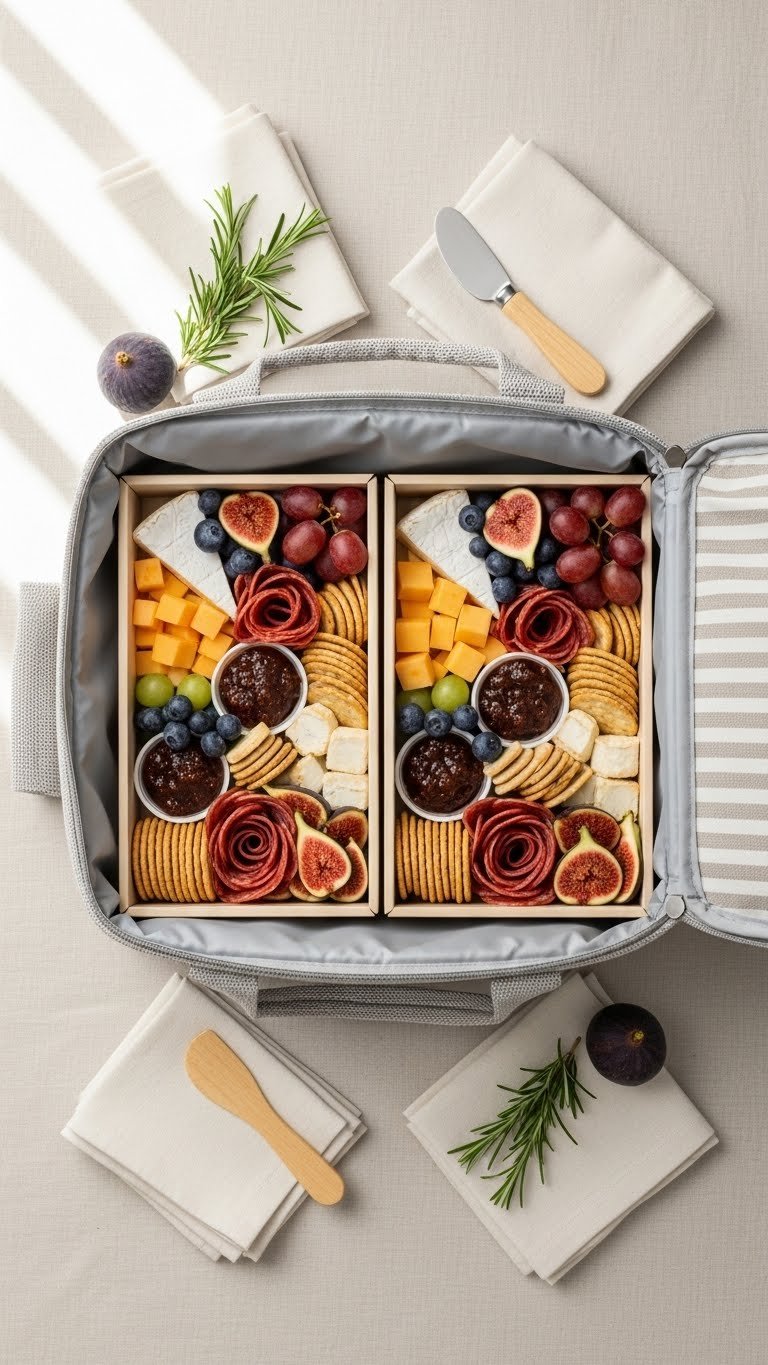
You love the idea of a perfectly styled picnic but hate lugging a full board. Making picnic charcuterie in portable containers solves that—so you get individual, beautiful bites without the mess. This guide shows you how to build portable charcuterie boxes that travel well, stay fresh, and look pin-worthy.
You’ll learn what containers to choose, exact portion sizes, step-by-step packing tips, and smart make-ahead tricks. Follow these simple steps and you’ll have picnic charcuterie in portable containers ready in 20–30 minutes.
What You'll Need: Containers, Tools, and Ingredients for Portable Charcuterie
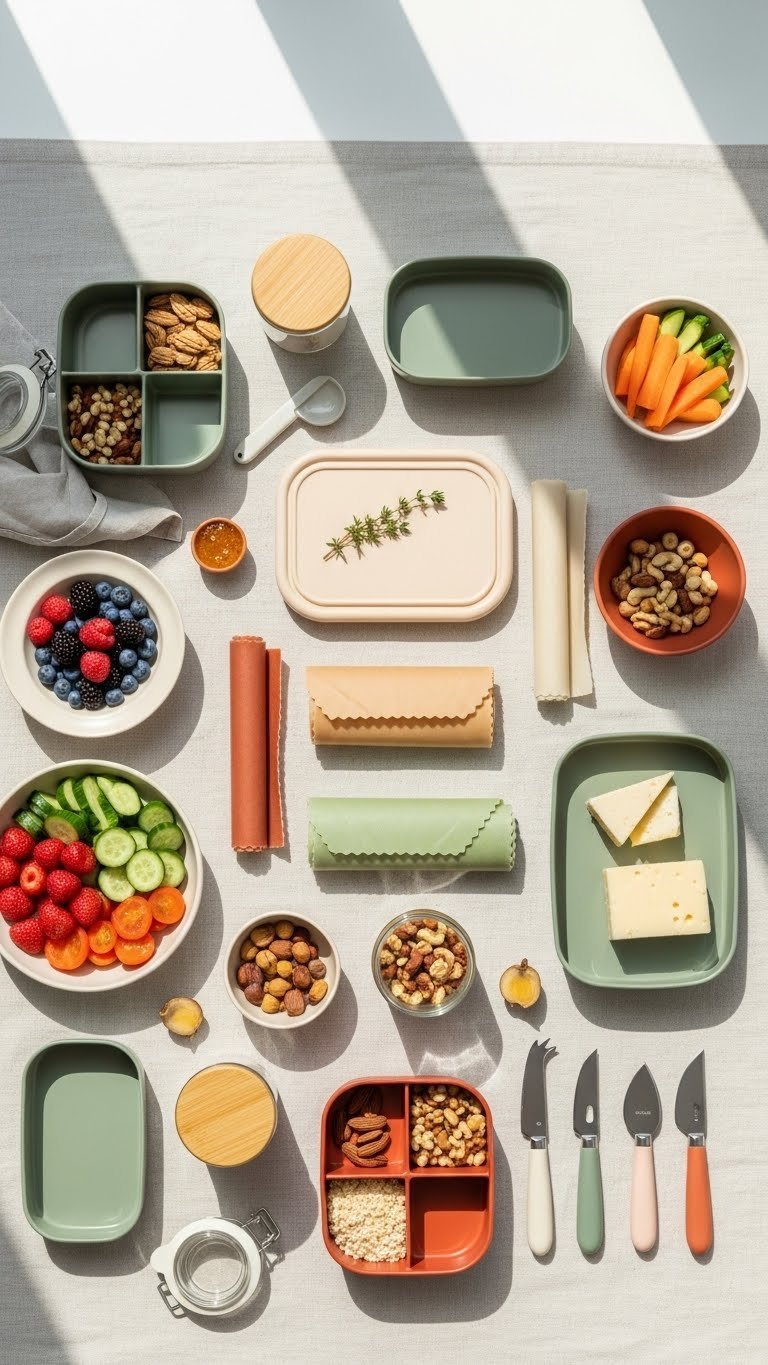
Gather a few reliable containers and the right portions to keep flavors and textures separate. For one person, plan on 2–3 compartments or one shallow box with dividers.
Essentials:
- Containers: 8 x 6 inch bento box, small round tins (4–6 oz), or glass jars with tight lids.
- Tools: small cheese knife, silicone cups, parchment squares, ice pack for cooler.
- Ingredients per person:
- 2 oz firm cheese (cheddar, manchego)
- 2 oz soft cheese (brie wedge or goat cheese)
- 3–4 slices cured meat (prosciutto, salami)
- 1/4 cup mixed nuts or olives
- 4–6 crackers or a small baguette slice
- 2 tbsp jam or honey, fresh fruit (6–8 grapes or 3–4 strawberry halves)
Quick tips:
- Use silicone cups to keep wet items separate.
- Pre-slice cheeses into 1/4-inch slices for easy packing.
Preparing Ingredients: How to Cut, Portion, and Pack for Travel

Prep makes portable charcuterie in portable containers simple and fast. Do prep the day before for non-perishables and the morning of for items that need peak freshness.
Prep steps:
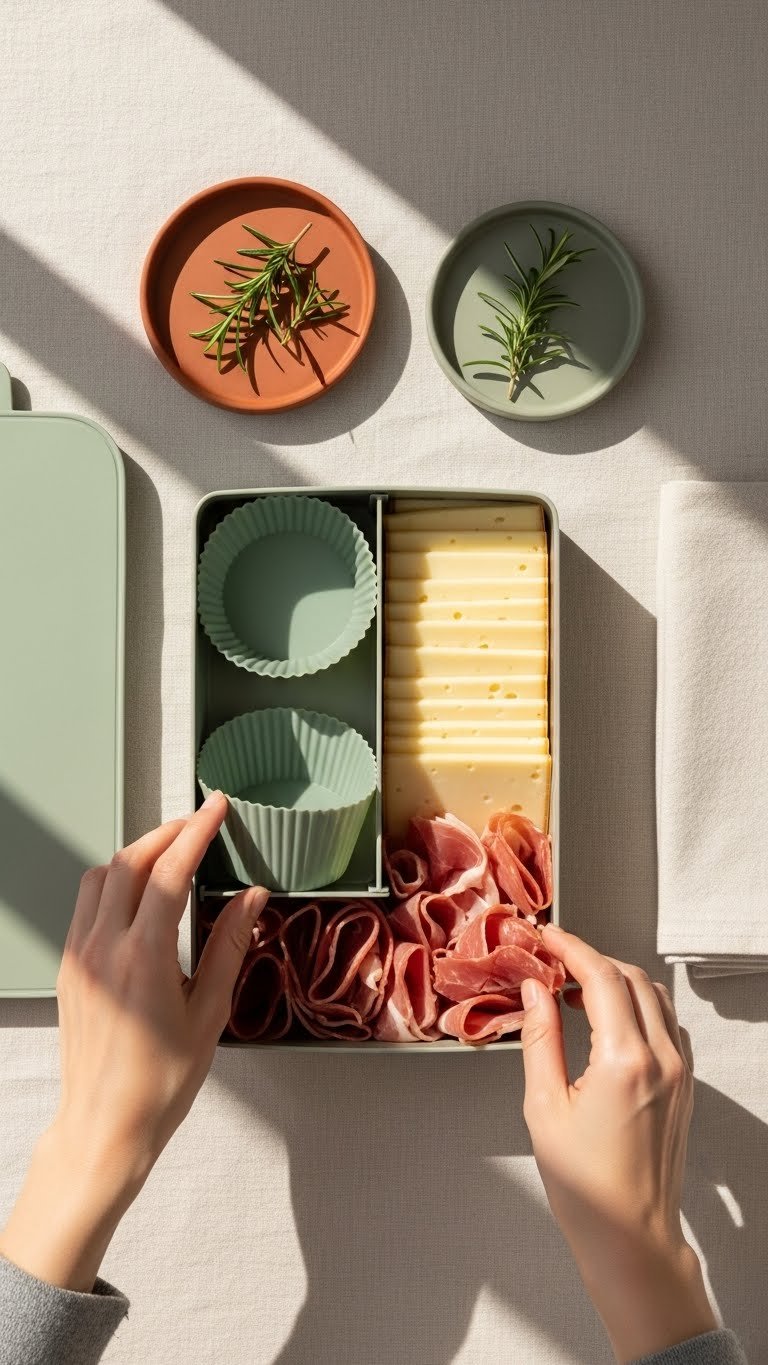
- Slice cheeses and wrap in parchment to prevent sticking.
- Fold meat into small bundles or roll prosciutto for a neat fit.
- Portion spreads into 1–2 tbsp containers or silicone cups.
- Wash and dry fruit thoroughly—moisture causes sogginess.
Pro tricks:
- Chill containers for 10 minutes before packing cold items.
- Use small ice packs under the box in your cooler for cheeses and soft spreads.
- Avoid slicing crackers—pack whole to maintain crispness.
Assemble: Step-by-Step Packing for Picnic Charcuterie in Portable Containers
Follow these steps for a neat, travel-ready box:
- Line each compartment with parchment or a small lettuce leaf.
- Place soft spread (goat cheese or jam) in a silicone cup, then tuck it into a corner.
- Add cheese slices next to the spread—keep firm cheeses and soft cheeses separated.
- Fold and stack meats into another compartment.
- Fill remaining space with crackers, nuts, and fruit.
Assembly tips:
- Leave a little air space so items aren’t crushed.
- Put delicate items (berries, herbs) on top last.
- For jars: layer crackers at the top, spread in the middle, and denser items below to avoid sogginess.
Warnings:
- Do not overpack fragile items; crushed fruit ruins presentation.
- Keep cold items chilled until serving—store boxes in a cooler with an ice pack.
Serving, Storage, and Make-Ahead Tips for Outdoor Picnics
Serving:
- Remove boxes from the cooler 10–15 minutes before eating for best flavor.
- Offer small wooden spatulas or disposable spreaders.
Storage and make-ahead:
- Make non-perishables (nuts, crackers, cured meats) 24 hours ahead.
- Pack cheeses the morning of or within 12 hours of serving.
- Store boxes in the fridge up to 24 hours; avoid over 48 hours for freshness.
Variations:
- Vegetarian: replace meats with marinated artichokes, roasted peppers, and falafel bites.
- Kid-friendly: swap cheeses for mini grilled cheese squares and add sliced apples.
Final caution: avoid leaving soft cheeses out for more than 2 hours in warm weather.
You’ve now got a repeatable method for stylish picnic charcuterie in portable containers that travels well and looks great. Pin this guide for your next outdoor meal! Save this for later and share with friends who love picnics—which container will you try first?