
You want your lemonade stand to look irresistible in photos and effortless in real life. If you've ever set up a table that felt cluttered or bland, this guide shows exactly how to decorate a lemonade stand for picture-perfect parties. You’ll get a clear materials list, step-by-step setup, styling tricks, and serving tips that make your stand pop on Pinterest and in-person.
Follow these steps and you’ll know how to decorate a lemonade stand like a pro. You’ll learn quick DIYs, exact quantities, and simple staging ideas that photograph beautifully. Ready? Let’s make something bright, fresh, and totally shareable.
What You'll Need (materials + tools)
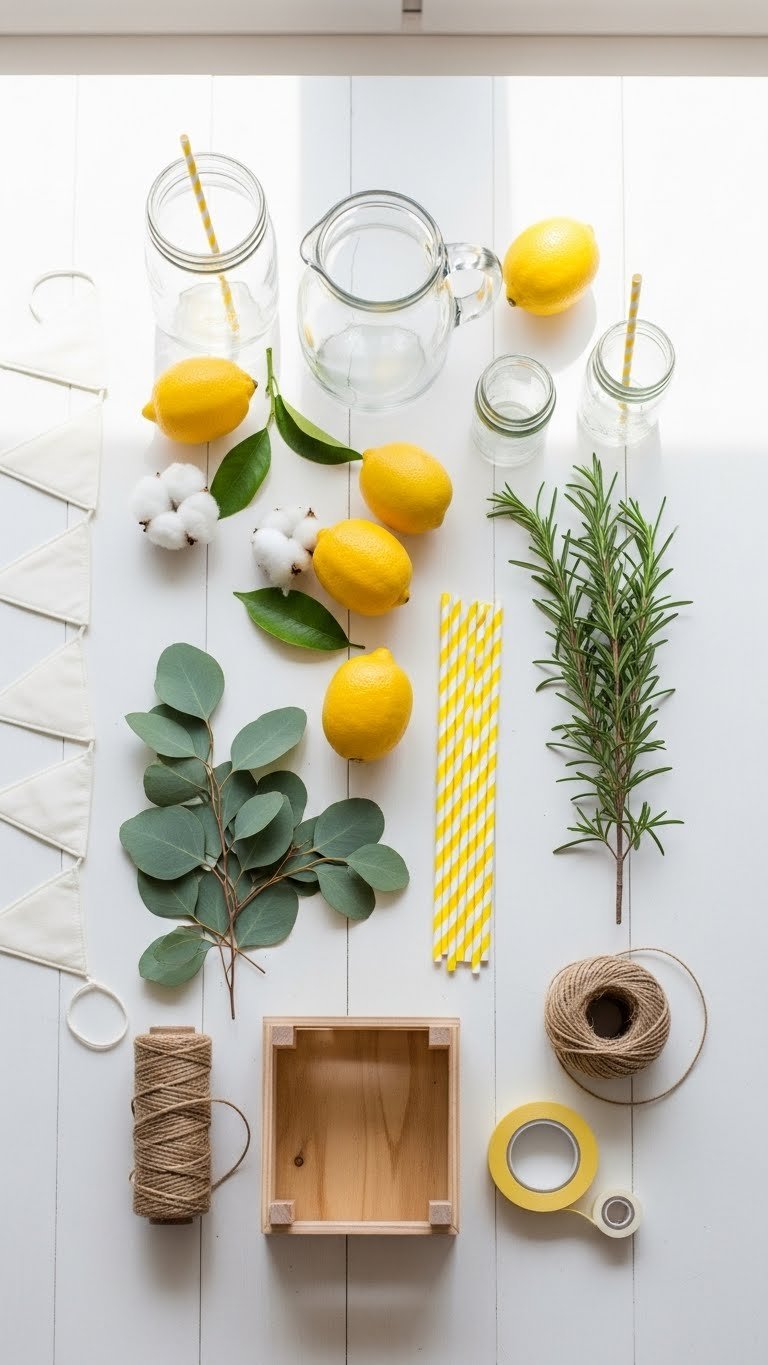
Collect these items before you start. Having everything ready saves time and keeps your setup tidy.
- Mason jars or clear pitchers (6 jars + 1 large pitcher)
- Fresh lemons (12–18, plus slices)
- Striped paper straws (pack of 25)
- Small wooden crate or riser for height
- Pennant bunting (5–6 feet) and twine
- Greenery sprigs (mint or small eucalyptus)
- Tape, scissors, and a small chalkboard or label tags
Quick tips:
- Buy extra lemons for garnish.
- Use double-sided tape to secure bunting in wind.
- Keep a small cooler nearby for ice and backups.
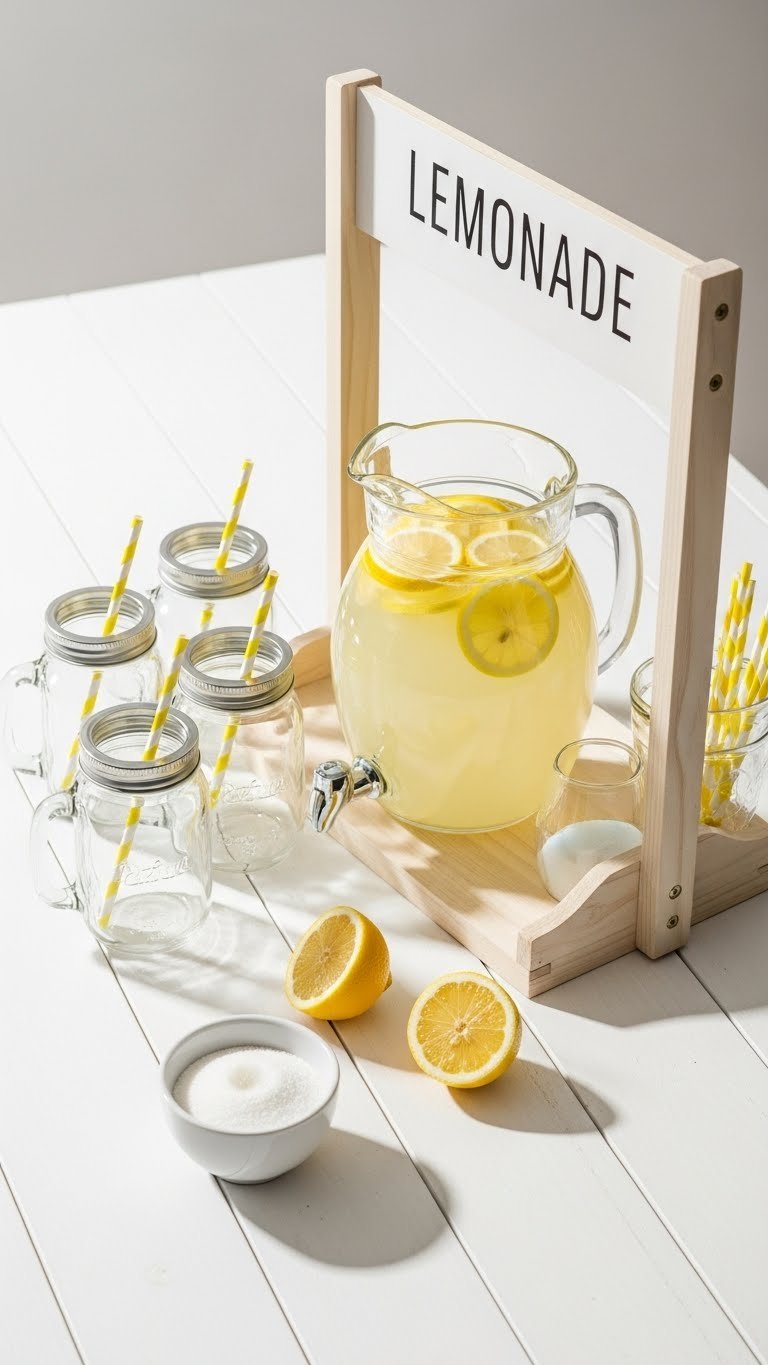
Setting Up Your Stand (layout + assembly)

Create a layered, balanced layout that reads well in photos.
- Place the large pitcher center-back on the stand.
- Add a wooden crate on one side to raise a mason jar.
- Arrange mason jars in front, staggered by height.
- Drape bunting across the stand front, secured with tape.
Design rules:
- Keep the color palette limited to yellow, white, and green.
- Leave small negative spaces so items breathe in photos.
- Use the crate to create depth and make the display dynamic.
Troubleshooting:
- If the setup looks busy, remove one prop per side.
- Windy outdoor setups: anchor bunting ends under jars or use small clamps.
Styling Tips and Tricks (photo-ready details)

Small details make big visual impact.
- Garnish each jar with a lemon wheel and a mint sprig.
- Tie a short piece of twine around jar necks for texture.
- Use a small chalkboard for the price or a friendly message.
- Keep straws visible and angled outward for movement.
Photography pointers:
- Shoot from a 45-degree angle for depth and context.
- Let sunlight hit the lemons to enhance color and texture.
- Use a shallow depth of field for soft backgrounds and sharp foregrounds.
Common mistakes:
- Avoid too many props; stick to 3–5 focal items.
- Don’t mix too many patterns—limit to one striped element.
Serving and Make-Ahead Tips (timing + storage)
Keep things simple and efficient so the party flows.
- Make lemonade up to 24 hours ahead and chill in the fridge.
- Use 1 cup sugar to 6 cups water, stir until dissolved, then add 1 1/2 cups lemon juice for a balanced batch (adjust sweetness to taste).
- Store extra lemonade in a sealed pitcher on ice.
- Refill jars quickly using the pitcher and a ladle to avoid spills.
Time-saving tricks:
- Pre-slice lemons and keep them in an airtight container.
- Pre-fill mason jars with ice and garnish, then add lemonade when serving.
Warning:
- If making large batches, taste-test before serving. Lemon quality varies.
You now have a practical plan for how to decorate a lemonade stand for picture-perfect parties. You’ve gathered the right materials, assembled an inviting layout, and learned styling and serving shortcuts. Your photos will look cohesive and bright, and your guests will know exactly where to find a refreshing pour.
Pin this guide for your next sunny celebration! Save it for later and share with friends who love easy, photogenic party setups. Which styling tip will you try first? Ready to make this happen? Let’s do it!