
You want your bridal sweets to look as pretty as they taste, and a tiered stand is the fastest way to get that pin-worthy display. When you know how to display bridal sweets on an elegant tiered stand, guests notice the care you took—and photos pop on Pinterest. This guide shows you what to buy, how to arrange tiers, styling tricks, and quick troubleshooting so you can set up a gorgeous dessert focal point in under an hour.
By the end you'll be able to display bridal sweets on an elegant tiered stand that feels balanced, cohesive, and easy to refill.
What You'll Need to Display Bridal Sweets
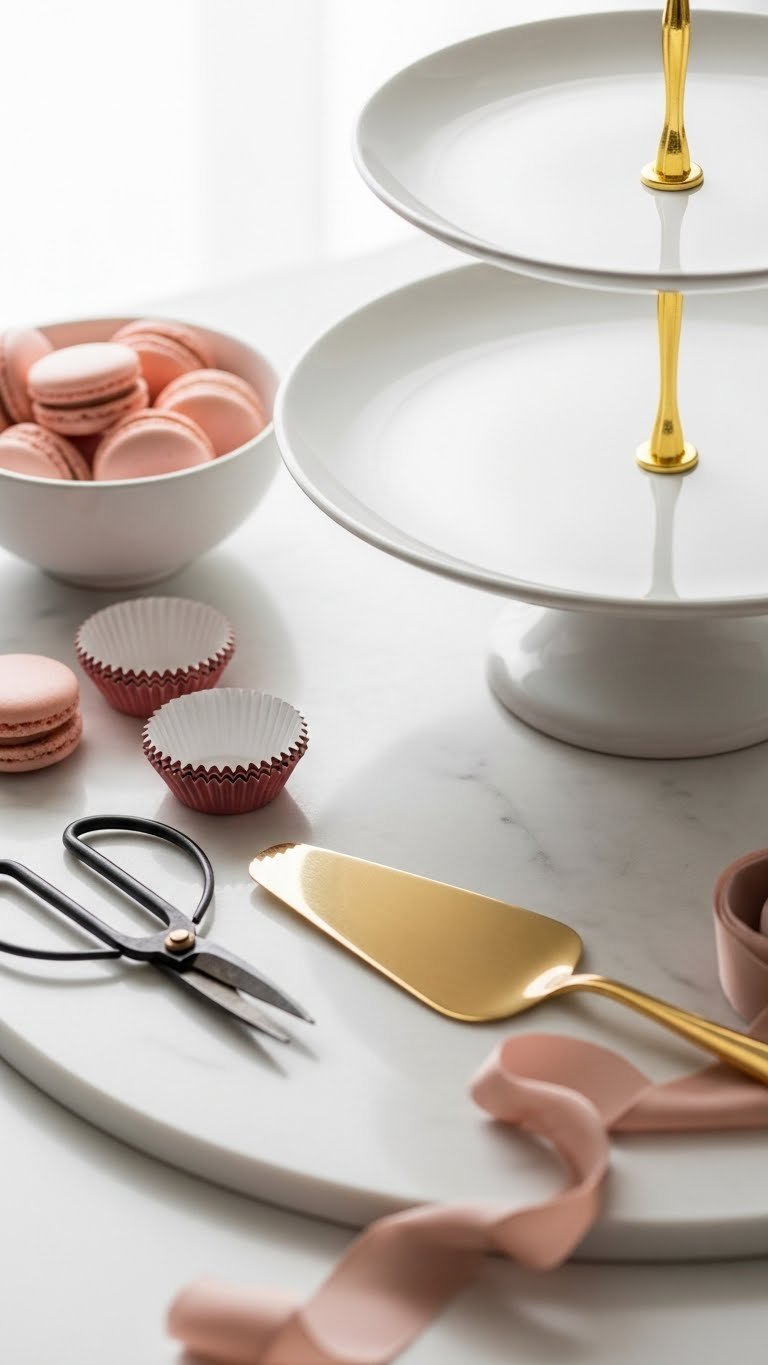
- Tiered stand (3-tier metal or ceramic, 10–12", 7–9", 4–6")
- Assorted sweets: 18–24 mini cupcakes, 24–30 macarons, 15–20 petit fours, 12 meringues
- Decor: fresh sprigs of baby's breath or small eucalyptus, silk ribbon (1–2 yards), doilies or gold liners
- Tools: small spatula, tweezers for placement, damp paper towel for clean-up
Quick tips:
- Buy sweets in small, consistent sizes so tiers stay balanced.
- Choose 1–2 dominant colors (blush and ivory) and 1 accent (soft gold or sage).
- Set aside 20–30 minutes for arranging, plus 10 minutes for touch-ups.
Setting Up Your Elegant Tiered Stand
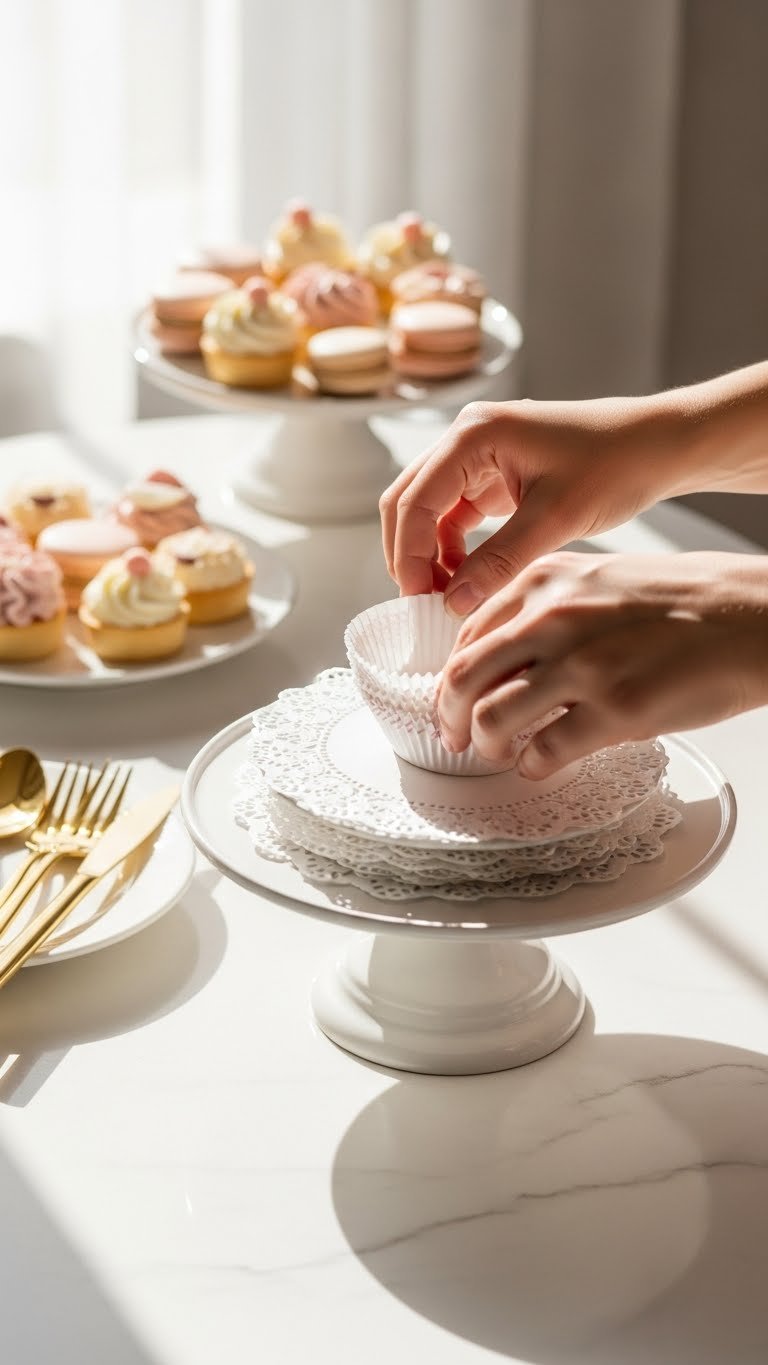
- Clean and center the stand on your display surface.
- Layer with doilies or liners: top tier—small items, middle—medium, bottom—largest.
- Start with a base ring: place 6–8 evenly spaced items around the edge of each tier to form a frame.
- Fill the center with smaller sweets, stacking where safe.
Measurements and proportions:
- Leave 1/2–1 inch space between sweets on the smallest tier.
- Bottom tier should hold the most—aim for 40–50% of total sweets for visual weight.
Warnings:
- Don’t overload the top tier—keep it light to avoid tipping.
- Avoid sticky or melting sweets in direct sunlight; choose stable options for long displays.
Styling Tips and Tricks for a Picture-Perfect Display

- Use color blocking: cluster 3–5 of the same item to create visual clusters.
- Add height with a small decorative cake topper or a mini floral spray on the top tier.
- Tuck greenery or tiny flowers between sweets for soft contrast.
- For symmetry, mirror clusters on opposite sides; for casual style, stagger placements.
- Use tweezers to adjust tiny details without smudging frosting.
Pro tricks:
- Place a few empty liners as placeholders to keep spacing while guests serve.
- Keep a small refill box nearby so you can swap in fresh sweets quickly.
Serving, Storage, and Make-Ahead Timeline

- Make-ahead timeline:
- 2–3 days: Bake or buy cookies and macarons; store in airtight containers.
- 1 day: Assemble cupcakes and petit fours; refrigerate if needed.
- 2 hours before: Arrange sweets on the tiered stand; add fresh flowers.
- Storage tips:
- Keep refrigerated sweets chilled until 20–30 minutes before service.
- Cover display loosely with a breathable cloth to protect from dust.
- Troubleshooting:
- If a top tier leans, remove a few items and redistribute weight evenly.
- For sticky weather, swap buttercream for fondant-topped sweets or meringues.
Ready-to-serve look: balanced tiers, repeating colors, and a few floral accents for softness. That’s what makes pins stand out.

You can now display bridal sweets on an elegant tiered stand that looks intentional and effortless. Try one color cluster and one floral accent first; you’ll see how quickly the display comes together. Pin this guide for your next shower or wedding and share it with friends who are planning sweets. Which styling tip will you try first? Ready to make this happen? Let's do it!