
You love delicate royal icing flowers, but when you try to flood them the petals look pitted or uneven. You can get perfectly smooth finishes every time if you learn the right consistencies and simple scribe techniques. This guide shows you how to flood royal icing flowers for smooth finishes, step by step, with exact measurements, timings, and pro tips you can use on your next batch.
Read on and you’ll learn what tools to gather, how to mix pipe and flood consistencies, the exact flooding process, and quick fixes when things go wrong. You’ll be ready to create pin-worthy floral cookies and cake toppers.
What You'll Need to Flood Royal Icing Flowers
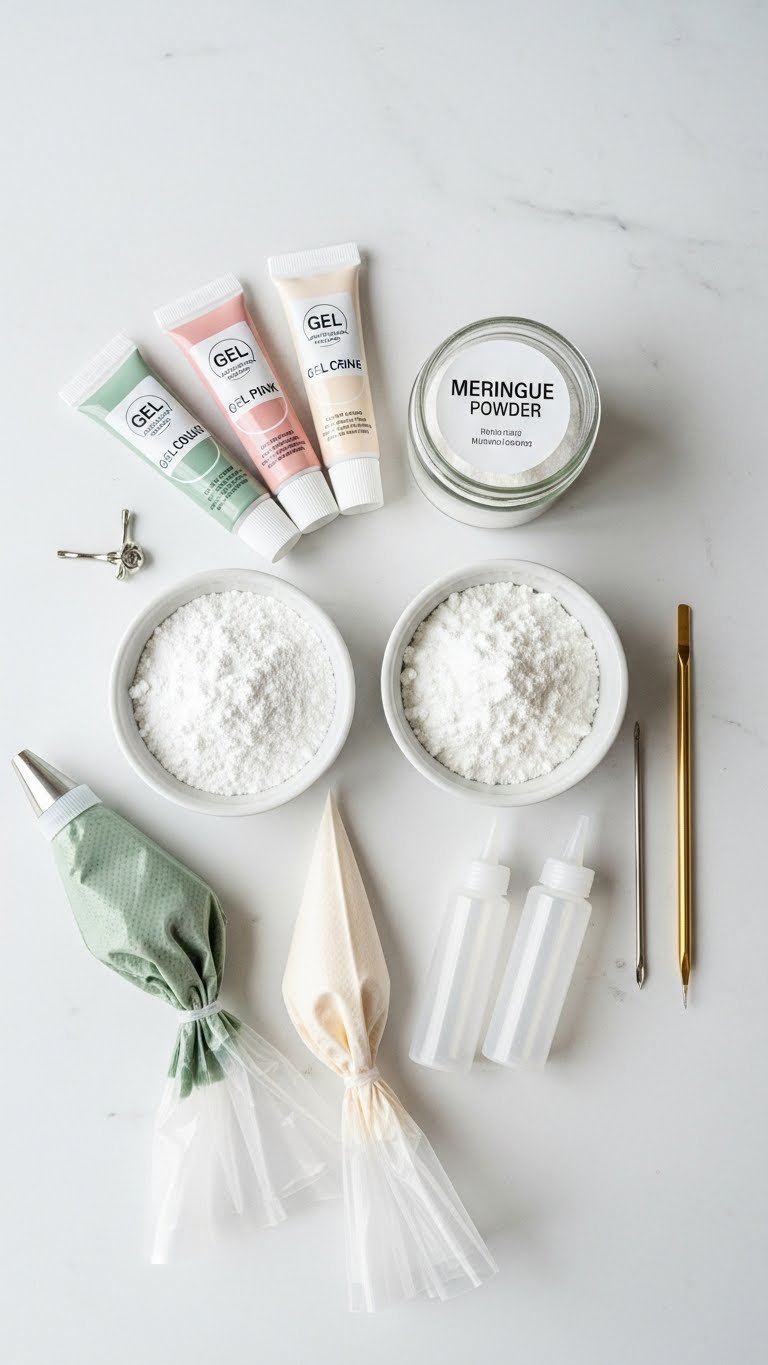
Gathering the right tools speeds the process and prevents common mistakes. You’ll work with two consistencies: pipe for outlines and details, and flood for filling petals.
- Ingredients
- 2 cups powdered sugar
- 2 tbsp meringue powder
- 2–4 tbsp water (adjust)
- Gel food color (sage, blush, cream)
- Tools
- Piping bags with #1–#3 tips
- Squeeze bottles for flood icing
- Flower nail or parchment circles
- Gold scribe tool or toothpick
- Small bowls and spatula
Keep icing covered to prevent crusting. Label bowls when you mix multiple colors.
Getting Started: Prepare Royal Icing for Flooding
Prepare a small batch first so you can test viscosity. The goal is a stable pipe consistency and a slightly thinner flood consistency.
- Whisk 2 cups powdered sugar with 2 tbsp meringue powder.
- Add 2 tbsp water and beat until stiff peaks form for pipe icing.
- Divide and color small portions with gel color.
- Thin the flood portion with ½ tsp water at a time until it falls back into the bowl in a smooth ribbon in 10–15 seconds.
Tips:
- Use gel color; avoid adding extra water for color.
- Test on parchment: pipe an outline, flood inside, observe how it spreads.
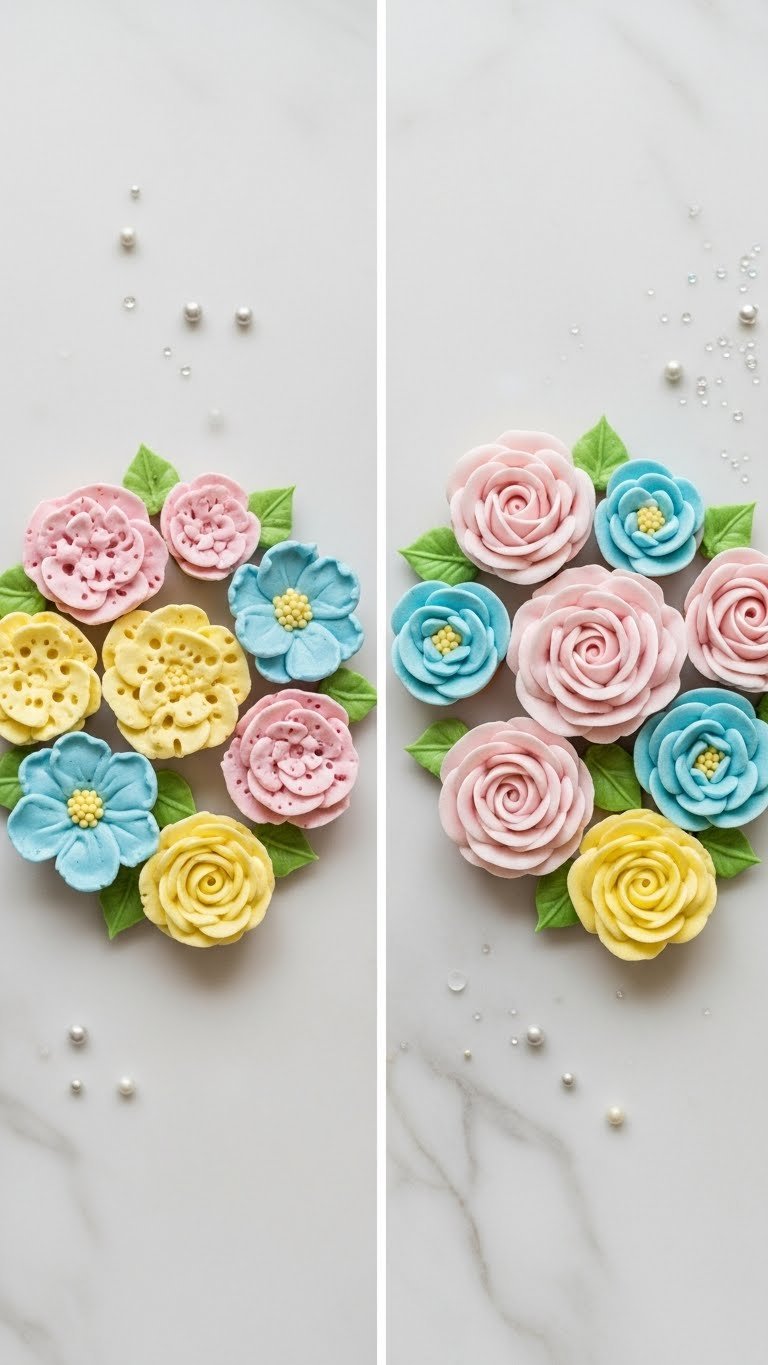
Flood Royal Icing Flowers: Step-by-Step Technique
Follow these numbered steps for smooth petal floods:
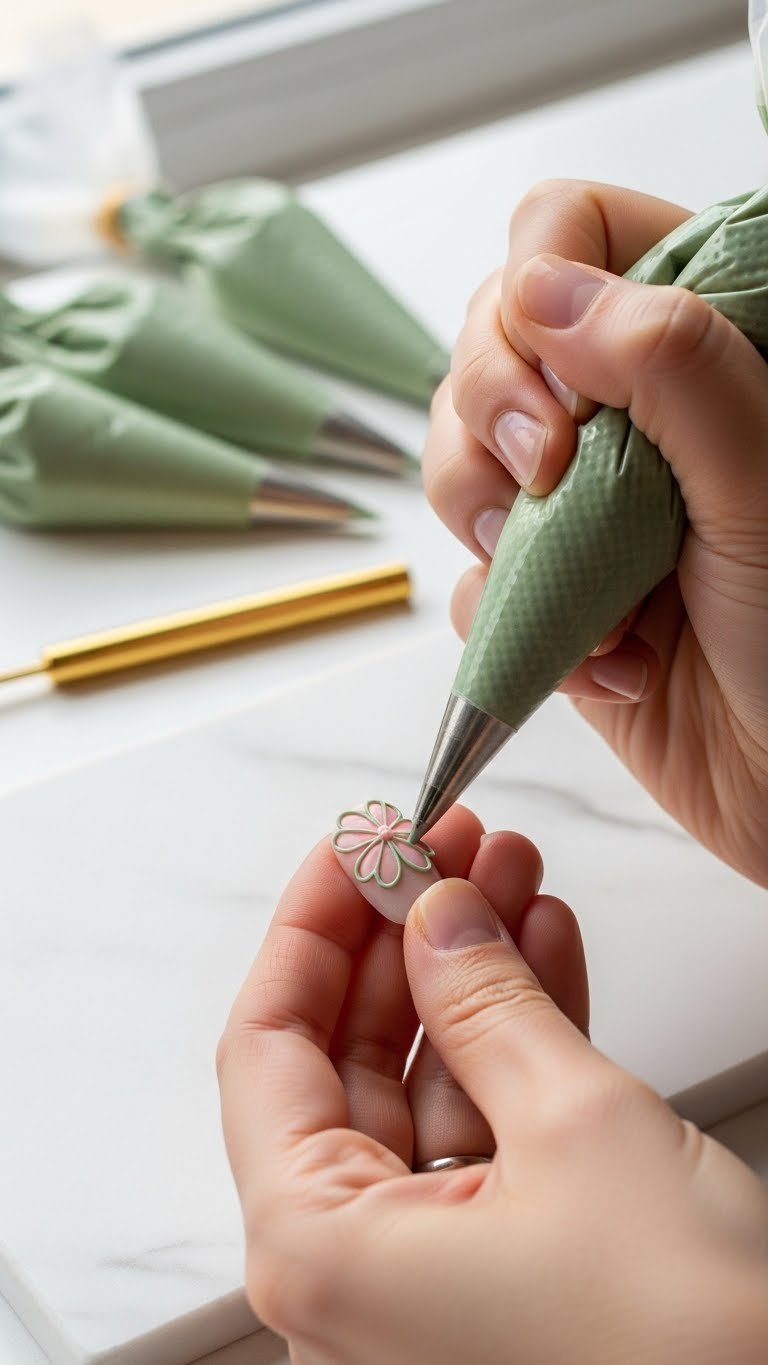
- Outline each petal with pipe consistency. Keep lines thin but continuous.
- Fill with flood icing using a squeeze bottle or spoon. Work one petal at a time.
- Use a scribe tool to nudge flood icing into corners and pop air bubbles.
- Feather petal edges by dragging a tiny dot of flood color from center outward, if desired.
- Let petals crust for 15–30 minutes before moving to avoid smudging.
- For full flowers, flood center last so edges settle inward.
- Allow flowers to dry flat for overnight for a fully hardened finish.
Quick pro tricks:
- Keep a damp towel nearby; if icing thickens, add ¼ tsp water and stir.
- Work in small batches to prevent crusting in tools.
Troubleshooting Common Issues & Finishing Touches
If flood icing beads up or creates rings, your flood consistency may be too thick. Thin in ½ tsp increments. If colors run into one another, your icing was too wet or applied next to a still-wet color—work petal-by-petal and let petals crust slightly before adjacent flooding.
Common fixes:
- Air bubbles: lightly tap the board or use a scribe tool to release them.
- Crusts forming too quickly: add ¼ tsp water to the flood icing.
- Sticky surfaces: let dry 12–24 hours in a cool, dry spot.
Storage and make-ahead:
- Fully dry flowers store flat in an airtight container for 2–3 weeks.
- Make flowers up to a week ahead for cake toppers; for cookies, allow full hardening first.
Which color combo will you try? Keep practicing the ribbon test and your results will look smooth and professional.
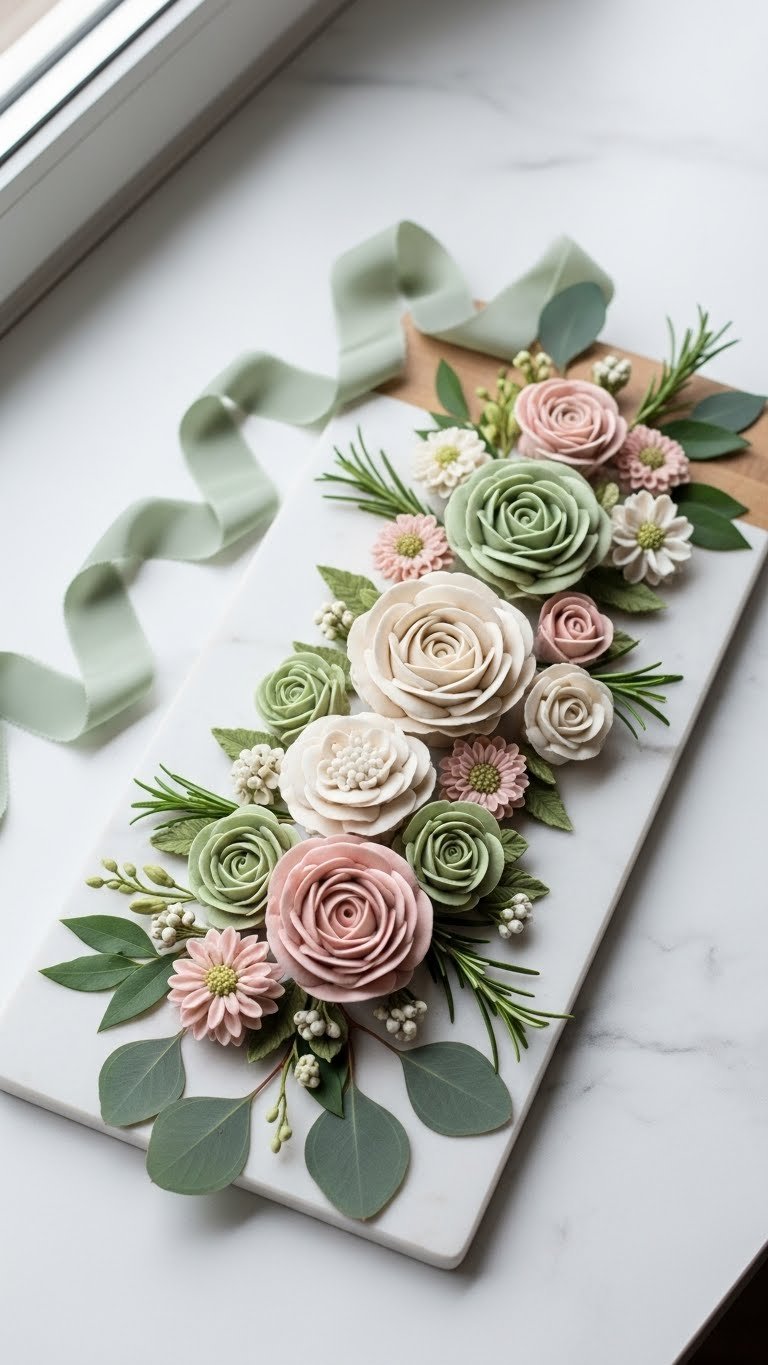
You’ve learned how to flood royal icing flowers for smooth finishes, from mixing precise flood consistency to scribing away bubbles. Celebrate small wins and try one tip per batch. Pin this guide for your next bridal shower or party, and share it with friends who decorate. Which tip will you try first?