
You want picnic-worthy lunches that look as good as they taste, and learning how to layer pasta salad in jars is the easiest way to get there. When you layer pasta salad in jars the right way, you get neat, colorful layers that stay crisp and transport well. This guide shows you what to pack, the exact layer order, and quick tips so your jars stay fresh and pin-worthy.
Expect simple measurements, precise steps, and make-ahead tricks that save time. By the end you’ll know how to layer pasta salad in jars so every bite has flavor and texture.
What You’ll Need to Layer Pasta Salad in Jars
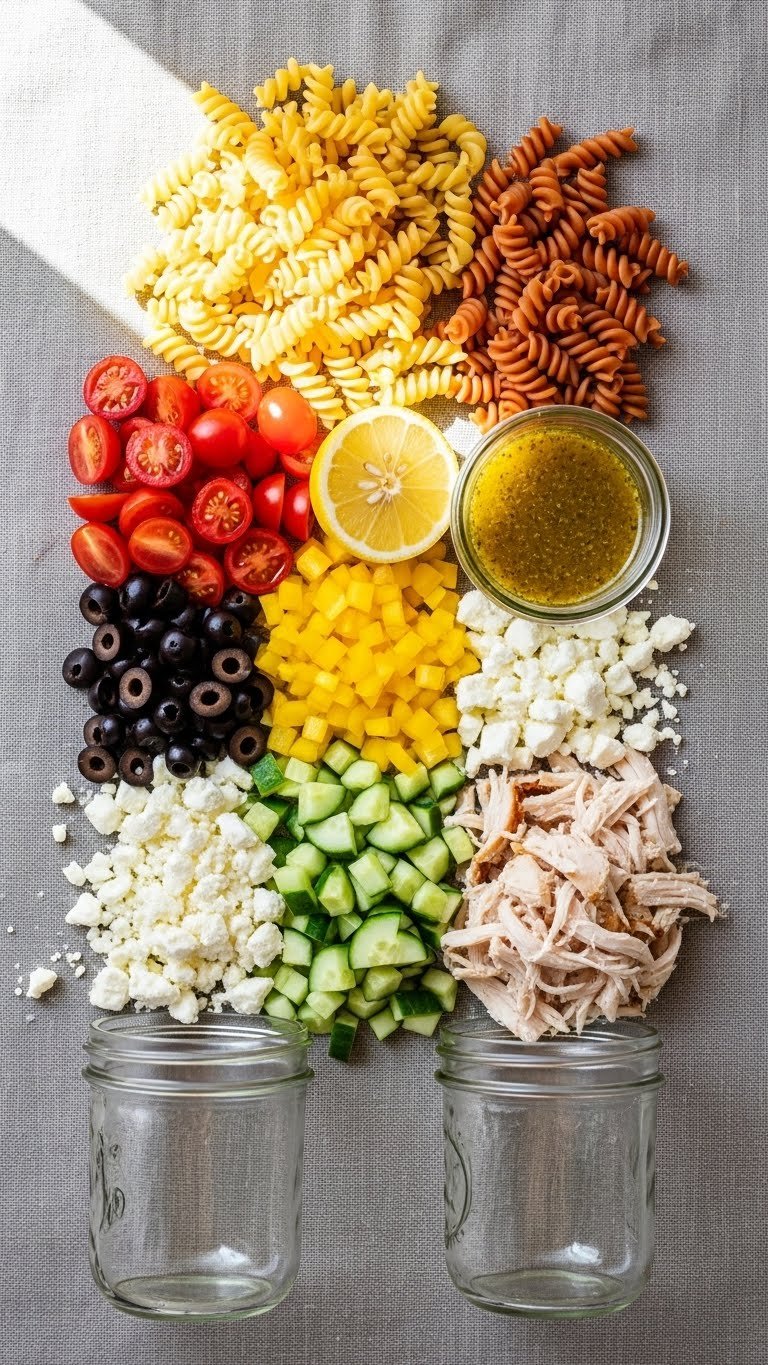
- Tools:
- 4–6 (16 oz) mason jars with lids
- Measuring cups, spoon, small mixing bowl
- Salad dressing shaker or jar
- Ingredients per jar:
- 1 cup cooked pasta (rotini or orecchiette), cooled
- 2 tbsp dressing
- 1/4 cup cherry tomatoes, halved
- 1/4 cup cucumber, diced
- 2 tbsp bell pepper, diced
- 2 tbsp olives or beans
- 2 tbsp crumbled feta or shredded cheese
- Handful of mixed greens or arugula
- Optional: 1/4 cup cooked chicken or chickpeas
Prep time: 15–20 minutes. Make-ahead: assemble up to 3 days ahead (see storage).
Preparing Your Ingredients

- Cook pasta al dente and rinse under cold water. Cool completely to avoid soggy layers.
- Chop vegetables into bite-sized pieces so they layer neatly.
- Toss dressing in a small jar and shake well. Use a thinner vinaigrette for bottom-layer stability.
- If using chicken or beans, shred or drain and pat dry.
Tip: Use pre-cooked rotisserie chicken or canned beans for a faster assembly.
Step-by-Step Instructions for Layering
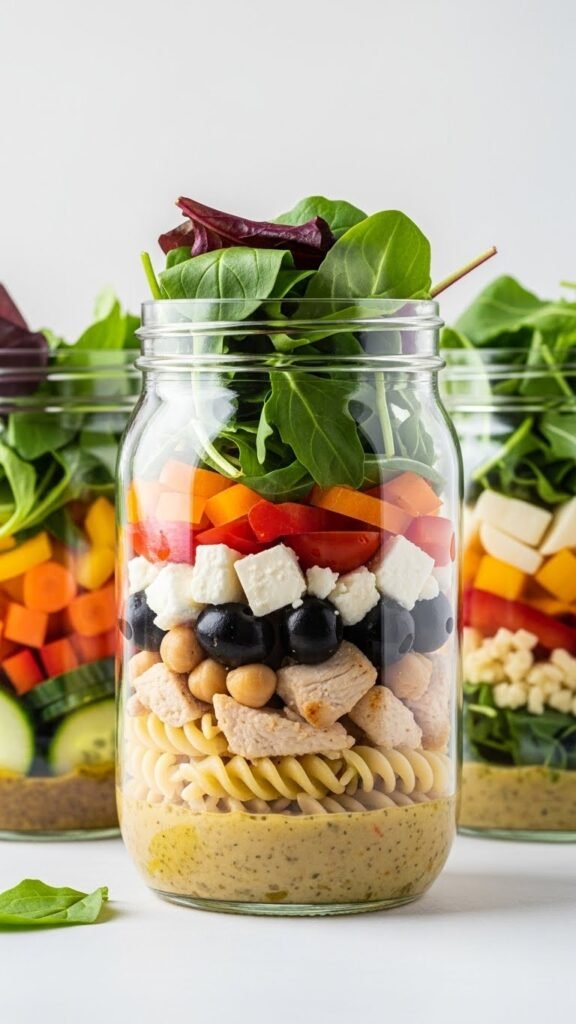
Follow this layer order to keep greens crisp and flavors balanced:
- Dressing first — Add 2 tbsp of dressing to the jar bottom. This keeps pasta from getting soggy.
- Hearty veggies — Place cucumbers, carrots, bell pepper (sturdy items) on top of the dressing.
- Proteins and olives — Add chicken, chickpeas, or olives next to keep them separated from greens.
- Pasta — Pack 1 cup cooked pasta firmly but gently.
- Soft veggies & cheese — Add tomatoes and 2 tbsp crumbled feta so they sit above the pasta.
- Greens last — Finish with a handful of mixed greens at the top.
- Press lightly after each layer for compact jars.
- Leave about 1/2 inch headspace before sealing.
- Screw lids on tightly and refrigerate upright.
Warning: Don’t mix layers inside the jar; the point is separate textures until you shake or pour.
Decorating, Serving, and Storage Tips
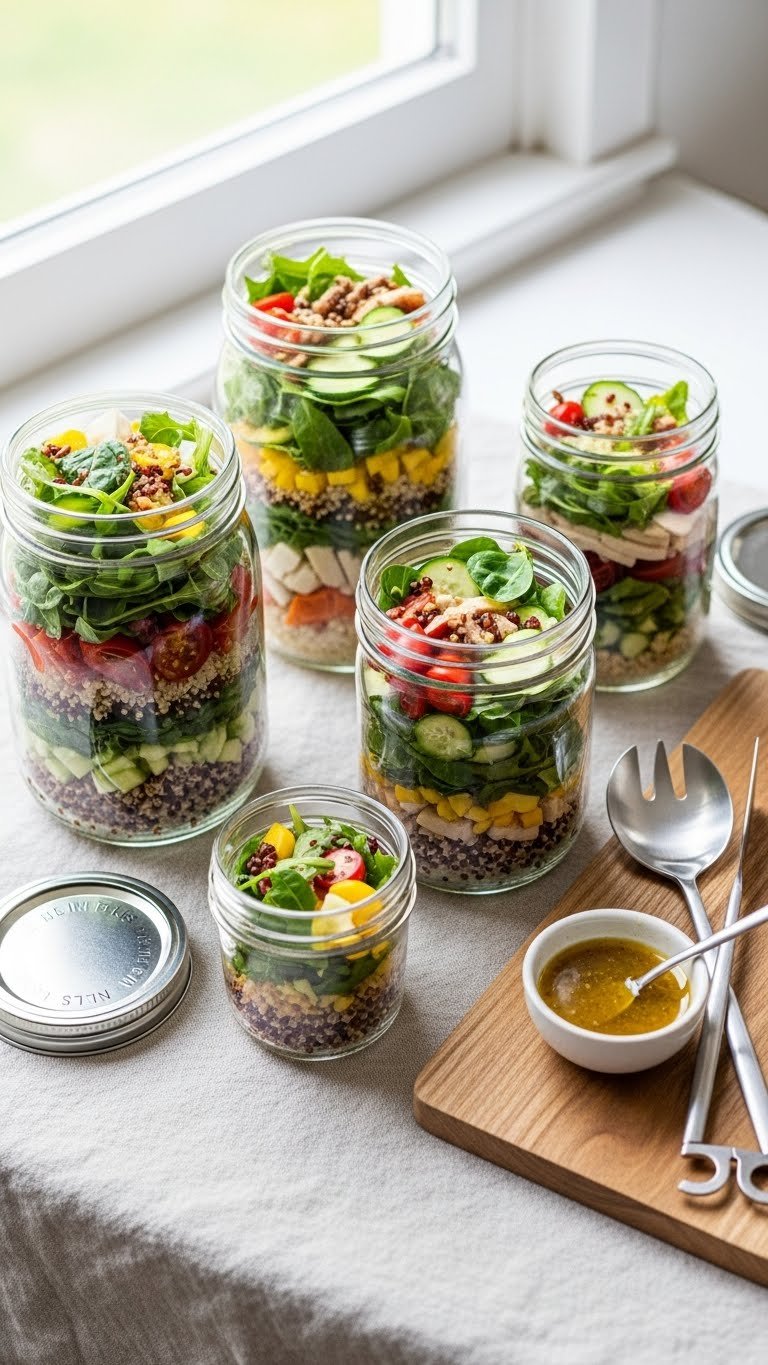
- Serving: Shake jar and pour into a bowl, or open and eat straight from the jar.
- Garnish: Add a lemon wedge or herb sprig tucked under lid for presentation.
- Storage:
- Refrigerate upright for up to 3 days.
- If you want day-of freshness, keep greens separate and add before serving.
- Quick fixes:
- Soggy pasta? Use less dressing or pack dressing in a separate small container.
- Leaky jars? Replace worn seals or use wide-mouth jars with new lids.
Variations:
- Greek: add cucumber, olive, feta, oregano.
- Pesto: swap vinaigrette for 1 tbsp pesto + 1 tbsp olive oil.
- BBQ chicken: grill chicken, add corn, black beans, cheddar.
Which variation you pick, layering keeps the jars tidy and ready to impress.
You’ve just learned a simple system to layer pasta salad in jars that keeps flavors separate and presentation sharp. Pin this guide for your next picnic, save it for weekly lunches, and share it with friends who love pretty, portable meals. Which jar-layering tip will you try first? Ready to make this happen? Let’s do it!