
Bright showers call for bright flavors. If you want a simple, show-stopping filling that makes cupcakes, tartlets, and layered cakes sing, learn how to make lemon curd filling that’s silky, tangy, and easy to use. You’ll get a reliable lemon curd filling recipe, timing, and storage tips so you can fill desserts for a bridal or baby shower without last-minute stress. Read on and you’ll be ready to pipe, spoon, and spread with confidence.
What You'll Need for Lemon Curd Filling
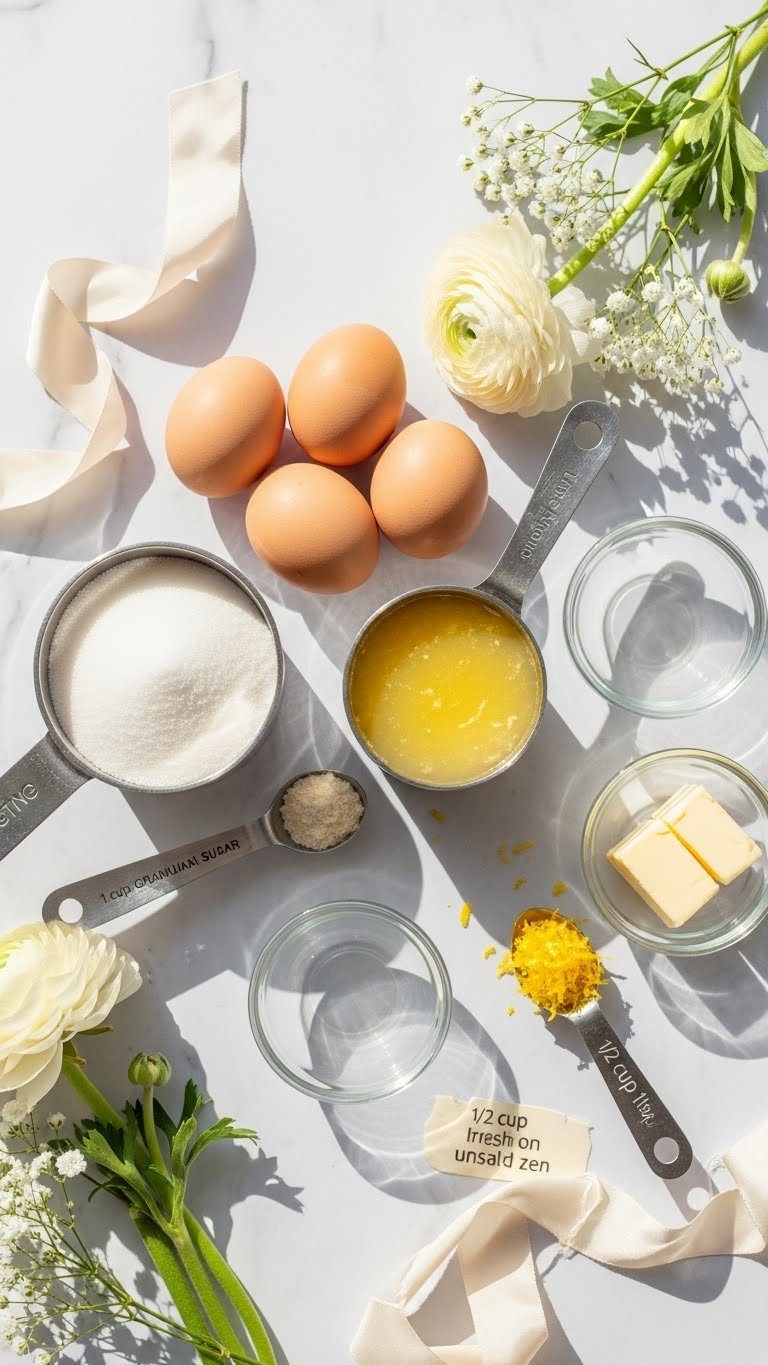
- Ingredients
- 4 large eggs
- 1 cup (200 g) granulated sugar
- 1/2 cup (120 ml) freshly squeezed lemon juice
- 1 tbsp finely grated lemon zest
- 1/2 cup (113 g) unsalted butter, cut into cubes
- Pinch of salt
- Tools
- Heatproof bowl and saucepan (for double boiler)
- Whisk and spatula
- Fine-mesh sieve
- Jars or piping bag for storage
- Tip: Use fresh lemons for the best aroma and flavor.
Preparing Your Ingredients

Prep saves time and keeps the curd even. Zest before juicing so you only get bright yellow zest, not bitter pith. Whisk the eggs lightly to break them up—no need to beat air into them. Cut the butter into small cubes so it melts quickly and emulsifies into the curd.
- Measure liquids and solids first.
- Warm the juice slightly if your kitchen is cool; it helps prevent temperature shock.
- Keep a sieve ready to strain any cooked bits for an ultra-smooth finish.
Step-by-Step Instructions: Cook the Lemon Curd Filling
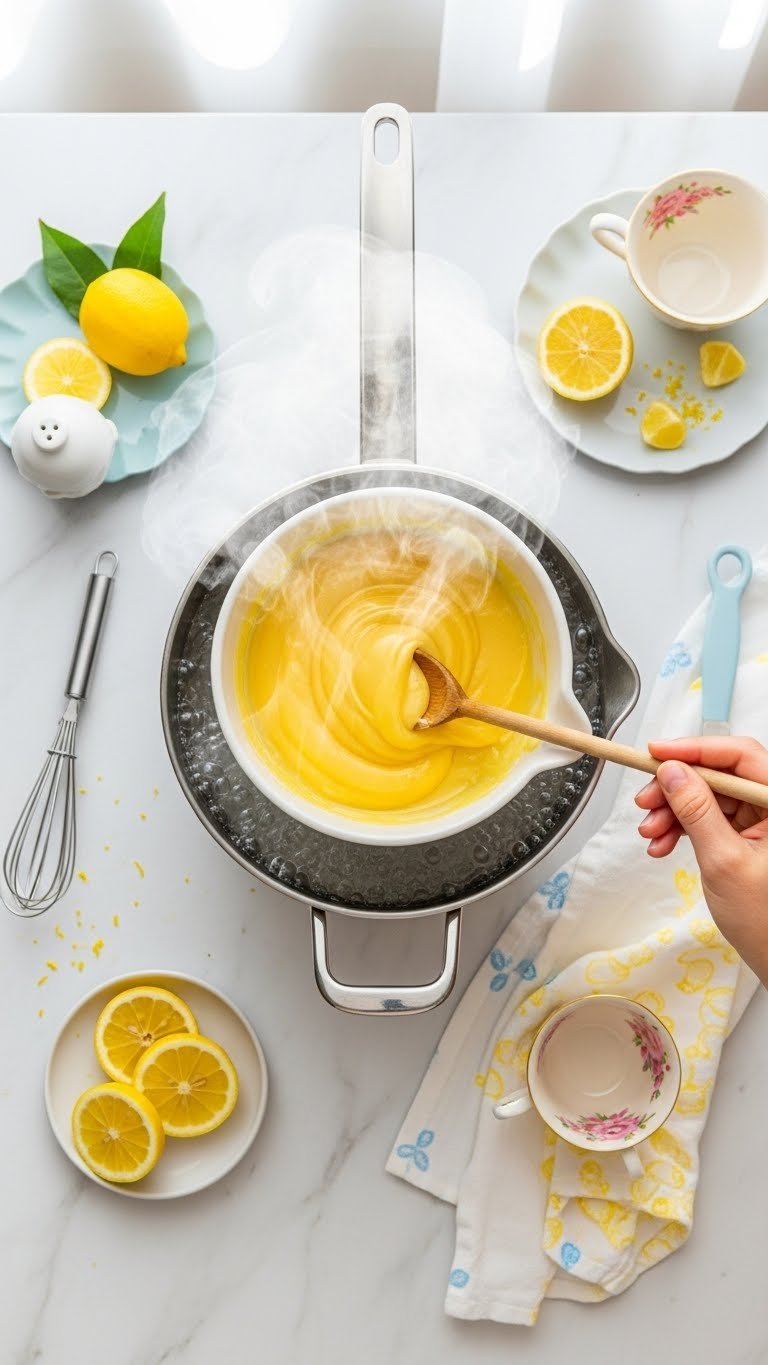
- Set up a double boiler: simmer water in a saucepan without touching the bowl.
- In the heatproof bowl, whisk together 4 eggs, 1 cup sugar, 1/2 cup lemon juice, and 1 tbsp lemon zest.
- Place the bowl over simmering water and whisk constantly.
- As the mixture thickens (about 8–12 minutes), stir in the 1/2 cup cold butter cubes one at a time.
- Cook until curd coats the back of a spoon and reaches about 170°F (77°C).
- Strain through a fine-mesh sieve into a clean bowl to remove zest bits and any cooked egg bits.
- Cover the surface with plastic wrap and chill for 1–2 hours to firm.
- Quick check: the curd should be glossy and hold a trail on the spoon.
- Warning: Don’t overheat; eggs will scramble if it boils.
Decorating & Finishing Touches for Shower Desserts
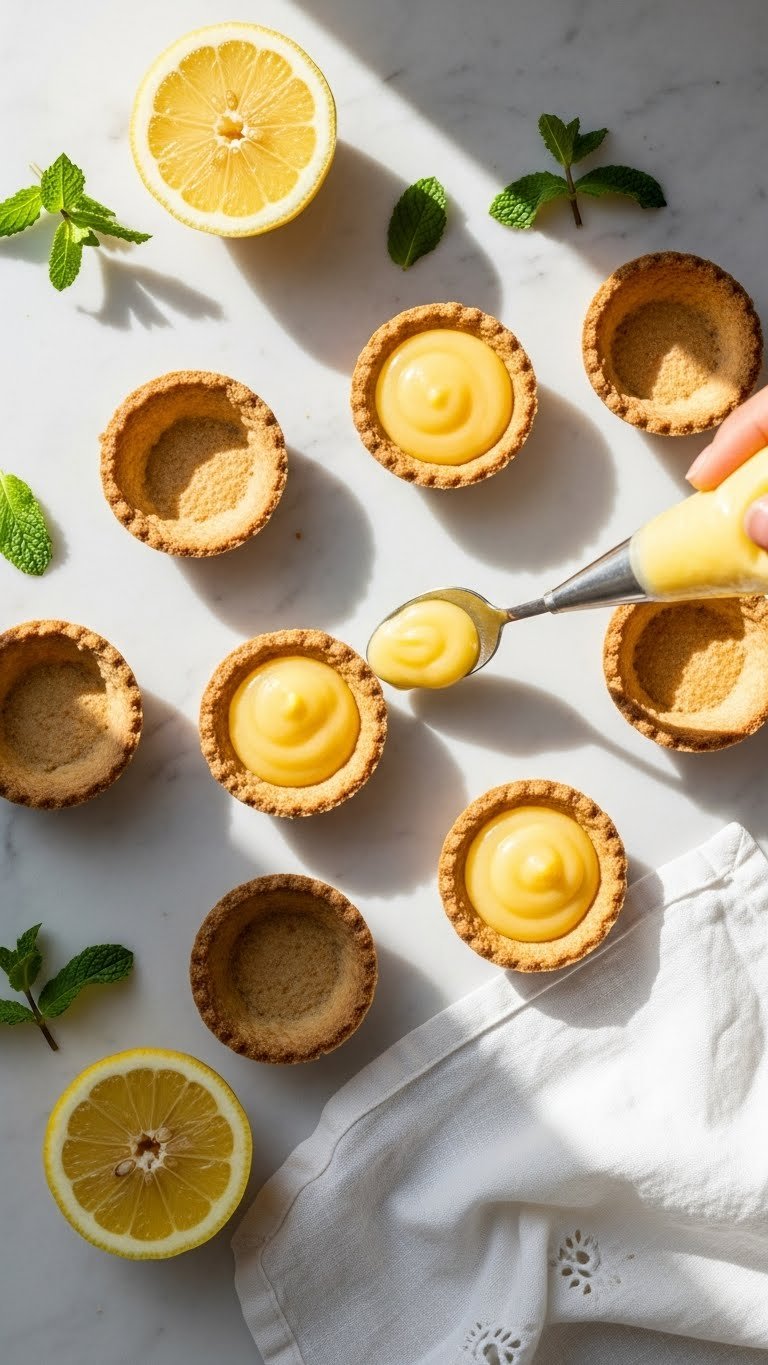
Once chilled, your lemon curd filling is easy to use. Fill tart shells, spoon into cupcake centers, or layer between cake tiers.
- For piping: use a disposable bag with a round tip and fill at room temperature.
- For glossy finish: warm a thin layer of curd and brush lightly.
- For texture contrast: top curd with whipped cream, meringue, or sugared berries.
Creative swaps:
- Replace half the lemon juice with orange for a milder citrus.
- Fold in 1/2 cup whipped cream for a lighter mousse-like filling.
Serving and Storage Tips for Lemon Curd Filling
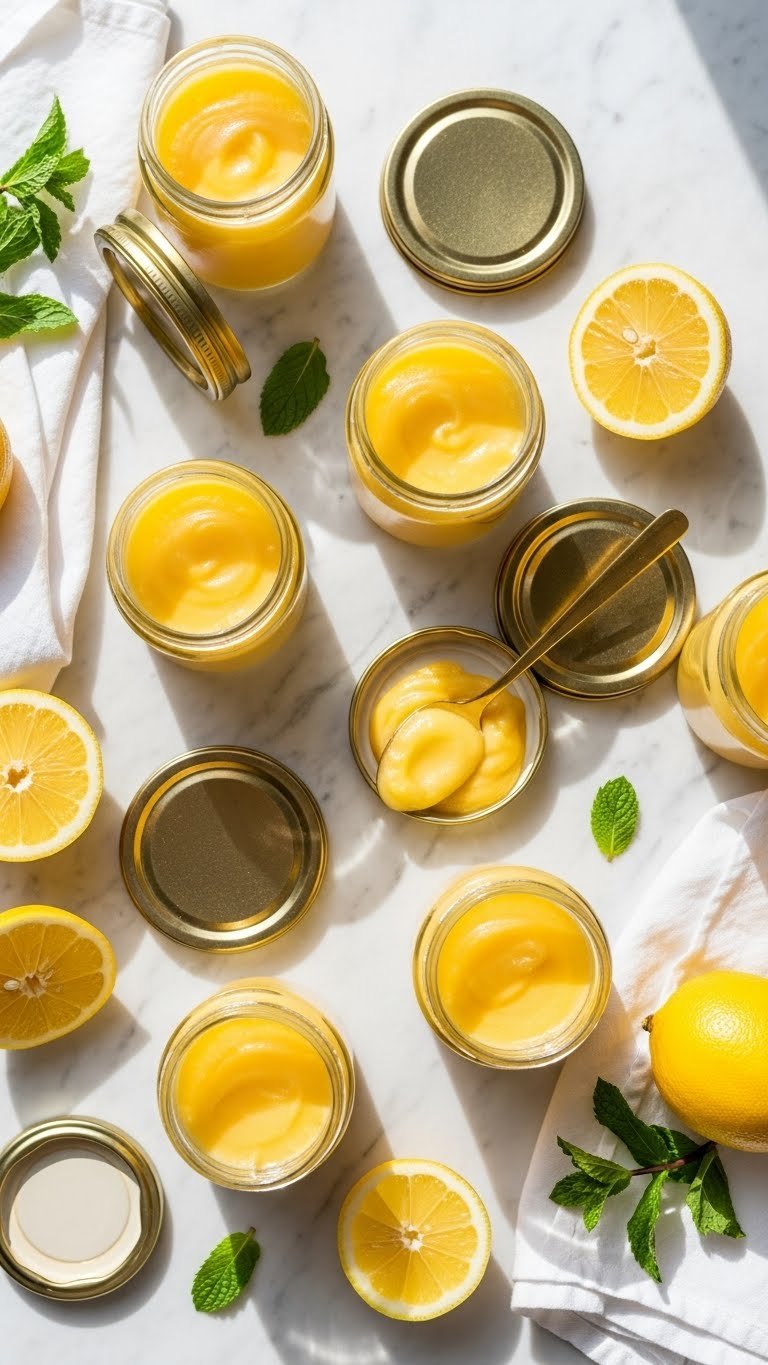
- Refrigerate in airtight jars up to 1 week.
- Freeze up to 3 months in freezer-safe containers; thaw in the fridge overnight.
- Make-ahead: cook the curd the day before the event and chill. Re-whisk gently before using.
- Safety note: keep lemon curd refrigerated when filled into cakes or cupcakes, especially with dairy toppings.
Common problems and fixes:
- Grainy curd = slightly overcooked; strain and whisk in a bit of warm butter to smooth.
- Too thin = chill longer or add a bit more butter and reheat slightly while whisking.
Final sensory cue: the right lemon curd filling should smell bright of lemon, taste balanced between sweet and tart, and feel velvety on the tongue.
You’re ready to make lemon curd filling that looks beautiful and holds up in shower desserts. Pin this guide for your next celebration and save time with the make-ahead tips. Which dessert will you fill first — tartlets, cupcakes, or a layered cake? Ready to make this happen? Let's do it!