
You’re short on time but craving a fresh outdoor meal — enter the no cook picnic. A no cook picnic lets you skip the stove and still serve something delicious, fresh, and photo-ready in 20–30 minutes. Whether you’re heading to the park or setting up on your balcony, this guide shows you how to plan, pack, and plate a no cook picnic that looks great and tastes even better.
You’ll learn what to grab at the market, how to assemble quick crowd-pleasing plates, and smart packing tips to keep everything chilled and spill-free. Follow these steps and you’ll have a relaxing picnic in no time.
What You'll Need (ingredients + tools for a no cook picnic)

Start with a simple shopping list focused on ready-to-eat items. Aim for variety: protein, produce, carbs, and a small sweet.
- Cheese: 200–300g total (mix a firm, a soft)
- Charcuterie: 150–200g or a vegetarian hummus + roasted pepper jar
- Fresh fruit: 1 bunch grapes, 4–6 stone fruits or a pint of berries
- Veggies: cherry tomatoes, sliced cucumbers, baby carrots
- Bread/crackers: one baguette or box of crackers
- Extras: olives, pickles, nuts, dark chocolate
- Drinks: sparkling water, lemonade, or a bottle of wine (if allowed)
Tools and packing:
- Insulated cooler or ice pack
- Reusable containers with tight lids
- Small cutting board and knife
- Reusable plates, cups, napkins, and utensils
Quick tip: pick items that travel well and don’t bruise easily. Pre-sliced cheeses and store-bought antipasti save time.
Quick Assembly Plan (how to put it together fast)
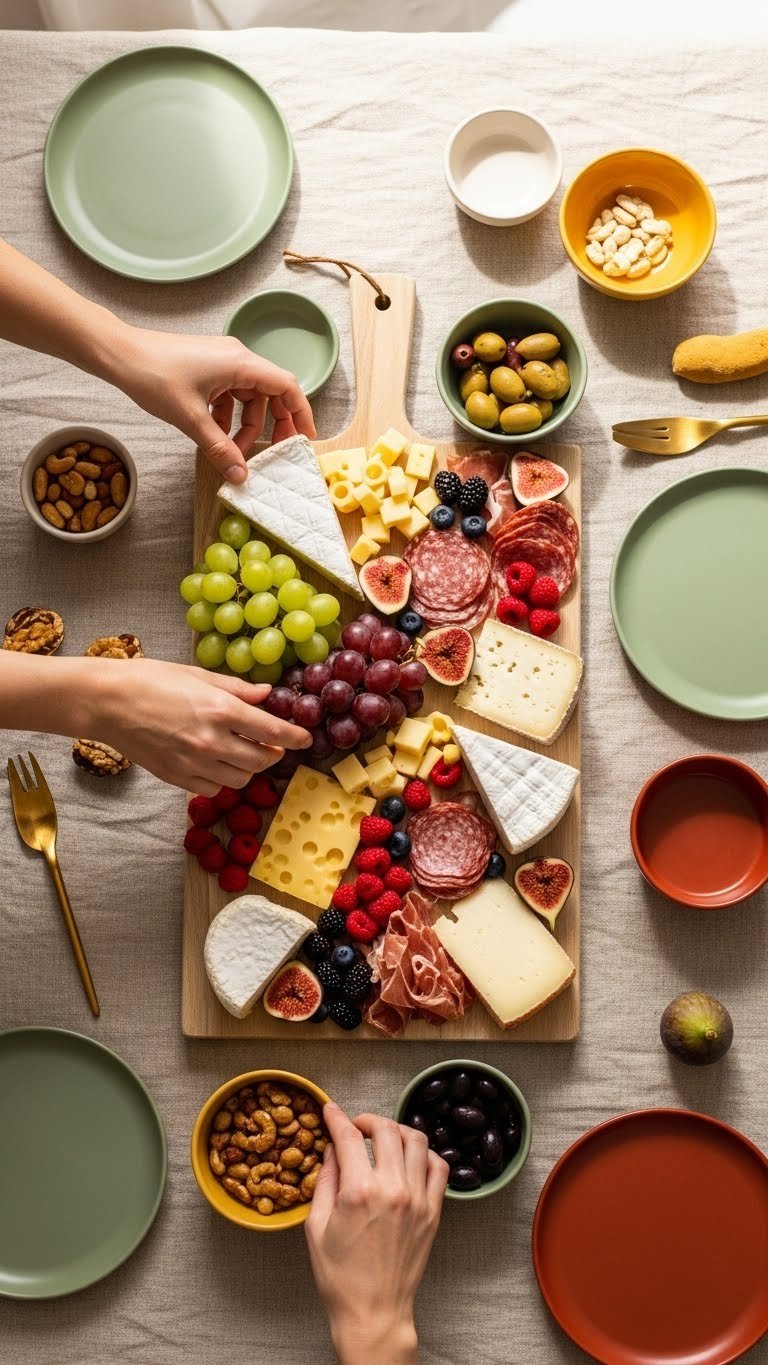
Assemble a balanced picnic in three simple stages: chill, slice, arrange. You can finish this in 15–20 minutes once ingredients are ready.
- Chill: Pack drinks and anything perishable with an ice pack. Keep dairy and cured meats below 40°F (4°C).
- Slice and portion: Cut cheeses and bread into bite-size pieces. Place dips in small containers and add serving spoons.
- Arrange: Build a grazing board quickly — place cheeses first, fill gaps with fruit, meats, and crackers. Add herbs for color.
Assembly tips:
- Use contrasting colors: green grapes next to terracotta crackers.
- Make one focal item (a wheel of brie or jar of hummus).
- Pack dressings separately to avoid soggy veggies.
Pack and Plate: No Cook Picnic Steps
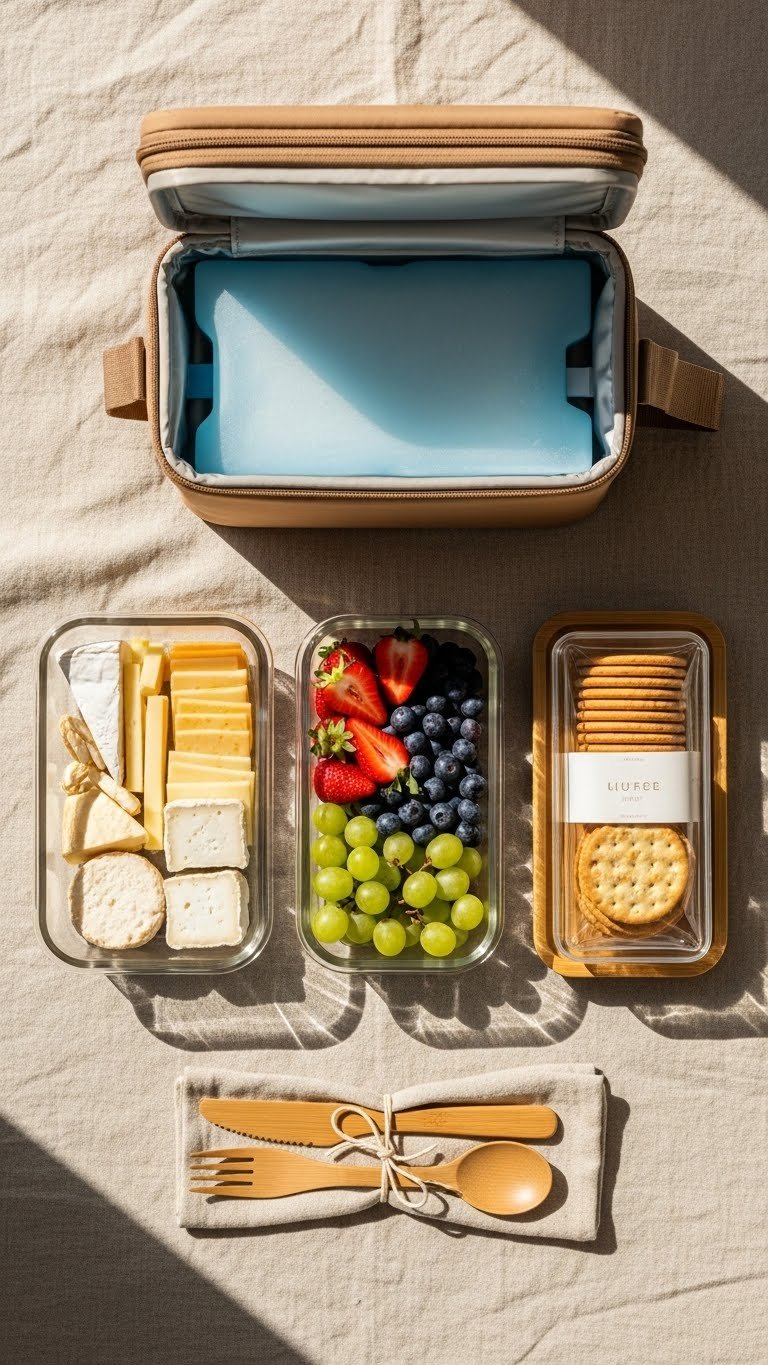
Packing smart keeps food fresh and your trip stress-free.
- Use stackable containers and keep heavy items at the bottom.
- Put fragile items (berries, soft cheeses) in the top layer.
- Use small jars for dressings and olive oil; screw caps prevent spills.
- Bring disposable or washable wet wipes and a small trash bag.
Step-by-step packing:
- Wrap bread in linen to avoid condensation.
- Place cold packs near cheeses and dips.
- Add reusable plates and cloth napkins on top so they stay dry.
Warning: don’t leave perishable items out more than 2 hours in warm weather; reduce to 1 hour if it’s over 90°F/32°C.
Serving, Storage, and Time-Saving Variations

When it’s time to eat, keep portions simple and picture-ready.
- Serve on a wooden board or directly on ceramic plates.
- Offer small plates and toothpicks for easy grazing.
- Store leftovers in the cooler with ice packs and refrigerate within 2 hours.
Fast variations:
- Vegetarian: hummus, roasted red peppers, marinated artichokes, and pita.
- Salad box: pre-washed greens, cherry tomatoes, canned beans, and dressing on the side.
- Kid-friendly: cheese cubes, sliced apples, seedless grapes, and mini sandwiches.
Pro tricks:
- Pre-slice fruit at home and add a squeeze of lemon to prevent browning.
- Use a mason jar layered salad for zero-mess servings.
You’re ready to relax and enjoy a no cook picnic that looks effortless and tastes wonderful. Pin this guide for your next quick outdoor meal, save it for later, and share with friends who could use a fast, beautiful picnic plan. Which quick plate will you make first? Ready to make this happen? Let's do it!