
You love picnics, but nothing ruins the mood like warm salads or soggy crackers. If you want to know how to pack a picnic basket that keeps everything fresh, this guide gives you a simple, follow-right-now plan. You’ll learn the exact tools, chilling tricks, and packing order that prevent soggy sandwiches and melted desserts.
Follow these highly visual, Pinterest-ready steps to pack smart, keep food cold, and serve a picture-perfect spread. By the end you'll have a cool basket and a happy crowd.
What You'll Need: Picnic packing tips and tools
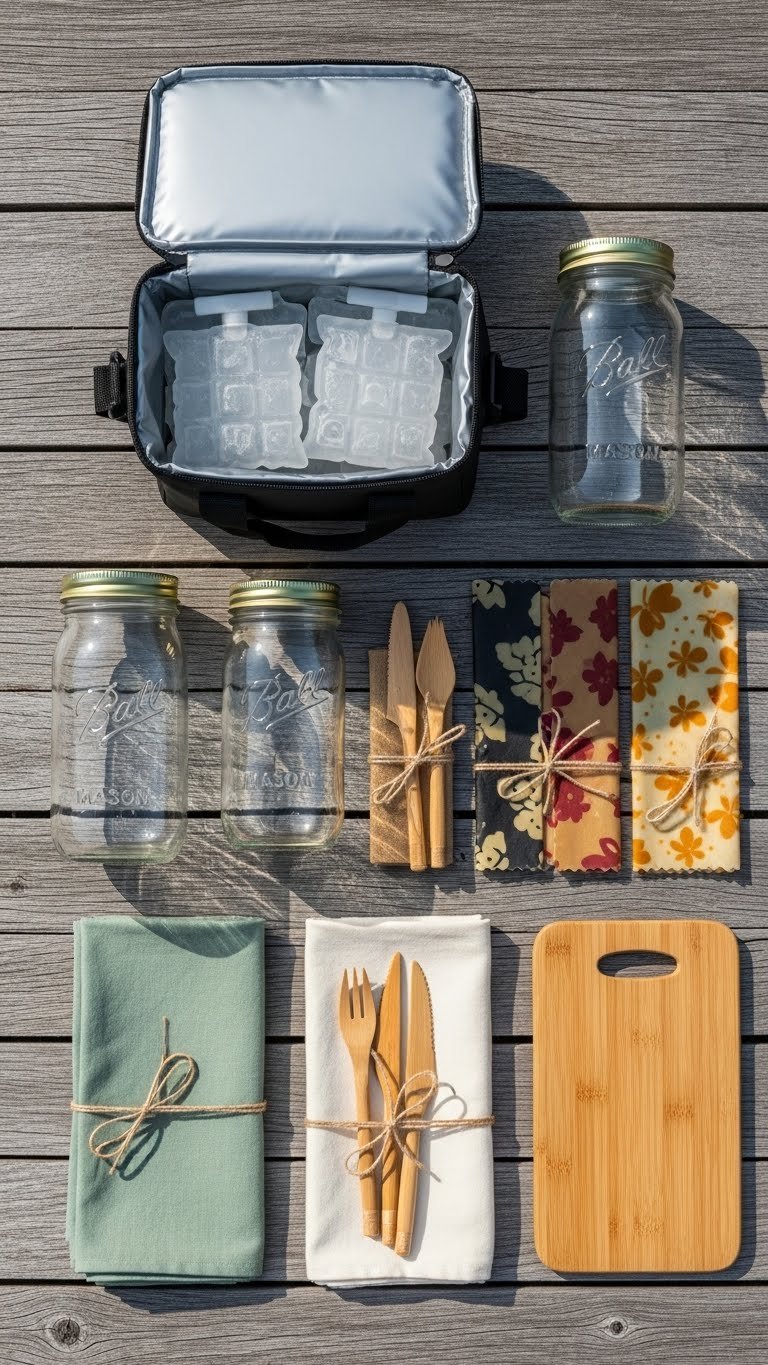
Gather everything before you start. Having the right gear saves time and keeps food fresher longer.
- Insulated cooler bag or a small soft cooler (one per 4 people)
- Frozen gel packs (2–4 depending on basket size)
- Glass jars with tight lids for salads and dips
- Airtight containers for sandwiches and fruit
- Beeswax wraps or silicone lids for soft cheeses
- Reusable water bottles frozen overnight (act as ice)
- Linen napkins and a thin towel to insulate and cushion
Tip: Freeze water bottles overnight to double as ice packs and chilled drinks. Aim for 2–4 hours of prep time before leaving.
Prep and Chill: Keep picnic food cold
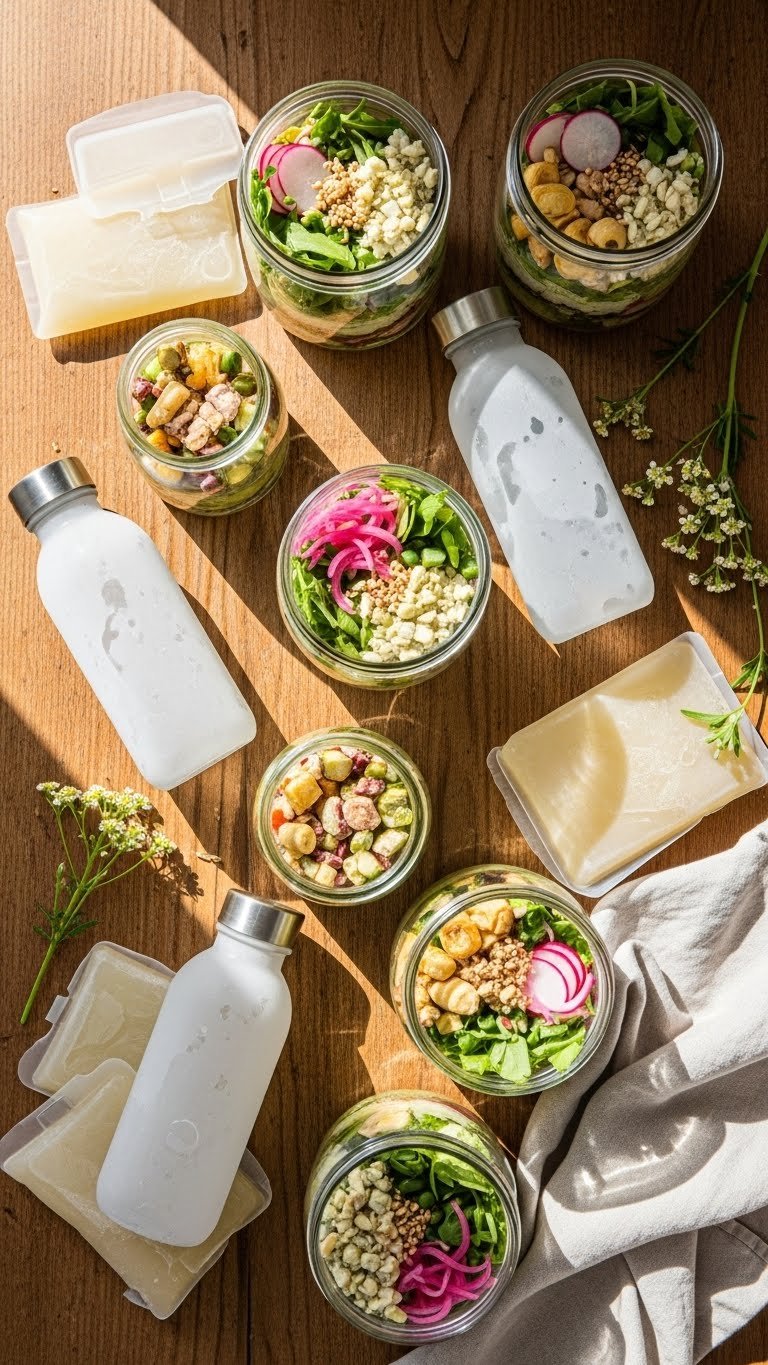
Cold starts with prep. How to pack a picnic basket that keeps everything fresh begins in your kitchen.
- Chill containers: Place empty jars and containers in the fridge 30 minutes before packing.
- Pre-chill foods: Cool cooked items on a rack, then refrigerate until cold — 2–4 hours.
- Use layered cooling:
- Bottom of the cooler: frozen gel packs.
- Middle: rigid containers with salads or dairy.
- Top: frozen water bottles that double as drinks.
Warning: Perishable foods should not sit at room temperature for over 2 hours (or 1 hour above 90°F). Keep the basket in shade during transit.
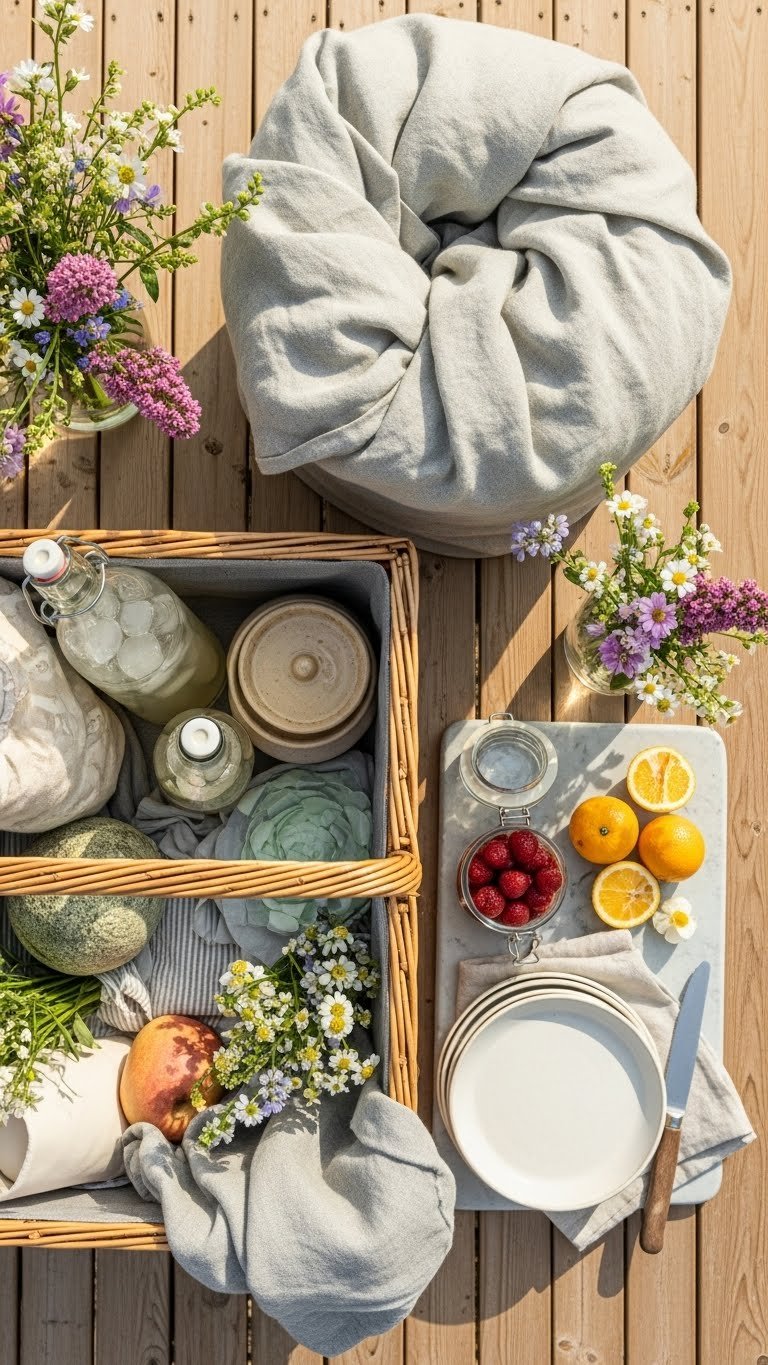
Pack Smart: Layering, arrangement, and spacing

How to pack a picnic basket that keeps everything fresh is mostly about order and spacing.
- Place heavy, cold items at the bottom on top of gel packs.
- Put fragile items (cheese, pastries) in the center, cushioned by linen.
- Keep dry goods (crackers, cookies) in airtight containers on top.
- Store condiments separately in small jars to avoid sogginess.
Numbered packing steps:
- Lay gel packs across the base.
- Add rigid containers of cold items.
- Nestle frozen water bottles beside containers.
- Top with dry items and a rolled towel to fill gaps.
Pro trick: Use beeswax wraps around bread to keep crust crisp and place a paper towel under wet fruit to absorb moisture.
Transport and Serving: Keep freshness on the move
Transport and serve thoughtfully to maintain freshness.
- Keep the basket upright and shaded while driving.
- Use a cooler bag inside your picnic tote for long trips.
- Serve cold dishes first; replenish gel packs by swapping out frozen bottles when they thaw.
- For hot days, bring extra gel packs and a small insulated box for dairy.
Make-ahead and storage:
- Assemble salads and dress right before serving, or keep dressing in a separate jar.
- Most chilled dishes stay safe for up to 2 hours in heat; plan accordingly.
- Leftovers go into refrigerated containers within 2 hours of serving.
Common mistake to avoid: packing warm food straight from the stove. Let items cool in the fridge first.
You can create a beautiful, fresh-feeling picnic with a little planning and the right pack order. Pin this guide for your next garden picnic and try the frozen bottle trick—it's a small step that makes a big difference. Which tip will you try first? Save this for later and share with friends who love outdoor meals!