
Picture this: you’ve packed a picnic but you don’t want sticky fingers or soggy napkins. You want portable picnic finger foods that never make messes — snacks you can eat with one hand while you sip, laugh, or chase the kids. These bites stay neat, travel well, and still taste great.
This list gives you 14 portable picnic finger foods that never make messes. Each recipe includes exact ingredients, clear instructions, and serving tips so you can plan a no-fuss picnic. You’ll find savory and sweet options, vegetarian picks, and protein-packed snacks.
Grab your cooler and a picnic blanket. You’ll discover easy-to-make skewers, roll-ups, mini quiches, and more. Each recipe is built for one-bite enjoyment, tidy eating, and bright flavors that hold up outdoors.
1. Mini Turkey, Fig & Arugula Roll-Ups — easy picnic snacks

These roll-ups are tidy and elegant. Sweet fig jam meets tangy goat cheese and peppery arugula. Thin turkey slices hold everything in a neat bite. They’re perfect for a classy picnic or a quick office lunch. You’ll love the contrast of creamy, sweet, and peppery flavors. Expect soft, silky turkey, a hint of fig, and a fresh herb aroma.
Ingredients
- Prep time: 15 minutes
- Cook time: 0 minutes
- Total time: 15 minutes
- 12 thin slices deli turkey (about 8 oz)
- 4 oz soft goat cheese, room temperature
- 4 tbsp fig jam
- 2 cups arugula, washed and dried
- 1 small lemon, zested
- 1 tbsp honey
- 1 tsp black pepper, freshly ground
- 1 tbsp chopped fresh thyme
- 24 small wooden toothpicks
- 1/4 cup toasted walnuts, chopped (optional)
- Flaky sea salt, for finishing
Instructions
- Lay a slice of turkey flat on a board. Spread 1 tsp goat cheese down the center.
- Add 1/2 tsp fig jam on top of the cheese.
- Place 1 small leaf of arugula and a pinch of lemon zest at one end.
- Sprinkle a few chopped walnuts and a tiny pinch of thyme.
- Roll the turkey tightly around the fillings. Secure with a toothpick.
- Repeat with remaining slices until you have 12 roll-ups.
- Arrange on a platter and sprinkle with flaky sea salt and black pepper.
- Chill for 10–15 minutes for flavors to meld. No cooking required.
- Pack in a shallow airtight container with a paper towel to absorb moisture.
- Serve cold or at room temperature. Check for firmness before packing.
How to Serve It
Serve on a wooden board or in small paper cups for easy picking. Garnish with extra thyme sprigs and lemon slices. Pair with a crisp white wine or iced tea. Store covered in the fridge up to 24 hours. Make ahead up to 8 hours and keep chilled. These are perfect for spring picnics and bridal showers.
2. Caprese Skewers with Balsamic Glaze — no-mess picnic bites
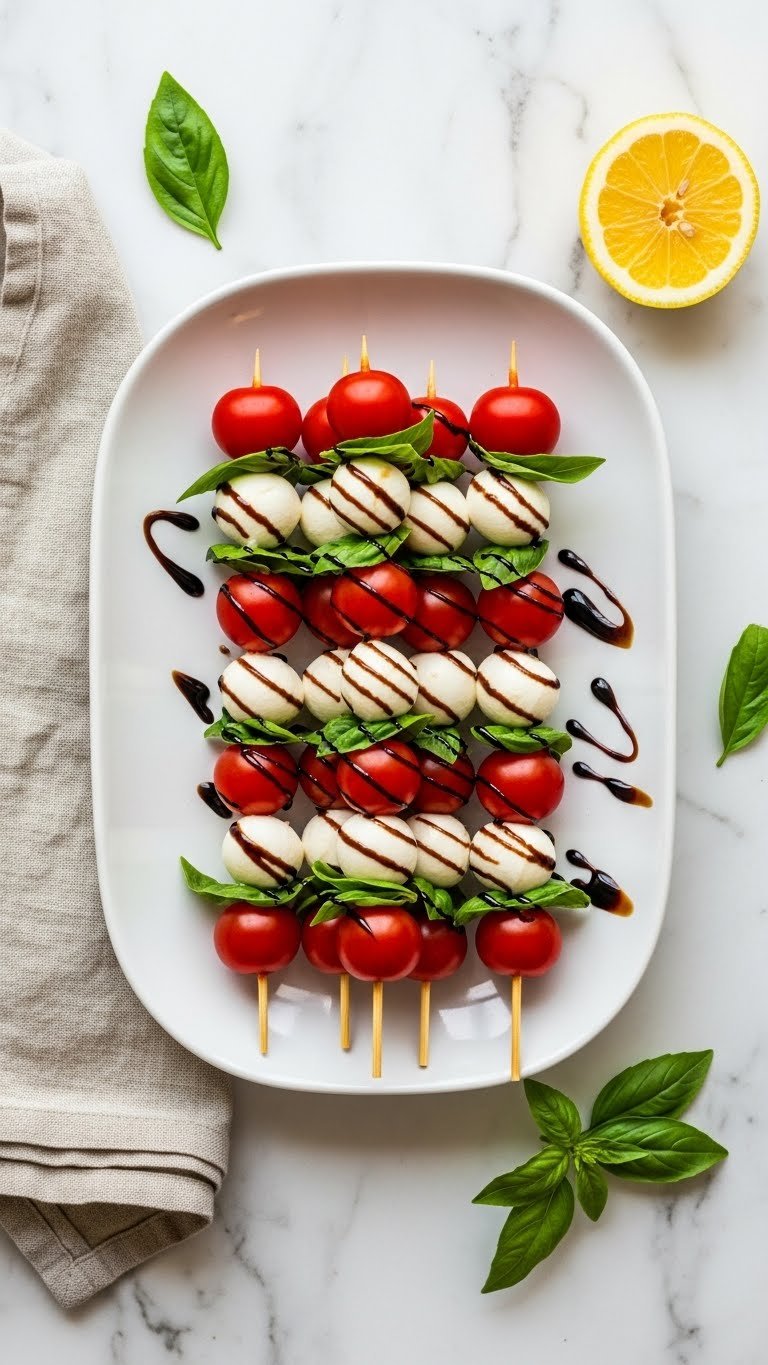
These Caprese skewers taste like summer in one bite. Juicy cherry tomato, creamy mozzarella, and bright basil make a classic combo. A light balsamic glaze adds sweet acidity without dripping. They’re neat, handheld, and great for warm days. Expect fresh tomato burst, milky cheese, and fragrant basil.
Ingredients
- Prep time: 15 minutes
- Cook time: 0 minutes
- Total time: 15 minutes
- 24 cherry tomatoes
- 24 mini mozzarella balls (bocconcini), drained
- 24 fresh basil leaves, medium size
- 24 short bamboo skewers
- 1/3 cup balsamic vinegar
- 1 tbsp brown sugar
- 2 tbsp extra-virgin olive oil
- 1/2 tsp sea salt
- 1/4 tsp black pepper
- Zest of 1 lemon (optional)
Instructions
- For glaze, pour balsamic vinegar and brown sugar into a small saucepan.
- Simmer over medium-low heat until reduced by half and syrupy, about 8–10 minutes.
- Remove glaze from heat and let cool to room temperature.
- On each skewer, thread a cherry tomato, a basil leaf (folded), then a mozzarella ball.
- Repeat until all skewers are assembled.
- Drizzle lightly with olive oil and lemon zest.
- Season with sea salt and black pepper.
- Add a small brush of balsamic glaze on top of each skewer, not too much to avoid dripping.
- Chill for 10 minutes before packing to set glaze.
- Pack flat in a shallow container with parchment between layers.
How to Serve It
Lay skewers on a platter with extra glaze on the side for guests. Garnish with basil sprigs and lemon wedges. Pair with chilled rosé or sparkling water. Store in the fridge for up to 24 hours. Make ahead the day of and add glaze just before serving. Great for summer picnic spreads and potlucks.
3. Smoked Salmon Cucumber Rounds — Portable Picnic Finger Foods That Never Make Messes

These cucumber rounds are cool and clean. Crisp cucumber holds a smear of lemony cream cheese and a silky smoked salmon rosette. They’re small, fragrant, and mess-free. You’ll notice bright citrus, smoky fish, and a fresh dill aroma. Perfect for elegant, portable picnic finger foods that never make messes.
Ingredients
- Prep time: 15 minutes
- Cook time: 0 minutes
- Total time: 15 minutes
- 2 large English cucumbers
- 8 oz smoked salmon, thinly sliced
- 4 oz cream cheese, room temperature
- 2 tbsp sour cream
- 1 tbsp lemon juice
- 1 tsp lemon zest
- 2 tbsp chopped fresh dill
- 2 tbsp capers, rinsed and drained
- 1/4 tsp black pepper
- 1/2 tsp sea salt
- 24 mini dill sprigs, for garnish
- 24 toothpicks (optional)
Instructions
- Slice cucumbers into 1/4-inch rounds. Pat dry with paper towel.
- In a bowl, beat cream cheese, sour cream, lemon juice, and lemon zest until smooth.
- Stir in chopped dill, salt, and black pepper.
- Spread about 1 tsp of cream cheese mix on each cucumber round.
- Cut smoked salmon into 24 strips. Roll each into a small rosette and place on cream cheese.
- Top each with a few capers and a dill sprig.
- If traveling, secure each with a toothpick through the center.
- Chill on a tray 15–20 minutes before packing.
- Pack in a single layer in an airtight container with absorbent paper.
- Serve cold; check for steady rosette hold before transport.
How to Serve It
Arrange on a white platter with lemon wedges and extra dill. Pair with chilled white wine or sparkling water with cucumber slices. Store covered in the fridge up to 24 hours. Make ahead and assemble same day for best texture. These are classy bites for seaside or garden picnics.
4. Mini Spinach & Feta Filo Cups — easy picnic appetizers

These filo cups are crisp, flaky, and perfectly portable. Spinach and tangy feta create a savory filling that stays inside the crunchy shell. They’re bite-sized and easy to pop in your mouth. Expect buttery filo, salty cheese, and a bright herb finish. Ideal for picnics where you want warm flavors without mess.
Ingredients
- Prep time: 20 minutes
- Cook time: 20 minutes
- Total time: 40 minutes
- 24 mini filo pastry shells (store-bought)
- 8 oz frozen chopped spinach, thawed and squeezed dry
- 4 oz feta cheese, crumbled
- 1/3 cup ricotta cheese
- 1 large egg, room temperature
- 2 tbsp grated Parmesan
- 1 small shallot, finely chopped
- 1 garlic clove, minced
- 1 tbsp olive oil
- 1 tbsp chopped fresh dill
- 1/4 tsp nutmeg
- Salt and black pepper, to taste
Instructions
- Preheat oven to 375°F (190°C). Line a baking sheet with parchment.
- Heat olive oil in a skillet over medium heat.
- Sauté shallot and garlic until softened, about 2 minutes.
- Add drained spinach, toss 1–2 minutes, remove from heat.
- In a bowl, mix spinach, feta, ricotta, Parmesan, egg, dill, nutmeg, salt, and pepper.
- Spoon about 1 tbsp filling into each filo shell.
- Arrange shells on the baking sheet and bake 18–20 minutes until golden and set.
- Check for golden edges and no runny center.
- Cool 10 minutes before transferring to a container.
- Store at room temperature up to 2 hours or refrigerated up to 24 hours.
How to Serve It
Serve warm or at room temperature on a slate board. Garnish with extra dill and lemon wedges. Pair with a crisp white wine or lemonade. Make ahead and reheat briefly in a low oven. Pack in a shallow container with parchment between layers. Great for spring and summer picnics.
5. Greek Olive, Feta & Pepper Skewers — no-drip picnic bites
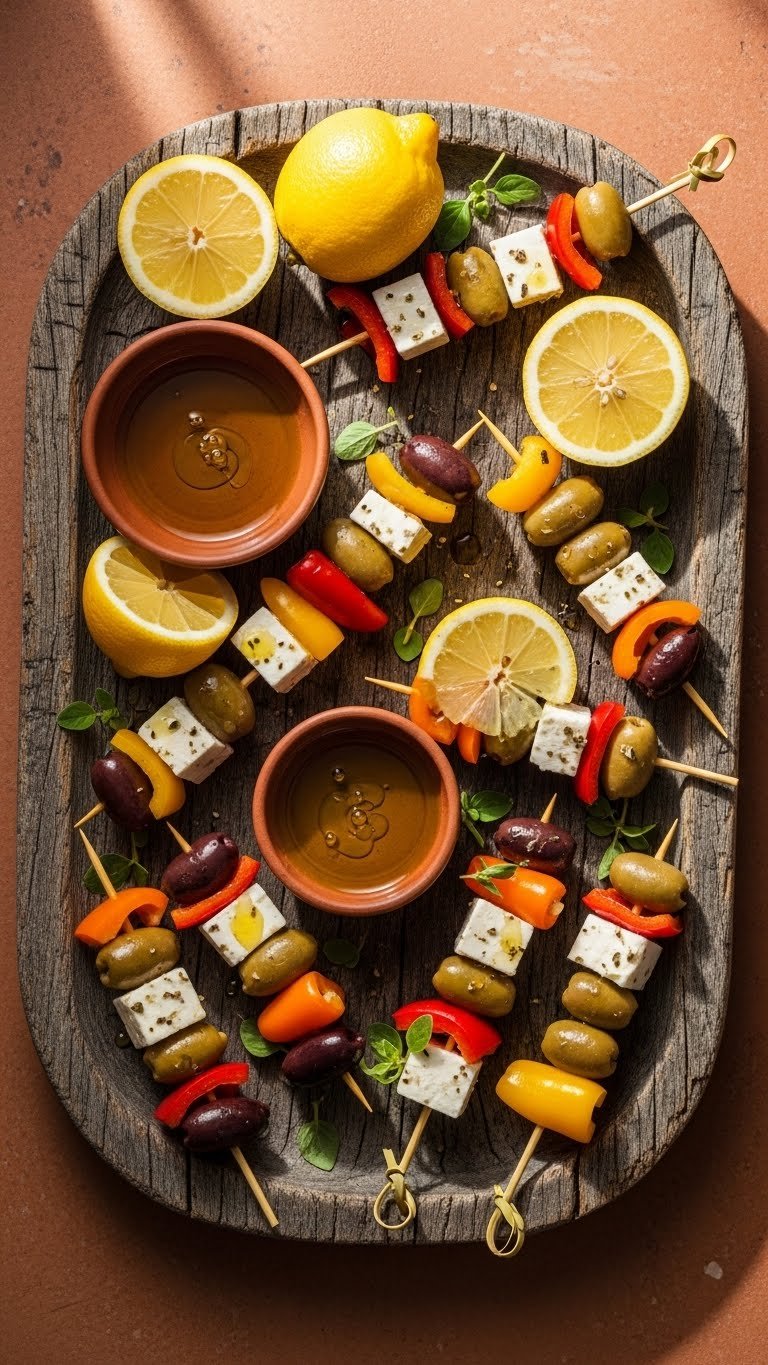
These skewers give you Greek flavors without the mess. Salty olives, creamy feta, and crunchy pepper are threaded for easy eating. The bites are tangy, herb-scented, and totally picnic-ready. You’ll taste briny olives, creamy cheese, and crisp pepper crunch. Built for no-drip enjoyment.
Ingredients
- Prep time: 15 minutes
- Cook time: 0 minutes
- Total time: 15 minutes
- 24 Kalamata olives, pitted
- 12 mini sweet peppers, halved and seeded
- 8 oz block feta, cut into 24 1/2-inch cubes
- 24 short bamboo skewers
- 2 tbsp extra-virgin olive oil
- 1 tbsp red wine vinegar
- 1 tsp dried oregano
- 1/4 tsp cracked black pepper
- 1/2 tsp lemon zest
- 1 tbsp chopped fresh parsley
- 1 tbsp capers (optional)
Instructions
- In a bowl, whisk olive oil, red wine vinegar, oregano, lemon zest, and pepper.
- Toss feta cubes gently with 1 tsp dressing to coat.
- Thread one olive, one feta cube, and one pepper half on each skewer.
- Repeat until all skewers are assembled.
- Drizzle the remaining dressing lightly over skewers.
- Sprinkle chopped parsley and capers if using.
- Chill 10–15 minutes before packing.
- Pack flat in an airtight container with parchment.
- Serve cold; check skewers for steady feta before transport.
- Discard any skewers with broken feta edges.
How to Serve It
Arrange on a ceramic plate with lemon wedges. Garnish with oregano sprigs. Pair with sparkling water or Greek wine. Store in the fridge up to 24 hours. Make ahead and add dressing just before serving to keep cheese firm. Great for Mediterranean-themed picnics.
6. Honey-Cinnamon Apple & Cheddar Bites — sweet no-mess snacks
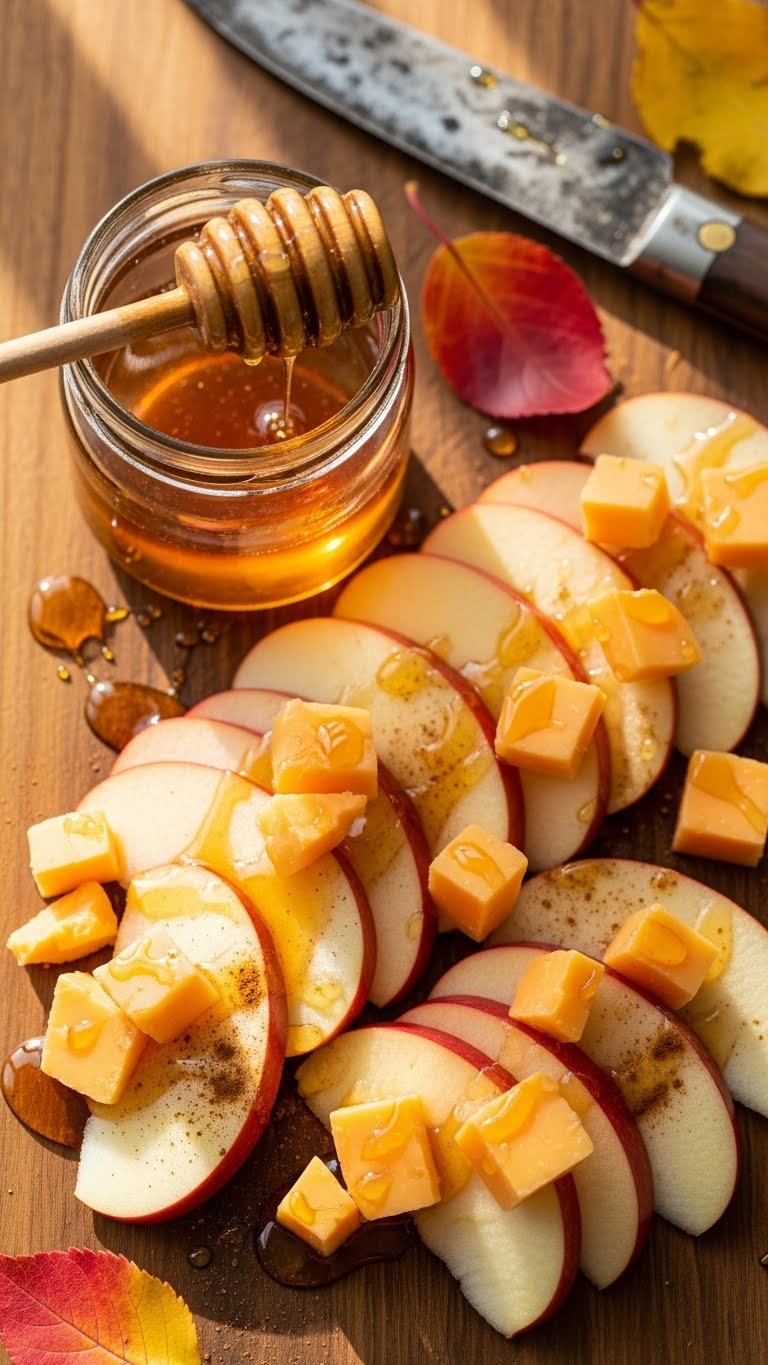
These apple and cheddar bites are sweet, sharp, and tidy. Crisp apple slices hold a small cube of cheddar and a touch of honey and cinnamon. They’re hand-held, crunchy, and satisfying. Expect juicy apple snap, sharp cheese bite, and warm cinnamon aroma. Perfect for autumn picnics or healthy snack lovers.
Ingredients
- Prep time: 10 minutes
- Cook time: 0 minutes
- Total time: 10 minutes
- 2 large firm apples (Honeycrisp or Pink Lady)
- 8 oz sharp cheddar, cut into 24 small cubes
- 2 tbsp honey
- 1/2 tsp ground cinnamon
- 1 tbsp lemon juice
- 1 tbsp chopped toasted pecans (optional)
- 1 tbsp chopped fresh parsley (optional)
- 24 toothpicks
- Pinch sea salt
Instructions
- Core apples and slice into 24 even rounds about 1/4-inch thick.
- Toss apple slices with lemon juice to prevent browning.
- Place 1 cheddar cube on each apple round.
- Drizzle with 1/4 tsp honey per bite.
- Sprinkle a tiny pinch of cinnamon and sea salt.
- Add chopped pecans or parsley for texture if desired.
- Secure with toothpicks for easy eating.
- Chill 10 minutes if preferred before packing.
- Pack in a single layer in an airtight container with paper towel.
- Serve chilled or room temperature within 6 hours for best texture.
How to Serve It
Arrange on a wooden board with extra honey and cinnamon. Pair with hard cider or iced tea. Store in the fridge up to 6 hours to prevent browning. Make ahead and assemble just before leaving. Ideal for fall picnics and family outings.
7. Mini Egg Muffins with Ham & Chives — Portable Picnic Finger Foods That Never Make Messes

Mini egg muffins are portable and filling. Whisked eggs bake with diced ham, cheese, and chives into neat handheld bites. They’re fluffy, savory, and travel well. Expect light, tender eggs with pockets of melted cheese and a mild oniony chive scent. These are solid options for protein-rich portable picnic finger foods that never make messes.
Ingredients
- Prep time: 10 minutes
- Cook time: 18 minutes
- Total time: 28 minutes
- 12 large eggs, room temperature
- 1/2 cup whole milk
- 1 cup diced ham (about 5 oz)
- 1 cup shredded cheddar cheese
- 1/4 cup chopped fresh chives
- 1/2 tsp salt
- 1/4 tsp black pepper
- 1/2 tsp garlic powder
- Nonstick spray
- 12-cup mini muffin tin
- Parchment paper or silicone liners (optional)
Instructions
- Preheat oven to 375°F (190°C). Spray mini muffin tin with nonstick spray.
- In a bowl, whisk eggs and milk until smooth.
- Stir in ham, cheddar, chives, salt, pepper, and garlic powder.
- Spoon the mixture evenly into 12 wells (about 3/4 full).
- Bake for 15–18 minutes until puffed and golden.
- Test doneness with a toothpick — it should come out clean.
- Let cool in pan 5 minutes, then transfer to a rack to cool 10 minutes.
- Press gently to release if stuck. Cool completely before packing.
- Store in an airtight container in the fridge up to 3 days.
- Reheat gently in a microwave or low oven before serving if you like warm.
How to Serve It
Serve on a platter with extra chopped chives and pickles on the side. Pair with lemonade or cold brew coffee. Pack in layers separated by parchment for transport. Make ahead and refrigerate up to 3 days, or freeze for up to 2 months and thaw before packing. Great for picnic breakfasts or brunch outdoors.
8. Prosciutto-Wrapped Melon Bites — summer no-mess picnic snacks
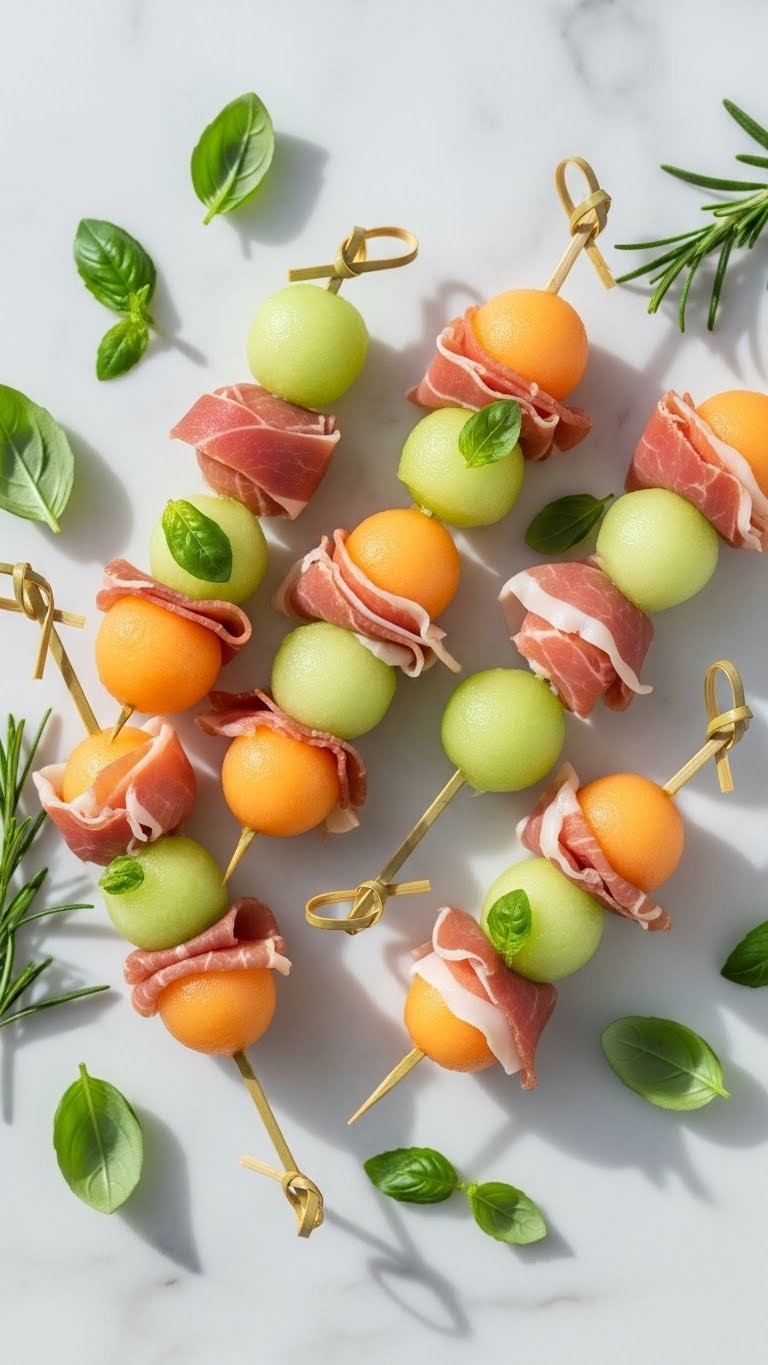
Sweet melon and salty prosciutto make a classic combo. Each bite is wrapped for neat eating. They’re juicy, savory, and refreshingly light. Expect sweet melon flesh softened with a silky layer of prosciutto. Great for hot days and poolside picnics.
Ingredients
- Prep time: 15 minutes
- Cook time: 0 minutes
- Total time: 15 minutes
- 1 small cantaloupe
- 1 small honeydew melon
- 8 oz thinly sliced prosciutto
- 24 small wooden picks
- 2 tbsp fresh mint, chopped
- 1 tbsp lime juice
- 1 tsp honey
- Freshly cracked black pepper, to taste
- 1 tbsp toasted pistachios, chopped (optional)
- Flaky sea salt, for finishing
Instructions
- Cut melons in half and remove seeds. Use a melon baller to scoop 24 balls.
- Place melon balls on a tray and chill 10 minutes.
- Lay out prosciutto slices and cut into 24 narrow strips.
- Wrap each melon ball with one prosciutto strip and secure with a pick.
- Whisk lime juice and honey, drizzle lightly over wrapped bites.
- Sprinkle chopped mint and toasted pistachios if using.
- Finish with a light crack of black pepper and a pinch of sea salt.
- Chill 10–15 minutes to let flavors marry.
- Pack in a single layer in a shallow container with paper towel.
- Serve cold; consume within 6 hours for best texture.
How to Serve It
Arrange on a white platter with mint sprigs and lime wedges. Pair with Prosecco or chilled white wine. Store chilled up to 6 hours. Make ahead quickly at the picnic site to keep prosciutto crisp. Perfect for summer gatherings and tastings.
9. Chicken Caesar Salad Cups — tidy handheld picnic bites
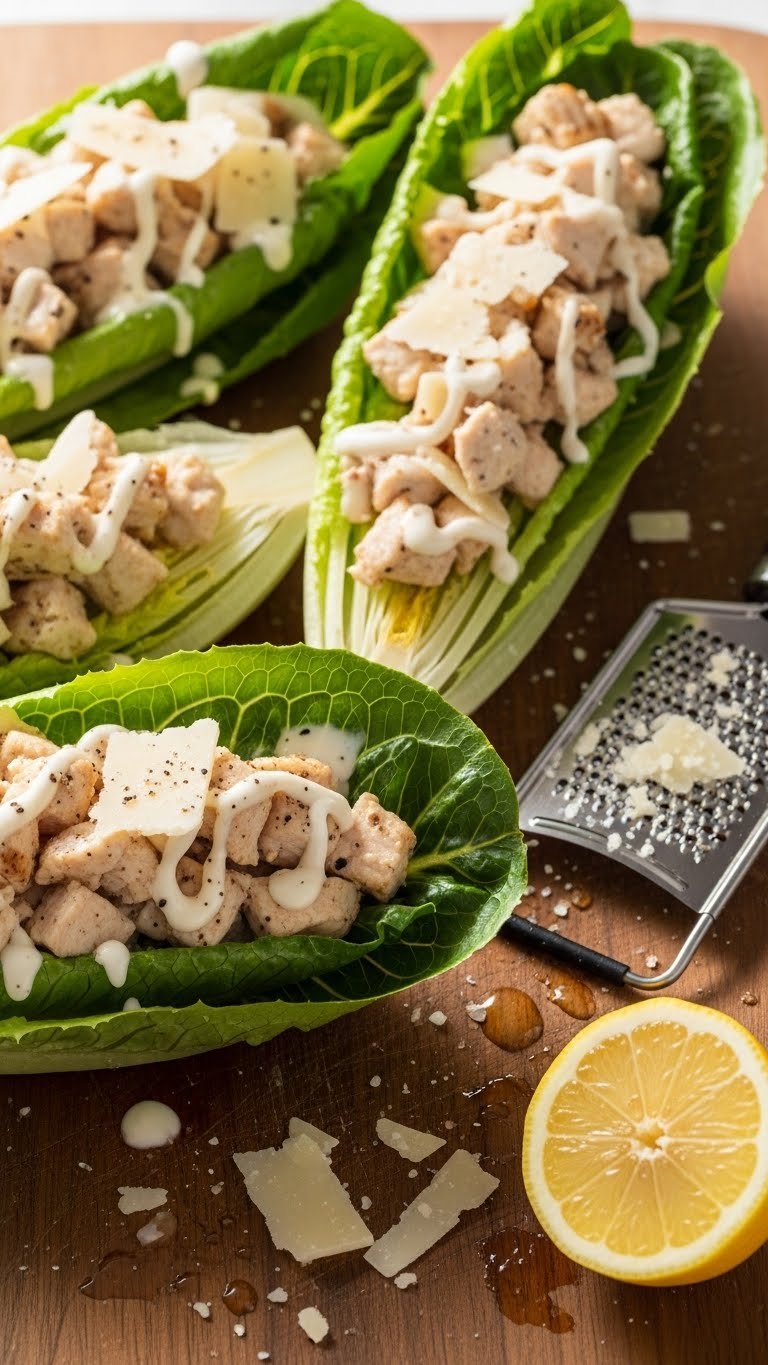
These Caesar salad cups turn a classic into a neat handheld snack. Crisp romaine leaves cradle chopped chicken, shaved Parmesan, and a light Caesar dressing. They’re crunchy, savory, and easy to eat. Expect crisp lettuce, tangy dressing, and savory chicken aroma. Ideal for light lunches on a blanket.
Ingredients
- Prep time: 15 minutes
- Cook time: 10 minutes (if cooking chicken)
- Total time: 25 minutes
- 2 cups cooked chicken, finely chopped (about 8 oz)
- 12 large romaine leaves, washed and dried
- 1/3 cup mayonnaise
- 2 tbsp grated Parmesan
- 1 tbsp lemon juice
- 1 tsp Dijon mustard
- 1 garlic clove, minced
- 1/4 tsp Worcestershire sauce
- 1/4 tsp black pepper
- 1/4 cup shredded Parmesan, for garnish
- 2 tbsp chopped fresh parsley
Instructions
- If cooking chicken, season and pan-sear a breast 6–8 minutes per side or use rotisserie chicken. Cool and chop.
- In a bowl, whisk mayonnaise, lemon juice, Dijon, garlic, Worcestershire, Parmesan, and pepper to make dressing.
- Toss chopped chicken with dressing until well coated.
- Spoon 1–2 tbsp chicken mixture into each romaine leaf cup.
- Top with shredded Parmesan and parsley.
- Gently press each cup to compact fillings slightly.
- Chill 10 minutes before packing.
- Pack flat in a shallow container, leaving space to avoid crushing leaves.
- Serve cold; check leaves for crispness before packing.
- Consume within 6 hours for best crunch.
How to Serve It
Serve on a bamboo board with lemon wedges. Pair with iced tea or light beer. Store in the fridge up to 6 hours; keep dressing separate if packing long-term. Make ahead but assemble at the picnic site if you want extra crunch. Great for sunny lunch outings.
10. Sesame Tofu Bites on Skewers — vegetarian no-mess picnic snacks
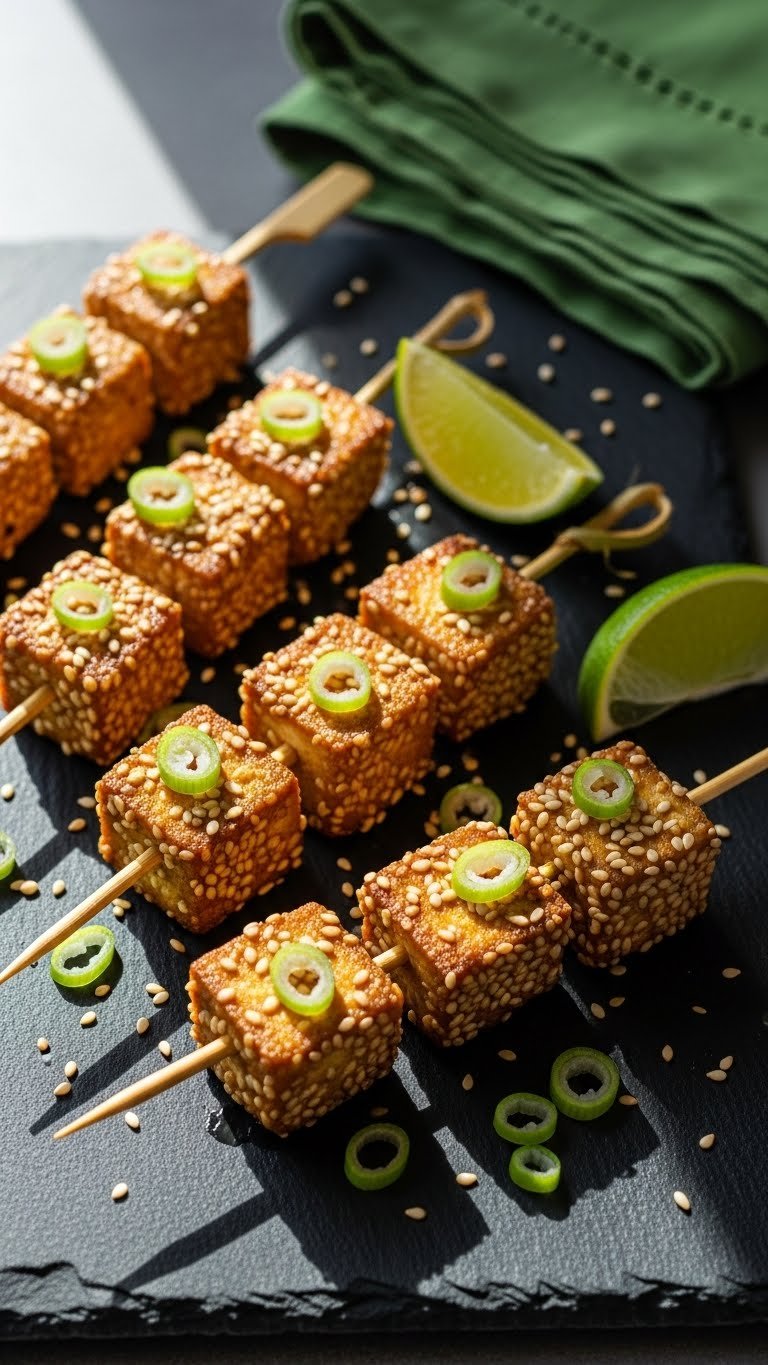
These sesame tofu bites are crisp, savory, and neat to eat. Marinated tofu cubes bake until golden and threaded on skewers for one-bite ease. You’ll taste savory soy, toasty sesame, and slight lime brightness. They travel well and make a hearty vegetarian picnic option.
Ingredients
- Prep time: 20 minutes
- Cook time: 25 minutes
- Total time: 45 minutes
- 14 oz firm tofu, pressed and cut into 24 cubes
- 2 tbsp soy sauce
- 1 tbsp sesame oil
- 1 tbsp honey or maple syrup
- 1 tsp rice vinegar
- 1 garlic clove, minced
- 1 tsp grated ginger
- 2 tbsp sesame seeds
- 2 tbsp cornstarch
- 24 short skewers
- 2 tbsp sliced scallions, for garnish
- Lime wedges, for serving
Instructions
- Preheat oven to 425°F (220°C). Line a baking sheet with parchment.
- Toss tofu cubes with cornstarch to coat evenly.
- In a bowl, combine soy sauce, sesame oil, honey, rice vinegar, garlic, and ginger.
- Toss tofu in the marinade and let sit 10 minutes.
- Arrange tofu on the baking sheet and sprinkle with sesame seeds.
- Bake 20–25 minutes, turning once, until edges are golden and crisp.
- Thread 2 tofu cubes per skewer, or 3 for smaller bites.
- Cool 10 minutes before packing.
- Garnish with scallions and serve with lime wedges.
- Store refrigerated up to 24 hours.
How to Serve It
Serve on a platter with extra sesame seeds and lime wedges. Pair with cold jasmine tea or a light lager. Pack in an airtight container with parchment. Make ahead and reheat briefly if you prefer warm. These are hearty vegetarian bites for park picnics.
11. Prosciutto & Mozzarella Twist — Portable Picnic Finger Foods That Never Make Messes

This prosciutto and mozzarella twist is simple and neat. Strips of prosciutto wrapped around stringy mozzarella are twisted and secured for easy handling. They’re salty, creamy, and fragrant with basil. Expect silky cheese, dry-cured ham bite, and a peppery finish. A perfect addition to portable picnic finger foods that never make messes.
Ingredients
- Prep time: 10 minutes
- Cook time: 0 minutes
- Total time: 10 minutes
- 8 oz fresh mozzarella, cut into 24 thin sticks
- 8 oz thinly sliced prosciutto, cut into 24 strips
- 24 small basil leaves
- 12 short skewers
- 2 tbsp extra-virgin olive oil
- 1 tsp lemon zest
- 1/4 tsp cracked black pepper
- Flaky sea salt, to taste
- 1 tbsp balsamic reduction (optional)
- Microgreens, for garnish
Instructions
- Cut mozzarella into 24 thin sticks about 1/2-inch wide.
- Lay a prosciutto strip flat; place a basil leaf and a mozzarella stick at one end.
- Roll prosciutto tightly around the cheese and twist once.
- Secure with a short skewer through the center.
- Repeat until all twists are assembled.
- Drizzle lightly with olive oil and lemon zest.
- Sprinkle with cracked pepper and a pinch of flaky sea salt.
- If using, brush a tiny balsamic reduction dot on each for sweetness.
- Chill 10 minutes before packing.
- Pack in a single layer with parchment and serve chilled.
How to Serve It
Arrange on a rustic wooden board with microgreens. Pair with sparkling water or light red wine. Store refrigerated up to 24 hours. Make ahead and assemble before leaving to keep mozzarella firm. Great for alfresco dinners and vineyard picnics.
12. Sun-Dried Tomato & Pesto Pinwheels — neat handheld picnic bites

These pinwheels are colorful, soft, and tidy. Tortilla wraps spread with pesto, layered with sun-dried tomatoes and cheese, then rolled and sliced into neat spirals. They’re flavorful and easy to eat without utensils. Expect herbaceous pesto, tangy tomato bites, and pillowy tortilla texture.
Ingredients
- Prep time: 20 minutes
- Cook time: 0 minutes
- Total time: 20 minutes
- 4 large flour tortillas
- 1/2 cup prepared basil pesto
- 1/2 cup sun-dried tomatoes in oil, drained and chopped
- 8 oz cream cheese, room temperature
- 1 cup shredded mozzarella
- 1/4 cup grated Parmesan
- 1/4 cup chopped roasted red peppers
- 2 tbsp chopped fresh basil
- Salt and black pepper, to taste
- Plastic wrap, for rolling
Instructions
- Lay a tortilla flat and spread 2 tbsp cream cheese evenly over the surface.
- Spoon 2 tbsp pesto on top and spread.
- Scatter chopped sun-dried tomatoes, roasted peppers, mozzarella, and Parmesan evenly.
- Add chopped basil, and season lightly with salt and pepper.
- Roll the tortilla tightly into a log.
- Wrap the log in plastic wrap and chill 15–20 minutes to firm.
- Unwrap and slice into 12 pinwheels per tortilla, about 1/2-inch thick.
- Repeat for all tortillas until you have about 48 pinwheels.
- Arrange pinwheels flat in a container with parchment between layers.
- Store refrigerated up to 24 hours.
How to Serve It
Place pinwheels on a pretty platter with extra pesto for dipping. Pair with a chilled white wine or sparkling water. Make ahead and slice just before leaving or chill fully for easier transport. Great for family picnics and kid-friendly snack plates.
13. Berry & Mascarpone Mini Tarts — sweet tidy picnic desserts

These mini tarts are small, neat, and sweet without sticky fingers. Crisp tart shells hold a mascarpone lemon filling and fresh berries. You’ll taste creamy citrus filling and bright berry juiciness. They’re portable desserts that finish a picnic on a fresh note.
Ingredients
- Prep time: 25 minutes
- Cook time: 12 minutes
- Total time: 37 minutes
- 24 mini tart shells, pre-baked
- 8 oz mascarpone cheese, room temperature
- 1/4 cup powdered sugar
- 1 tbsp lemon zest
- 2 tbsp lemon juice
- 1/2 tsp vanilla extract
- 1/2 cup heavy cream, whipped to soft peaks
- 1 cup mixed berries (blueberries, raspberries, sliced strawberries)
- 2 tbsp apricot jam, warmed (for glaze)
- Fresh mint leaves, for garnish
Instructions
- In a bowl, beat mascarpone, powdered sugar, lemon zest, lemon juice, and vanilla until smooth.
- Fold in whipped heavy cream gently until light and airy.
- Spoon about 1 tbsp filling into each tart shell.
- Top with a few mixed berries on each tart.
- Lightly brush berries with warmed apricot jam to add sheen without dripping.
- Chill 15–20 minutes to set filling.
- Garnish with a small mint leaf before serving.
- Pack in a shallow container with parchment and chill during transport.
- Serve chilled; consume within 6 hours to keep shells crisp.
- If shells soften, serve quickly or keep chilled until plated.
How to Serve It
Arrange on a dessert platter dusted with powdered sugar. Pair with chilled Moscato or iced coffee. Make ahead and assemble same day to keep shells crisp. Store refrigerated up to 6 hours. Lovely for summer or picnic dessert trays.
14. Oat & Peanut Butter Energy Balls — portable sweet protein bites
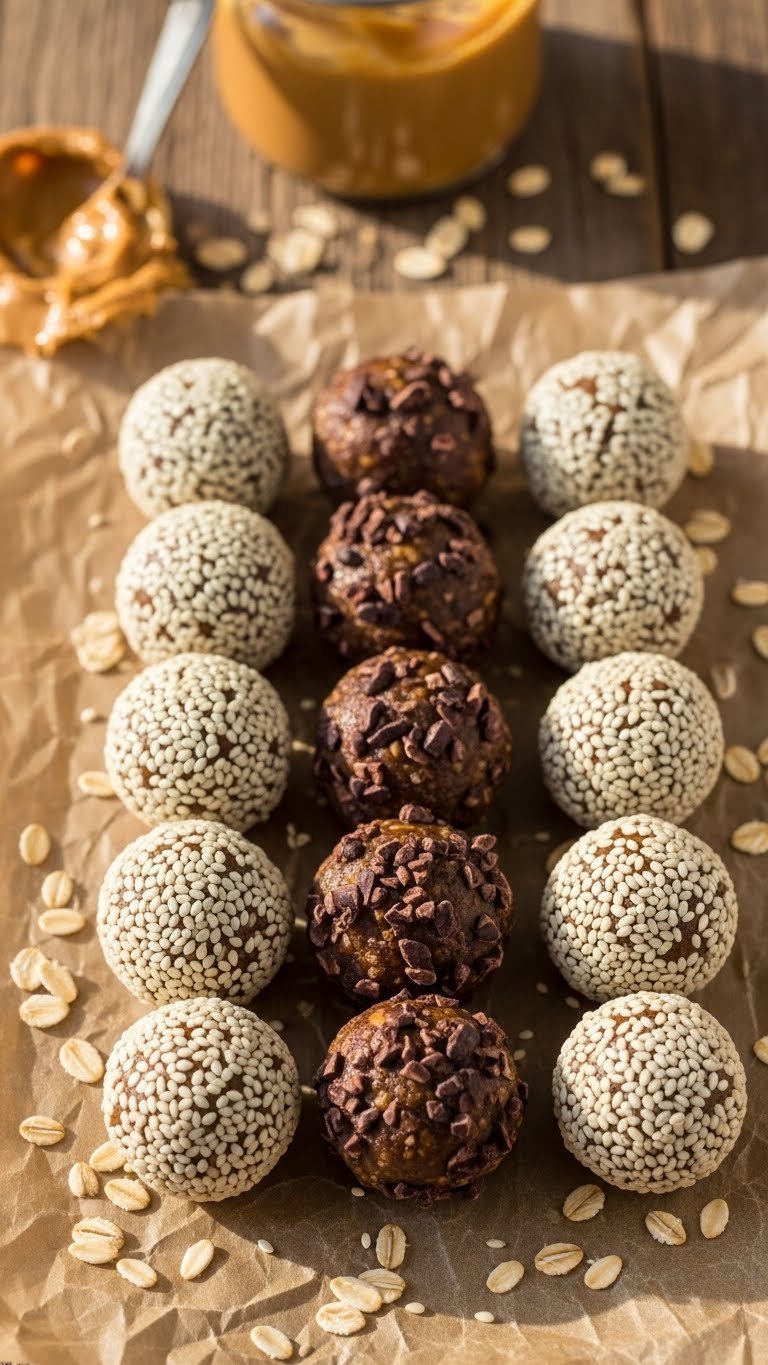
Energy balls are chewy, nutty, and completely mess-free. Rolled bites of oats, peanut butter, honey, and mix-ins give energy without crumbs. You’ll taste toasted oats, nutty peanut butter, and a hint of honey. They’re perfect for hiking or long picnics where you want a tidy snack.
Ingredients
- Prep time: 15 minutes
- Cook time: 0 minutes
- Total time: 15 minutes
- 1 1/2 cups old-fashioned oats
- 3/4 cup creamy peanut butter
- 1/3 cup honey
- 1/4 cup ground flaxseed
- 1/4 cup mini dark chocolate chips
- 2 tbsp chia seeds
- 1 tsp vanilla extract
- 1/4 tsp sea salt
- 2 tbsp sesame seeds or cocoa nibs, for rolling (optional)
- Zest of 1 orange, for brightness (optional)
Instructions
- In a bowl, stir oats, flaxseed, chia, and salt together.
- Add peanut butter, honey, vanilla, and orange zest if using.
- Mix until combined, then fold in chocolate chips.
- Chill mixture 10 minutes if too sticky to handle.
- Scoop 1 tbsp portions and roll into balls (about 24 balls).
- Roll balls in sesame seeds or cocoa nibs if desired.
- Place on a tray and chill 10 minutes to firm.
- Pack into airtight container with parchment between layers.
- Store refrigerated up to 2 weeks or freeze up to 3 months.
- Thaw briefly before serving.
How to Serve It
Arrange in a small jar or tin for easy grabbing. Pair with coffee or electrolyte drinks for hiking. Make a double batch and freeze for long trips. Perfect year-round, with citrus zest for summer and cinnamon for winter.
You’ve got 14 tidy, tasty choices for your next outdoor meal. From savory skewers to sweet mini tarts, these portable picnic finger foods that never make messes cover breakfasts, lunches, snacks, and desserts. Try a few recipes, mix sweet and savory, and pack a cooler with ice packs to keep everything crisp.
Save or pin this list to prepare ahead for your next park afternoon or beach day. Which recipe will you make first — a savory skewer or a sweet tart? Share these with friends or family, and enjoy cleaner, easier picnics together.