
You love hosting, but the thought of a dessert table that pleases every guest feels stressful. You want variety, pretty presentation, and an easy plan you can actually execute. This guide shows how to plan a dessert bar that satisfies every sweet tooth, with clear steps, quantities, and styling tips you can use today.
You’ll learn how to pick a menu, set up a balanced display, finish with pin-worthy styling, and save time with smart make-ahead moves. Read on and you’ll be ready to wow your guests without last-minute panic.
Dessert Bar Planning: Menu, quantities, and shopping (dessert bar planning)
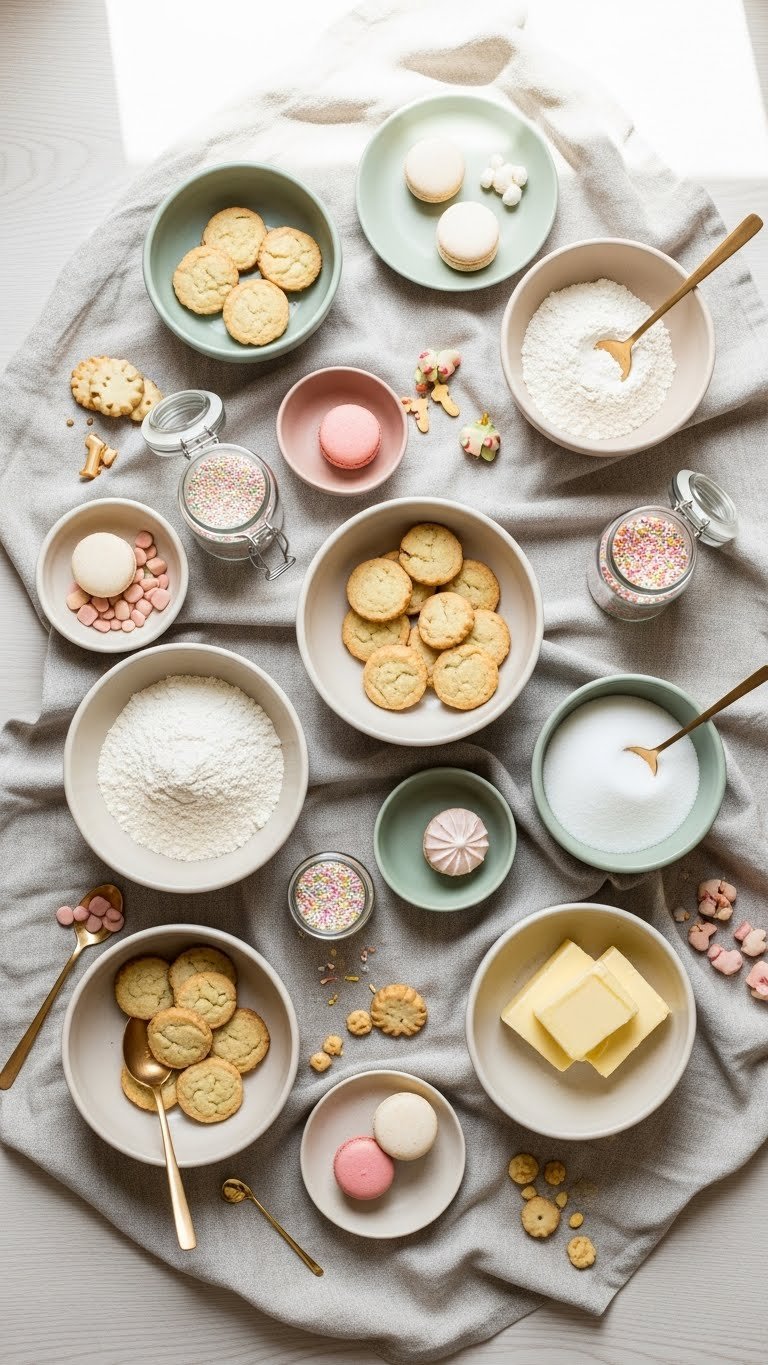
Start by deciding how many guests you’ll serve. Rule of thumb: 3–4 small bites per person if the dessert bar is the main sweet offering, or 1–2 bites per person if other desserts are served.
Make a balanced menu:
- One chocolate option (brownies, chocolate truffles)
- One fruity option (mini tarts, lemon bars)
- One crowd pleaser (cupcakes, cookies)
- One lighter choice (fruit skewers, meringues)
- Optional: a gluten-free or nut-free item
Shopping list basics:
- Quantities: for 30 guests, plan 90–120 total bites (e.g., 24 cupcakes, 36 cookies, 24 mini tarts, 12 brownies).
- Tools: cake stand(s), platters, tongs, label cards, napkins, serving utensils.
- Tip: Buy one extra dozen of the most popular item to avoid shortages.
Setting Up Your Dessert Table: Layout, flow, and food placement (dessert table setup)
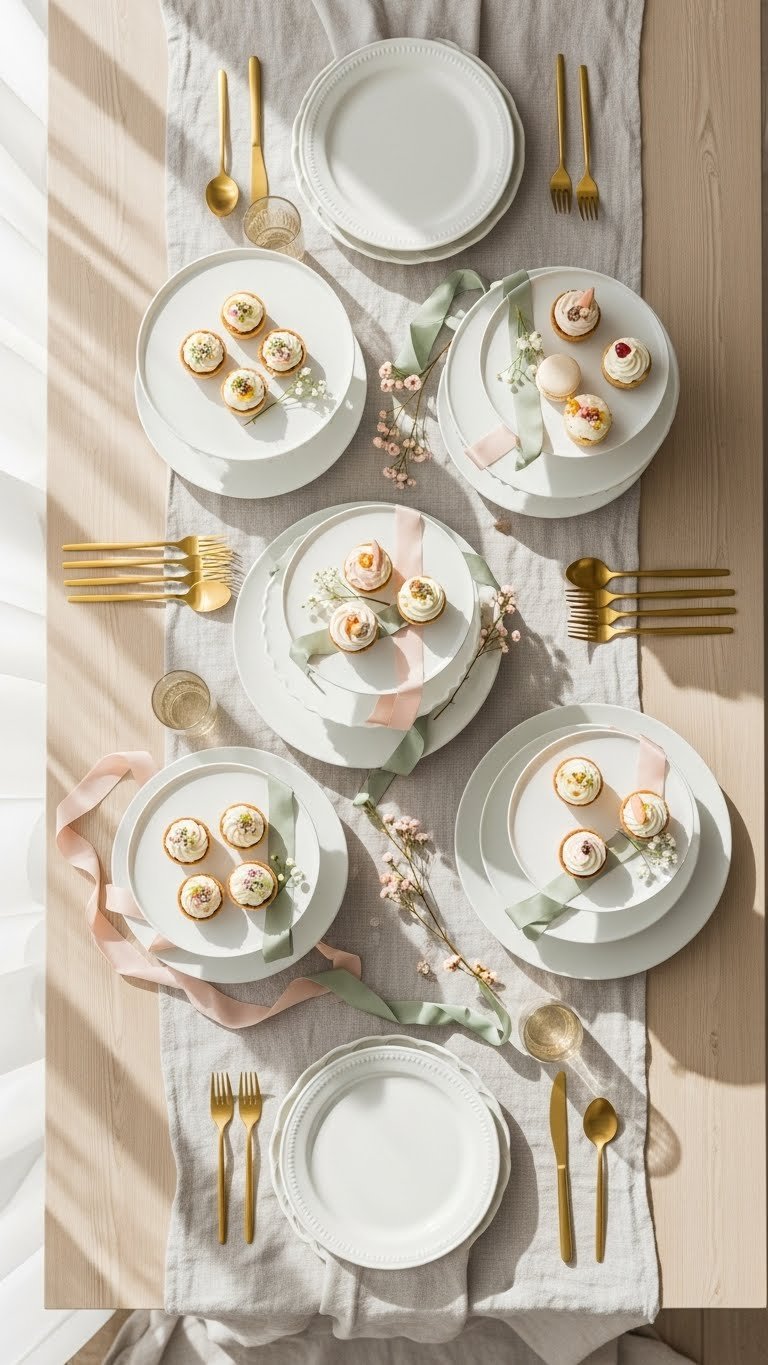
Create an easy flow so guests move from plates to sweets to utensils:
- Place plates and napkins at the far left or right.
- Use height: one tiered stand, two flat platters, one low board.
- Group items by type—chocolate, fruity, handheld—to avoid mix-ups.
Quick layout tips:
- Anchor the center with a statement cake or tiered stand.
- Put sticky or messy items near napkins and forks.
- Reserve a small area for dietary-specific items with clear labels.
Styling pro trick: leave gaps between platters so guests can reach each item easily. Aim for 3–4 inches of empty space around each dish.
Styling Tips and Dessert Bar Ideas (dessert bar ideas)
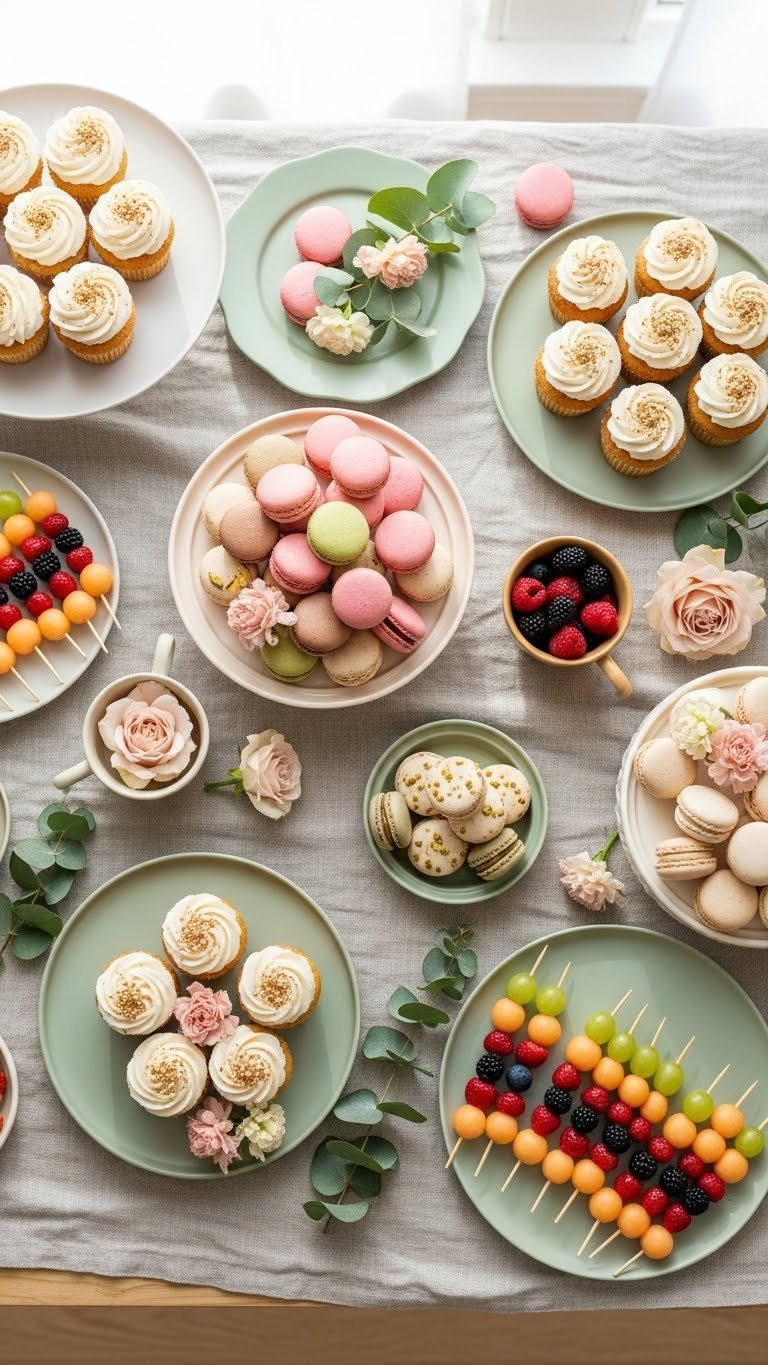
Make it pin-worthy with a few simple moves:
- Stick to the chosen palette: blush, cream, sage, and gold for unity.
- Use repeating shapes—circles (cookies), squares (bars), and skewers—to create rhythm.
- Add fresh flowers or greenery in small clusters for softness.
Decorating details:
- Use small chalkboard or cardstock labels for each item.
- Add a jar of small spoons and gold tongs for serving.
- Sprinkle a few loose petals or powdered sugar for texture.
Common mistakes to avoid:
- Overcrowding platters—leave space to serve.
- Hiding dietary items—label them clearly.
- Using too many colors—limit to your palette for cohesive visuals.
Make-Ahead Timeline, Storage, and Serving Tips (make-ahead timeline)
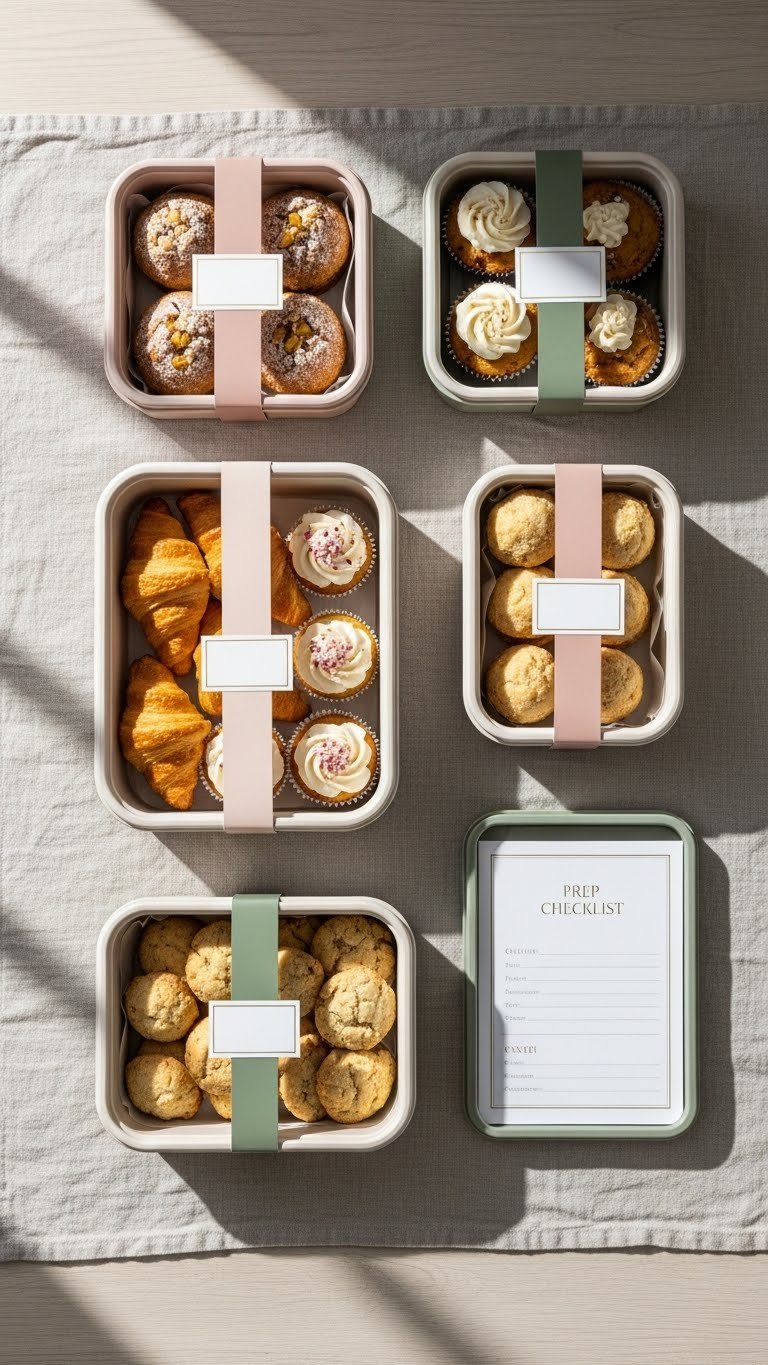
Use a simple timeline so you’re calm on the day:
- 48–24 hours before: Bake cookies, brownies, and bars. Store in airtight containers at room temperature.
- 24 hours before: Assemble cupcakes, macaroons, and tarts. Keep refrigerated if needed.
- 2–4 hours before: Arrange items on platters; add fresh flowers and final dustings.
- 30 minutes before: Set out plates, napkins, utensils, and labels.
Storage tips:
- Refrigerate cream-filled items and bring to room temperature 20 minutes before serving.
- Freeze meringues and thaw in a covered container to avoid humidity.
- Keep labels with allergen info to help guests choose.
Small shortcuts:
- Use store-bought cookies or macarons to save time.
- Pre-fill dessert jars or cups the night before.
- Delegate a friend to refresh platters during the party.
You’ve got a clear plan and a visual game plan now. When you plan a dessert bar that satisfies every sweet tooth, you combine smart shopping, easy layout, and consistent styling. Pin this guide for your next party, save the make-ahead timeline, and share it with a friend who loves hosting. Which dessert will you feature first? Ready to make this happen? Let's do it!