
You love hosting, but juggling grill, plates, and sides can kill the flow. You want a setup that keeps guests fed and you relaxed. This guide shows you how to set up an outdoor BBQ station for easy serving, step by step, so food moves smoothly and the party stays casual.
You’ll learn what to gather, how to arrange the station, styling tips, and quick troubleshooting. Follow these clear actions and you’ll have a pin-worthy BBQ serving station in under an hour.
What You'll Need for an Outdoor BBQ Station
Start by collecting gear. Laying everything out first saves trips back to the kitchen.
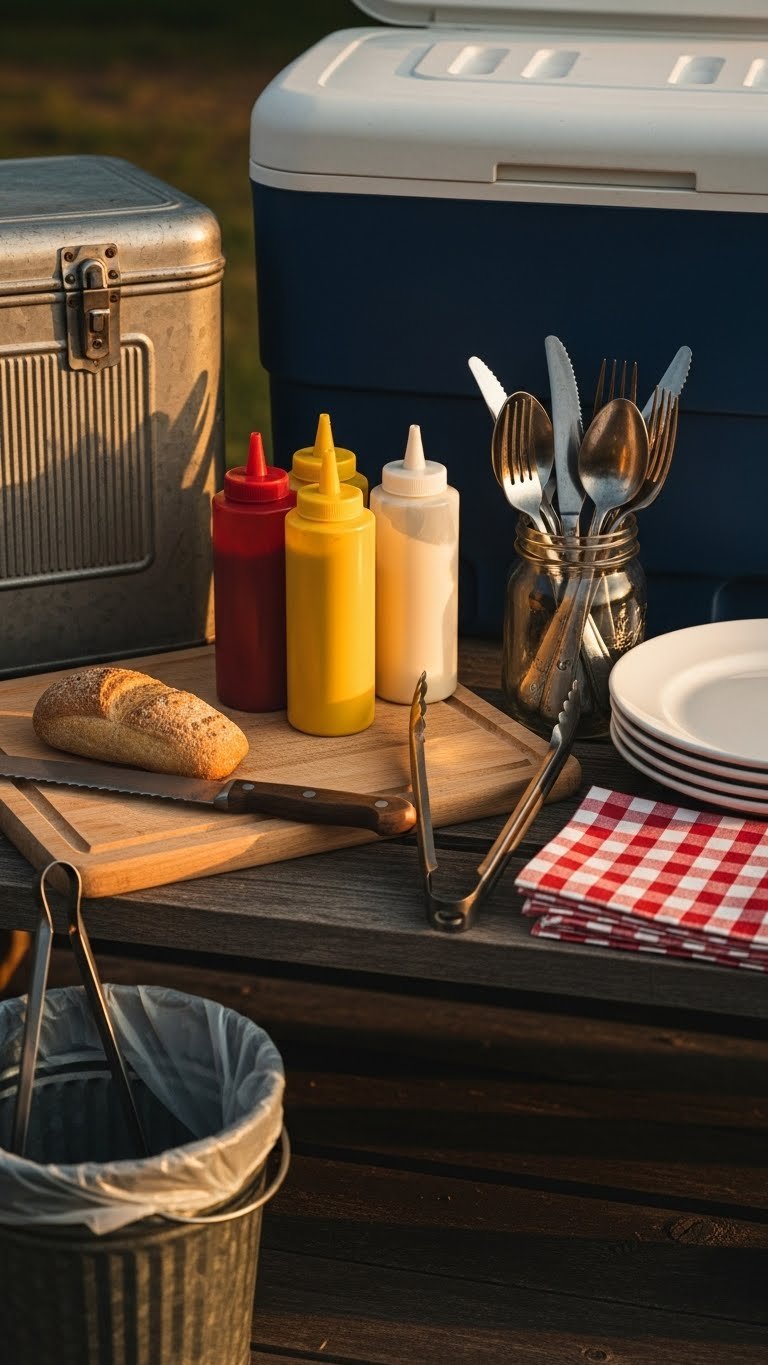
Essential list:
- Table or folding buffet: at least 6 ft long for a full setup.
- Two coolers: one for drinks, one for perishables with crushed ice.
- Serving trays and boards: wooden or metal, heat-resistant.
- Condiment station: 3–6 squeeze bottles and small bowls.
- Utensils: 3 sets of tongs, spatula, carving knife.
- Dinnerware: stackable plates, napkins, disposable or reusable cups.
- Trash and recycling bins: clearly labeled and within reach.
- Lighting: string lights or battery lanterns for after-sunset service.
Tips:
- Place heavier items near the middle of the table for balance.
- Use non-slip mats under coolers and boards to prevent sliding.
- Keep a small caddy with spare napkins, wet wipes, and hand sanitizer.
Arrange the Flow: Layout and Serving Zones
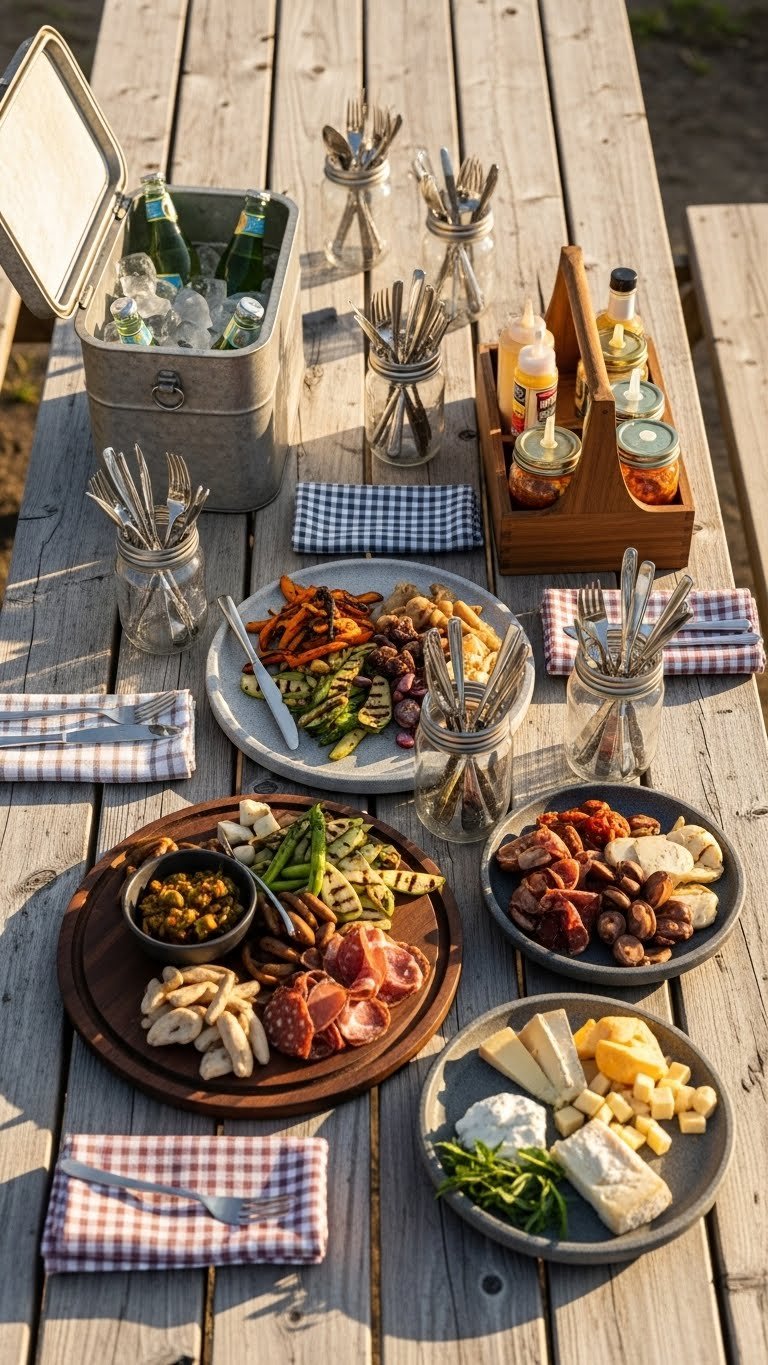
Design the station so guests move left to right or clockwise. That creates a natural flow and reduces congestion.
Suggested layout:
- Drinks at one end — keep bottles upright and cans on ice.
- Plates and cutlery next so guests pick up essentials first.
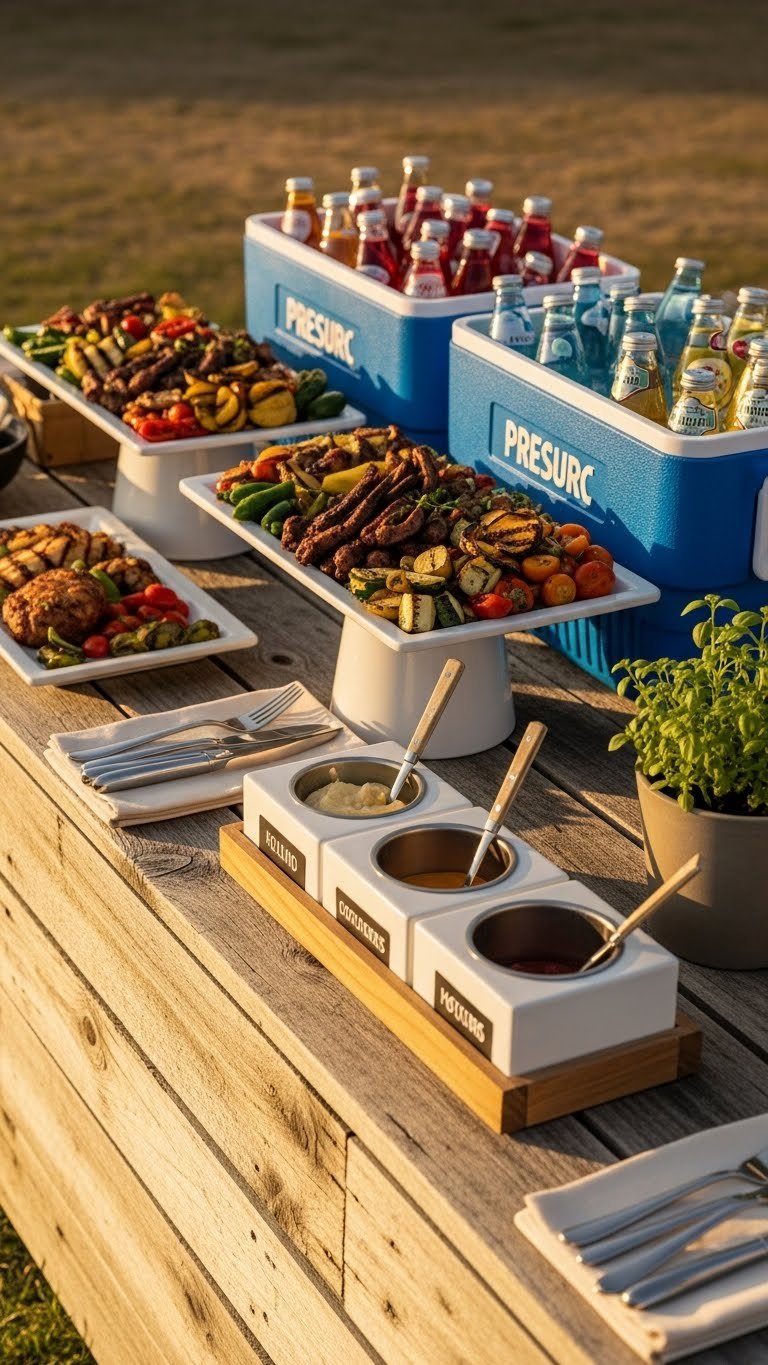
- Main dishes in the center—arrange hot items on elevated trays.
- Condiments and sides follow, with clear labels.
- Trash at the far end to keep the line moving.
Spacing rules:
- Leave at least 12–18 inches between platters.
- Keep hot pans on heat-proof trivets and mark them with a small cloth.
- Use risers or crates to add vertical layers and increase serving space.
Pro tip: Place a small sign or chalkboard listing the proteins (e.g., pulled pork, grilled veggies) so guests make quick choices.
Styling Tips, Time-Savers, and Serving Tricks

Style to make serving efficient and photo-ready. Keep it practical.
Quick tips:
- Group like items in trays for fast restocking.
- Use ice-packed coolers for perishables and swap them every 2–3 hours.
- Pre-portion sides into bowls of 1–2 cups for easier replenishing.
- Offer compostable plates to cut later cleanup time.
Common mistakes to avoid:
- Overcrowding the table—guests can’t serve comfortably.
- Putting drinks in the center—this blocks the line.
- Skipping trash placement—creates clutter and slows traffic.
Time-saving hacks:
- Make-ahead sauces in squeeze bottles up to 48 hours ahead.
- Heat main dishes in covered pans and keep warm on a grill-side warming rack.
- Keep an “emergency kit” with matches, extra ice, and zip bags nearby.
Final Touches, Make-Ahead, and Troubleshooting
Before guests arrive, do a quick run:
- Wipe surfaces with a damp cloth.
- Test the flow by pretending to serve a plate—adjust spacing.
- Keep a spare tray of napkins and utensils close to the grill.
Make-ahead options:
- Marinades and rubs prepared 24 hours earlier.
- Cold salads made up to 24 hours in advance and kept chilled.
- Condiments bottled 48 hours prior.
Troubleshooting:
- If the line backs up, open a second serving area with quick items.
- If ice melts fast, add a drainage tray to keep food from getting watery.
- If you run low on plates, offer hand-held serving with skewers.
You now know how to set up an outdoor BBQ station for easy serving. The setup keeps guests moving, keeps food organized, and frees you to enjoy the party. Pin this guide for your next backyard barbecue! Save this for later and share with friends who host. Which tip will you try first? Ready to make this happen? Let's do it!