
You want a relaxed, crowd-pleasing outdoor bar that looks effortless but functions like a pro setup. An easy, well-organized outdoor bar for summer entertaining keeps drinks flowing, cuts down wait time, and looks irresistibly pin-worthy. In this guide you’ll learn how to plan the layout, gather the right supplies, stock smart, and style the space so guests help themselves with confidence.
Follow these actionable steps and you’ll have an attractive, functional outdoor bar ready in under an hour.
What You'll Need (Supplies & Tools for an outdoor bar for summer entertaining)
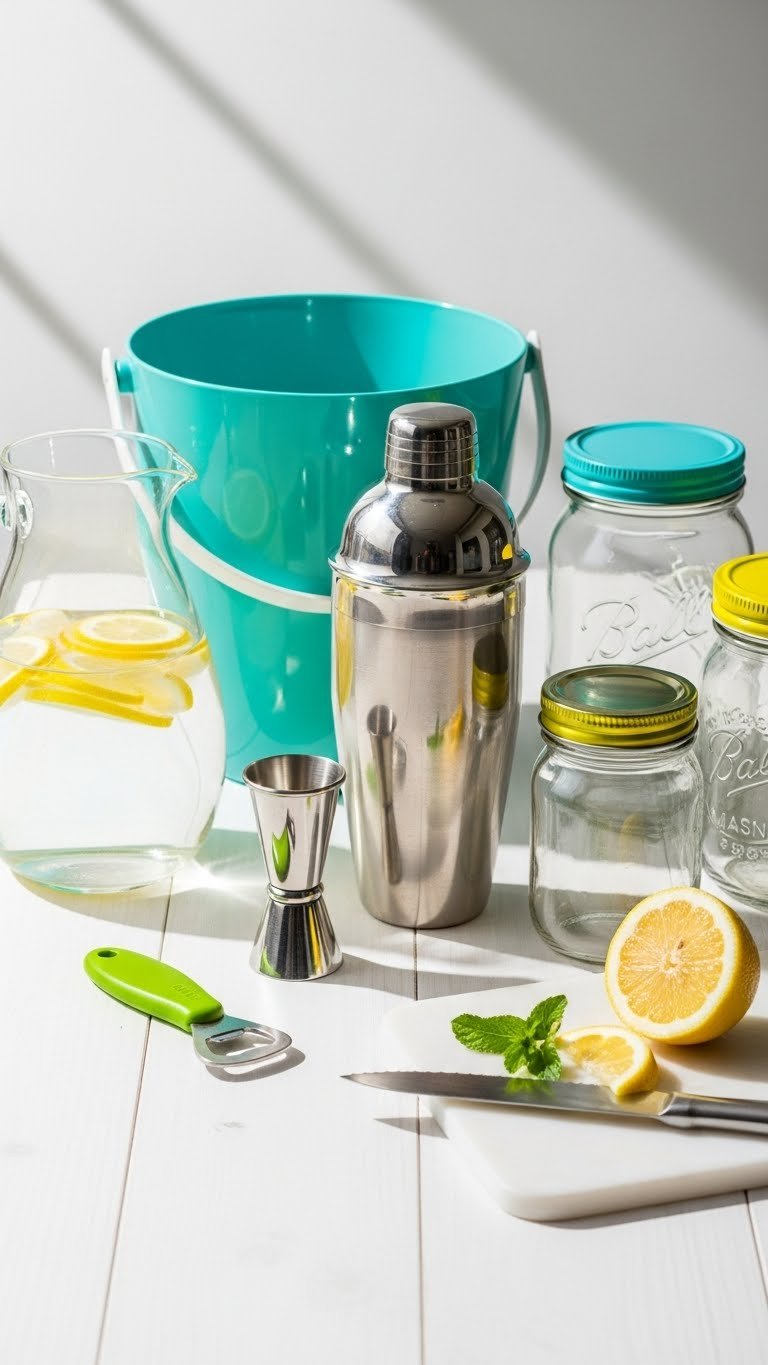
Start by collecting tools and containers that make service fast and tidy. Use simple items so guests know where everything is.
- Essentials: 1 large ice bucket, 3–4 bottles (mix of spirits, wine, and rosé), 1 cocktail shaker, 1 jigger, bottle opener, cutting board, sharp knife.
- Serveware: 12 drinking glasses (mix of tumblers and stemware), cocktail picks, straws, napkins.
- Extras: Small cooler or tub for beer, pitcher for pre-batched drinks, garish bowls for fruit and herbs.
Quick tip: label containers with chalkboard tags if you expect many guests. Keep a trash bowl on the bar to collect used garnishes and rinds.
Choose & Arrange Your Bar Space (Layout and Flow)
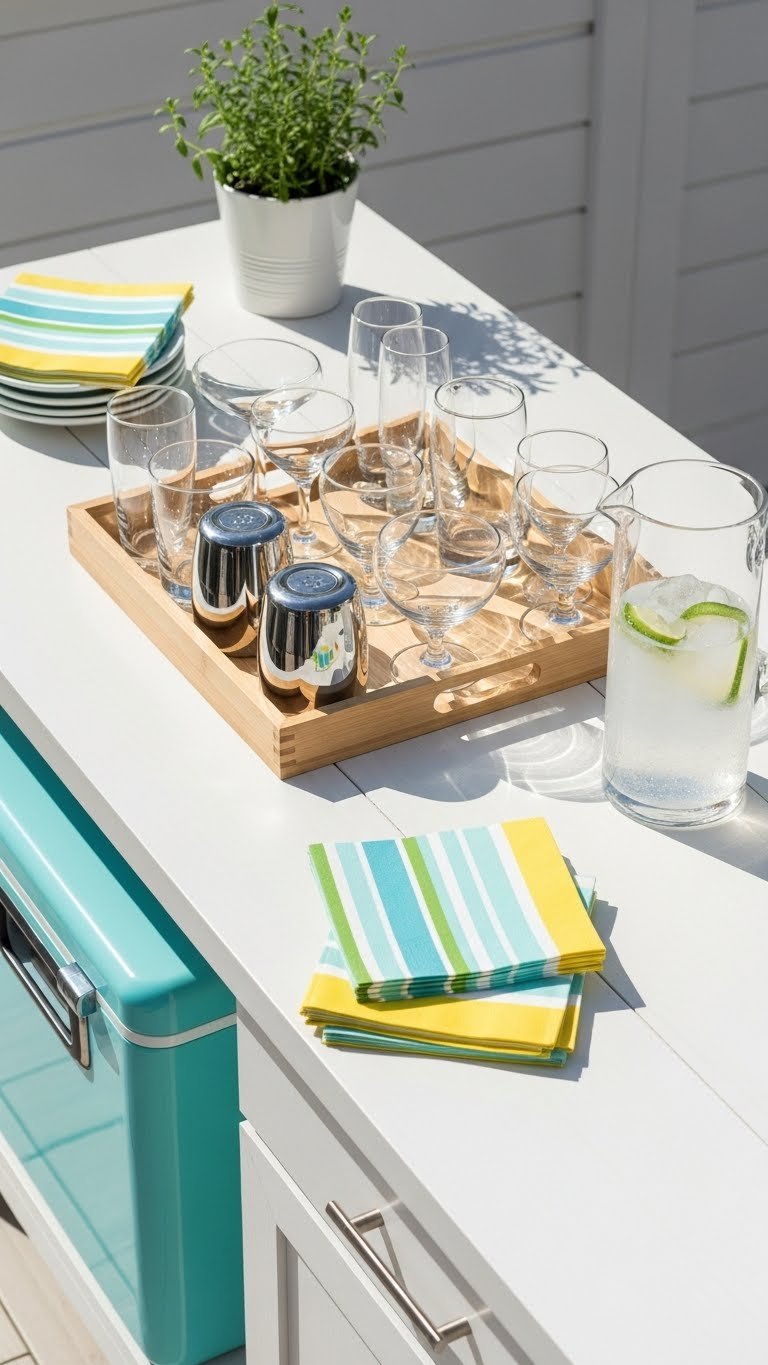
Pick a spot with easy access and shade for part of the afternoon. The best layout keeps cold items within reach and groups tools by task.
- Position the ice and cooler at the center or on the far side for self-serve access.
- Place glassware and napkins near the start of the line.
- Put spirits and mixers together so guests can mix quickly.
- Reserve a small prep zone with cutting board and garnishes.
Pro trick: leave one clear space for servers to set finished drinks. Avoid crowding by keeping the bar no wider than guests need to reach across—about 18–24 inches deep.
Stock the Bar: Drinks, Ice, and Garnishes
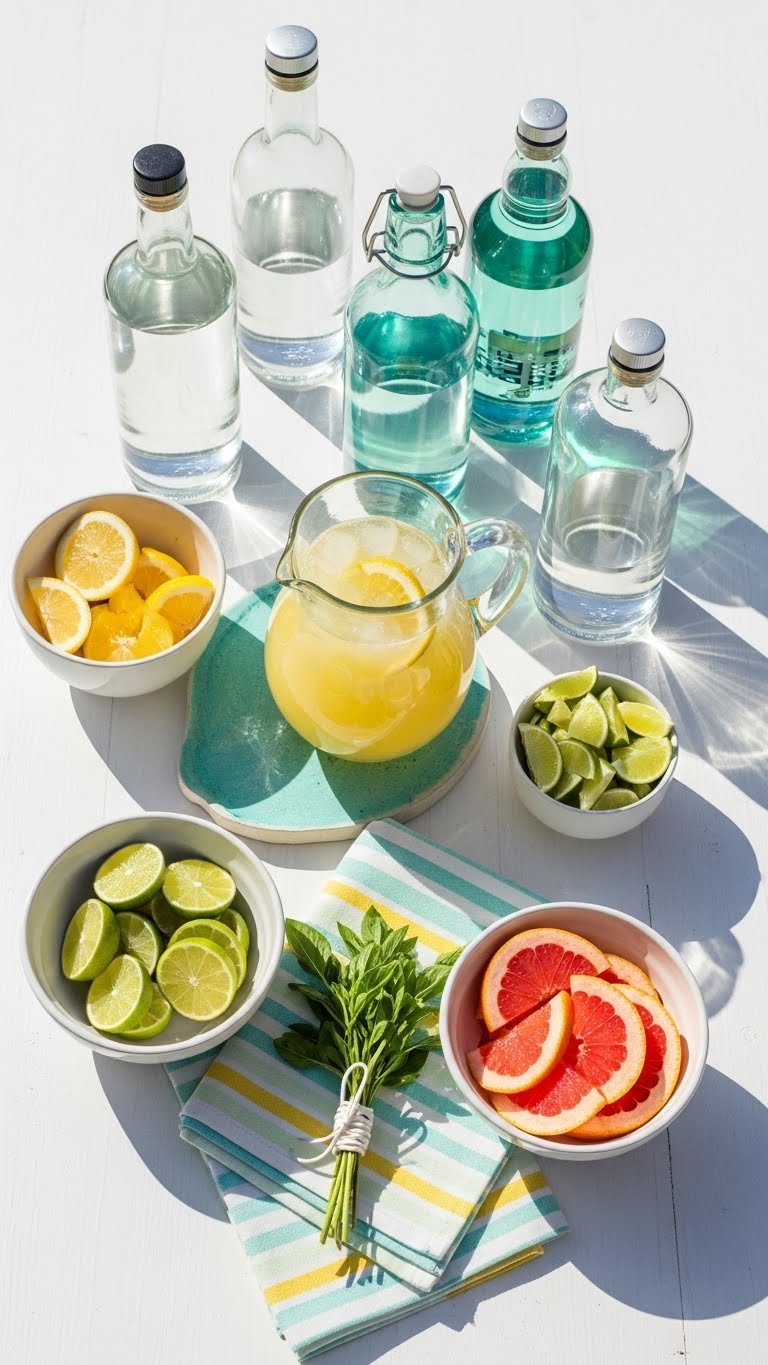
Stock smart so guests find options they like without a full bartender.
- Offer 3–4 drink choices: a signature cocktail (pre-batched), 1 wine, 1 beer, and a non-alcoholic pitcher.
- Use large ice bins—fill them 2/3 full to prevent melting too fast.
- Prep garnishes ahead: lemon and lime wheels, cucumber slices, mint sprigs, and salt/sugar rims in small bowls.
Batching saves time: mix enough for 12–16 servings in a pitcher. Label it and include simple mixing instructions nearby (e.g., “Serve over ice, garnish with mint”).
Warning: keep delicate mixers and herbs shaded to avoid wilting in direct sun.
Styling, Lighting & Final Touches (Pin-Worthy Presentation)

Small styling choices make the bar feel intentional and inviting.
- Use trays to corral small items and keep clutter controlled.
- Add a small vase of herbs or single-stem flowers for height and scent.
- Lay out a simple menu card (optional) with drink names and basic steps.
- Provide an easy cleanup station: a tray for empties and a discreet trash bowl.
Timing tip: set up 30–45 minutes before guests arrive. Keep backup ice in a cooler and restock every 60–90 minutes for long events.
Common mistakes to avoid:
- Overcrowding the bar surface
- Forgetting non-alcoholic options
- Skipping napkins or trash receptacles
You’re ready to host a breezy, attractive outdoor bar that encourages mingling and self-serve fun. Pin this guide and use the checklist the next time you plan a summer get-together. Which drink will you batch first? Ready to make this happen? Let's do it!